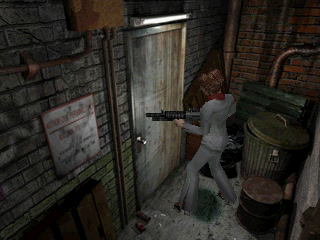
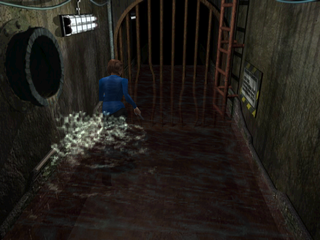
Resident Evil 3: Nemesis (PlayStation)
| Resident Evil 3: Nemesis |
|---|
|
Also known as: Biohazard 3: Last Escape (JP)
|
| This page is rather stubbly and could use some expansion. Are you a bad enough dude to rescue this article? |
To do:
|
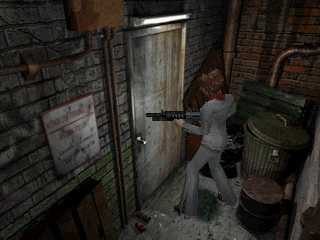
Resident Evil 3: Nemesis is the last mainline Resident Evil game released for the original PlayStation. The game manages to be a sequel to the first two games while also being a prequel to the second, as the first half of the game takes place a few days before Resident Evil 2. Ports of the game exist on several platforms, such as the Windows and GameCube versions.
Jill Valentine must survive the zombie outbreak of Raccoon City as she makes her last escape...
According to this interview of the scenario writer and the book Itchy, Tasty: An Unofficial History of Resident Evil, the game was originally intended as an un-numbered, low-budget PS1 spinoff project to cover the time while a proper next-gen third Resident Evil title (later transformed into Devil May Cry) could be developed. The game was suddenly promoted to a mainline sequel three months before final deadline (possibly related to Capcom going public around that time and wanting a hit to gain investor confidence), with the resulting last-minute budget increase being spent on extending various areas and the occasional FMV cutscene.
Contents
Sub-Page
| Prototype Info |
| Prerelease Info |
Tofu
Originally a hidden character in Resident Evil 2, Tofu's model was included in this game but goes unused. In comparison with Tofu from Resident Evil 2, the texture for the model differs and his hands, voice and perspiration are missing. It may have been used by the developers for testing the collision detection as it was in the previous game. It can be accessed with the GameShark code 800D1F86 0000000F.
Unused Graphics
Backgrounds
Room 101
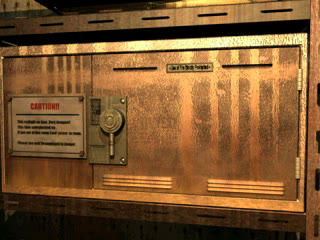
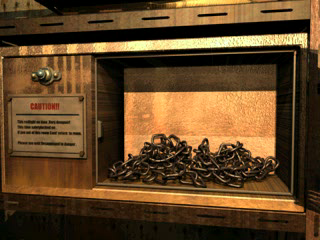
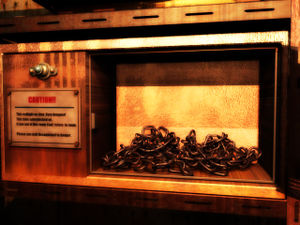
From the warehouse at the start of the game. In Hard Mode, the player can retrieve Hand Gun Bullets from this compartment but even the first screen is unused as when checking the compartment, the game switches directly to the inventory screen. Note that the part above the "caution" sign differs between the two backgrounds. The chain is an unused item.
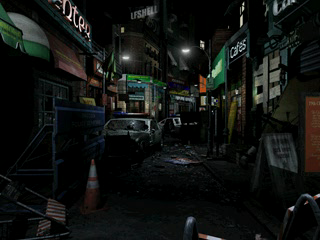
Room 103 + 11E
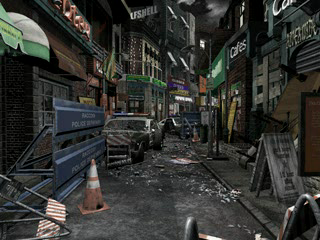
An unused camera angle from one of the early streets. It can be seen in action in some pre-release material.
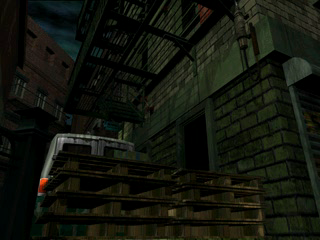
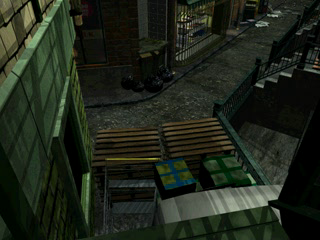
Room 106 + 121
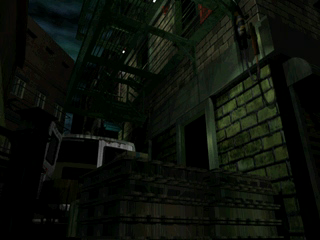
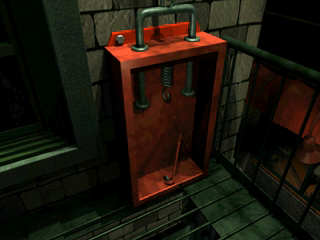
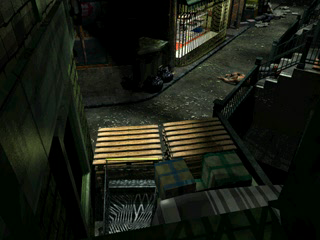
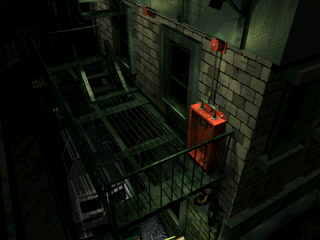
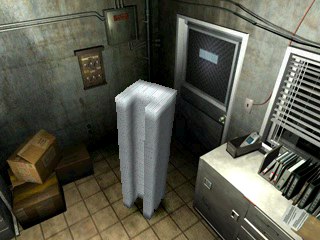
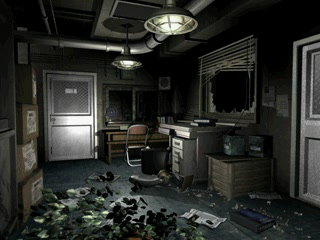
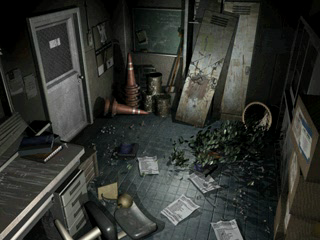
There are two versions of the room, the second darker one replaces the first once the player has cleared the police station. There are unused camera angles in both versions.
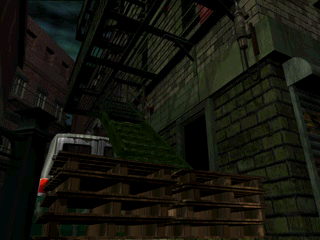
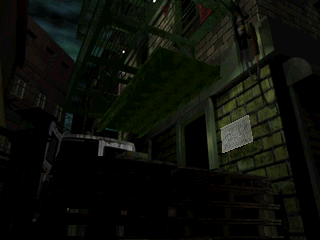
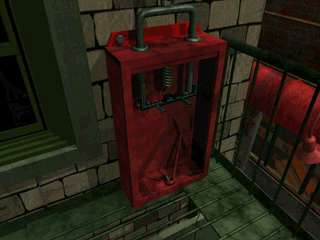
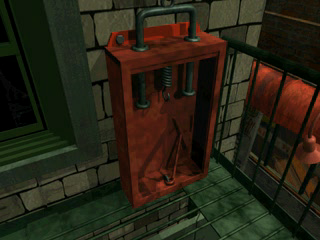
A look at some of these same unused camera angles but in-game, so the 3D models are visible. Note the 3D model on the last shot, the device presumably controls the emergency staircase.
Note the following:
- The odd camera angles suggest that some of them would be used for a cutscene.
- In the first shot of the darker version: the pallets are smaller and the door of Kendo's Gun Shop truck is opened. There are other discrepencies between both versions of the room, most notably detailing around the clothes shop (not pictured, can be seen during regular gameplay). Presumably the darker version of the room is based on an earlier version of the room.
- The emergency staircase is a 3D model and is up in the darker version of the room, which is why the camera angle up the staircase is unused in the dark version of the room.
- Variants of some of these camera angles exist in the Windows version.
- Yet another version of this area can be seen in E3 1999 footage in which the door of the truck is opened, the second pallet is completely missing, and the area map can be retrieved from the truck.
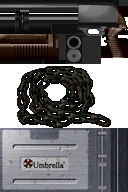
This is a rip of the textures for the 3D models of the darker version of the room. In other words, these items were supposed to be visible, either as pick-up items or as used items in cutscenes.
- As seen above, we already know that the chain was to be picked up in another room, so presumably the chain was to be used, possibly to bring the staircase down or keep it down. A cutscene using some of those unused camera angles could be triggered.
- Note also the presence of the shotgun on the room's texture set, which is also unused. In the final version of the game the shotgun is to be picked-up in a basement earlier, in that case it uses the same texture. Possibly the shotgun was to be picked-up in Kendo's Gun Shop Truck instead hence why the door of the truck is opened in one of the shots. In Resident Evil 2, Leon S. Kennedy can acquire a shotgun from Kendo.
Room 116
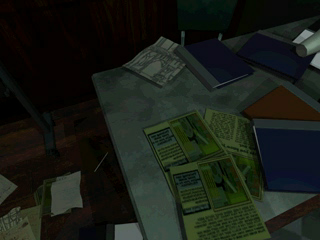
A close-up of the desk of the meeting room in the Raccoon Police Department. It is where Jill's S.T.A.R.S Card is located, but the item is picked-up without this camera angle being used. This background could be a left-over from Resident Evil 2, though it does not exist in any known version, prototypes included. In the Japanese version of Resident Evil 2, Hand Gun ammunition can be picked up on the desk.
Room 119
| Resident Evil 3: Nemesis: Unused | Resident Evil 3: Nemesis: Used | Resident Evil 2: Unused |
|---|---|---|
|
|
|
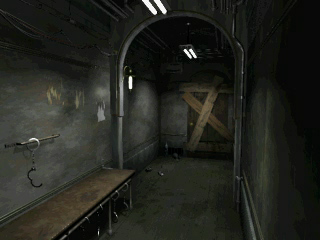
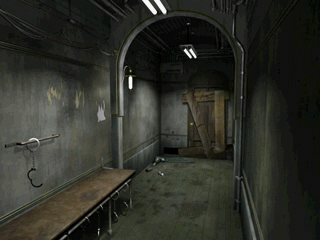
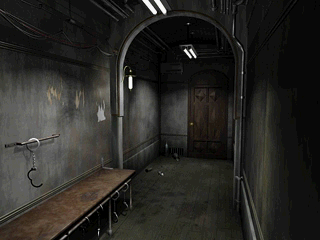
The corridor leading to the S.T.A.R.S. office in the Raccoon Police Department. In the unused version the grate of the ventilation shaft is still set on the wall, which corresponds to an unused background in Resident Evil 2. Presumably the background designer in charge of modifying the backgrounds was not told that this particular one would be unused, since compared to the version in Resident Evil 2, planks were added to block the door, although a version without the planks do exist in the Windows versions.
Note that in the unused Resident Evil 3 version, the lighting and the colours of the walls differ from the unused equivalent in Resident Evil 2. Several clues, such as the presence of Resident Evil 2 left-over backgrounds not present in Resident Evil 2 itself or the fact that in the Windows versions of Resident Evil 3 the door of the evidence room is using the design from prototype versions of Resident Evil 2, hint that the developers of Resident Evil 3 wouldn't have used the backgrounds for the RPD from the final version of Resident Evil 2 but from an earlier version, at least before doing some corrections. This would explain why the lighting and walls differ in the unused Resident Evil 3 version of the background: it would correspond to an earlier state of the room from the development of Resident Evil 2.
Room 201
In the parking garage where the power cable for the cable car is located, there is an unused version of the save room next door. To see it, you need to use a walk through walls code to walk through the door leading to the save room instead of opening it normally. The room appears totally trashed as if hit by an earthquake and the typewriter and item box are both missing. This version of the room was most likely intended for after the garage is trashed by the presence of the Grave Digger.
A variant of the first background exists in the Windows version.
Room 30E
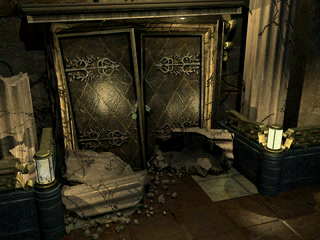
The destroyed version of the Clock Tower lobby. These two camera angles can not be seen in-game exactly because rubbles are in the way: the coordinates at which the change of camera angles would be triggered can not be reached.
Room 502
| Unused | Used |
|---|---|
|
|
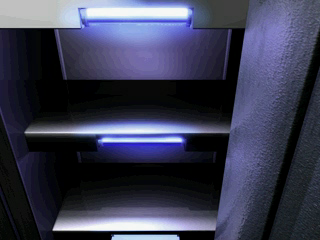
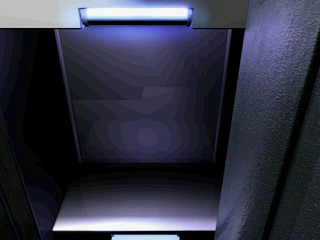
The background image that is used corresponds to the locker located in the Dead Factory which contains the Rocket Launcher. There is a second locker next to it which can not be opened, but it is unknown whether the unused background belongs to it or if it is an early version of the one that is used.
Left-Overs
Not surprisingly, the police station rooms are based on their counterparts from Resident Evil 2. These two background images are left-overs from that game, they are located in the room background data of the police station 2F corridor, the one with the statue, though they belong to an early version of Chief Irons' office. Two more similar background images also exist, though they are identical to the ones found in the demo versions of Resident Evil 2. These two are not in the Resident Evil 2 demos.
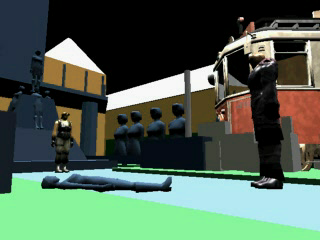
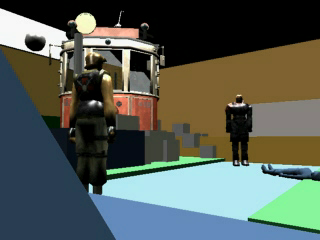
Two very early renders of the outdoor area of the Clock Tower. Jill everywhere!
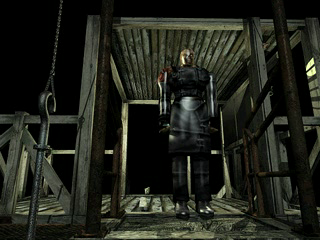
From the bridge connecting the City Park to the Dead Factory.
Epilogue
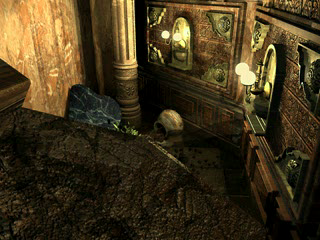
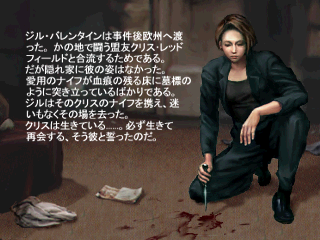
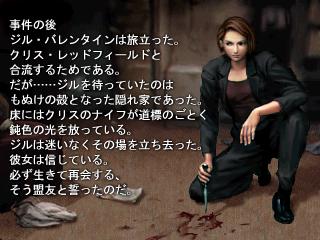
An earlier version of the first slide in OMBGJ.dat. The text is significantly different from the version used in the game.
Jill's face, the colour of her shirt, as well as several details in the background were improved compared to the unused earlier version.
Another version of this epilogue can be found in the Japanese Sample version.
Trial/Demo Leftovers
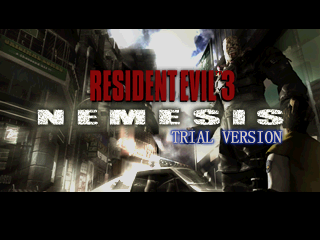
A leftover title screen background from the trial version.
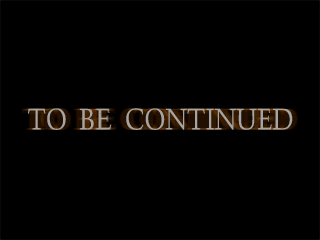
Used for when the player either completes the demo or gets a game over.
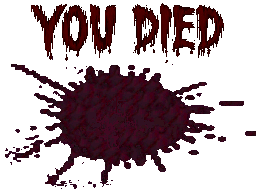
The "You Died" text from the demo version.
| ...But what does it mean? This game has text or audio that needs to be translated. If you are fluent with this language, please read our translation guidelines and then submit a translation! |
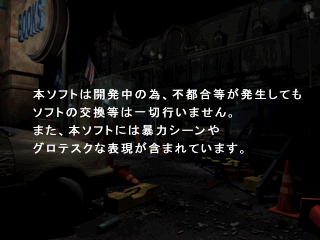
An earlier version of the gore warning screen left unused in the final version. It is used in the Japanese Sample version.
TGS Leftovers
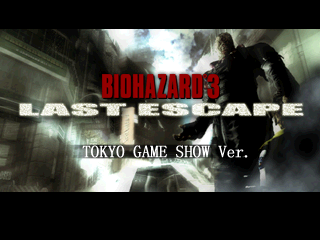
The title screen from the build of the game shown at Tokyo Game Show '99.
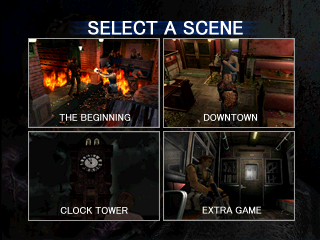
The stage select from the Tokyo Game Show build.
Unused Item Graphics
Several graphics are found unused within the final game and in the Biohazard 3 Trial Version. While they have full descriptions in the latter, the final version of the game has the descriptions cut out and only displaying 没/botsu in the Japanese version (romanized to "BOTU" in the English version), which means "rejected/discarded" for the item name and description when examined.
Placeholder Gun
This graphic is unused in the final game. It is the same graphic used in Resident Evil 2. It was more likely used as a placeholder for the item description graphics.
Demon Coins
These three coins are unused in-game and their use is unknown. They all depict a demon of some sort. They are possibly an early version of the Amber, Obsidian and Crystal balls as the number of items and their colours do match.
Broken Fire Hose and Adapter


![]()
![]()
While the Fire Hose is used in-game, it was more likely that it would have been found somewhere else, broken, as the end adapter is missing from it, and the player had to likely find this piece and combine it into the final Fire Hose that is used in-game. Reason for this decision is unknown, but likely to lessen the amount of back tracking in-game to find the items. If hacked into the game, the items can be combined into the Fire Hose and be used as normal.
The Broken Fire Hose can be used on the Fire Hydrant in the alleyway where the fire is blocking access to the Sales Office, though it displays "Non message" when used, and does nothing. It is possible this was a placeholder message to be added, before it was decided to scrap the idea of finding the adapter for the Broken Fire Hose and allow the player to obtain the already completed one in the final game.

This is a rip of the texture for the models used in the alley where the Fire Hose is picked-up in the final version. Note that it is actually the broken Fire Hose and the adaptor is missing, presumably the player would have picked-up the Broken Fire Hose instead of the Fire Hose and would have had to find the adaptor some place else.
Remote Control and Batteries
The Remote Control is used in the final game at the Sales Office, but was likely originally to be an item. The player likely had to find and replace the missing batteries for it to be used like in the final game. When hacked into the game, the remote without the batteries can be combined with the batteries and be made into the normal remote control but has no function whatsoever.
Giga Oil

![]()
The function of this item is unknown.
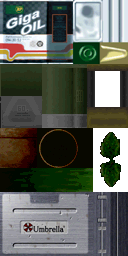
While it is easy to assume that the Giga Oil is an earlier version of the Mixed Oil found at the Gas Station and to be used on the tramway, this texture hints at otherwise. This texture for 3D models can be found in the data pertaining to the dining room of the Clock Tower, so the item was to be seen in the room, either as a pick-up item or used, possibly to light a fire in the fireplace which is unused.
Note that this is similar to the unused Oil item from the first Resident Evil.
Chain
The chain was likely to be used for a puzzle, but no information can be found on what it does, although a texture for it can be found in Room 121. It was found in the Warehouse as shown in this background that is not used in the final game. It is in the box that holds Hand Gun Bullets in Hard Mode.
Chemical
This is one of the few items that isn't labeled as BOTU. Its inventory graphic has a "HH" next to the image, which its meaning is unknown. It is labeled as Game Instruction A and has no description when examined. This item is also unused in Resident Evil 2, in which it is called "Chemical FR-W09" and can be combined with Grenade Rounds to convert them into Flame Rounds. Therefore, it may be an early version of the Gunpowder, although attempting to combine it with Grenade Rounds or Gunpowder gives no result in this game.
Keyring
This item doesn't have an inventory graphic and when it is in the inventory, it cannot be moved to the Item Box. Its use is unknown, and was likely used at the later half of the game after the Clock Tower.
Dummy Key (Developer's Key)
This is the only other item that isn't labeled as 没/BOTU in both versions, being called the 開発用キー/Kaihatsuyou Key in the Japanese version (literally "Key for development") and "Dummy Key" in the English version. The item has an actual description in the Japanese version, whereas in the English version it simply says "Dummy". The graphic used is the same as the Spade Key from Resident Evil 2. The Yamanouchi mentioned in the description is likely a reference to effect programmer Takaaki Yamanouchi.
| Japanese | Translation |
|---|---|
| 開発用のダミーキーです ゲーム本編には出てきません by 山之内 |
A dummy key to be use for development. It cannot be used in the main game. By Yamanouchi. |
Menu Text
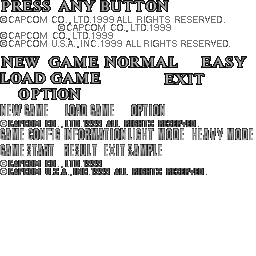
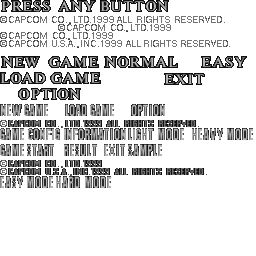
The graphical files used for title screen and menus text. On the left the Japanese version, on the right the NTSC-U version.
Several bits of text are unused: there are bigger, probably older, variants for most of the title screen texts. Note that the difficulty settings are called NORMAL and EASY in that version. PRESS ANY BUTTON is also unused.
These unused variants are actually straight from Resident Evil 2, the only difference being the date on the copyright changed from 1998 to 1999. They were possibly used by the devs as placeholder before the final menu text was made. The PRESS ANY BUTTON text, using this font, can be seen on the title screen of the pre-release E3 1999 version.
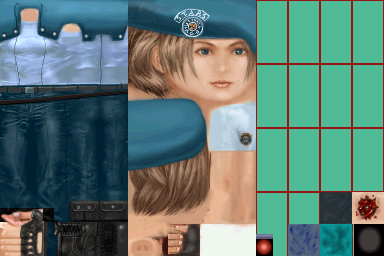
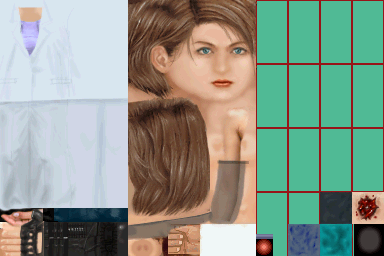
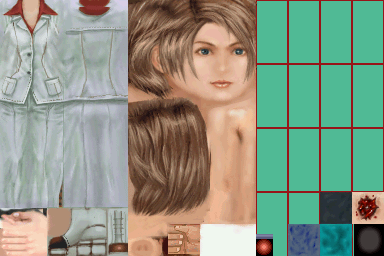
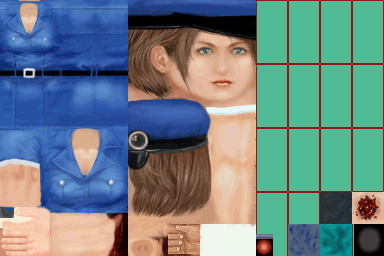
Early Costumes
| Early | Final |
|---|---|
|
|
|
|
|
|
|
|
|
|
|
|
|
|
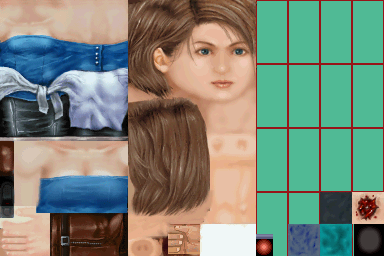
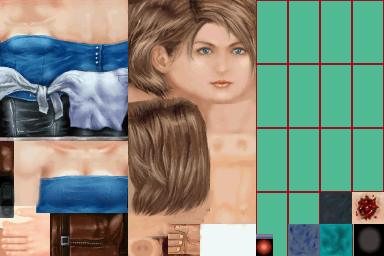
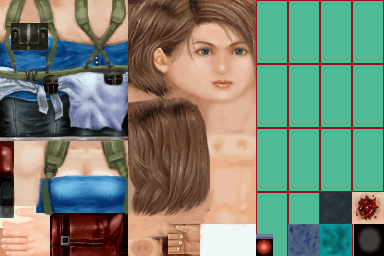
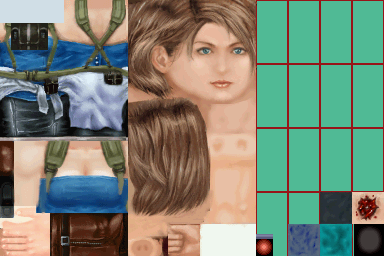
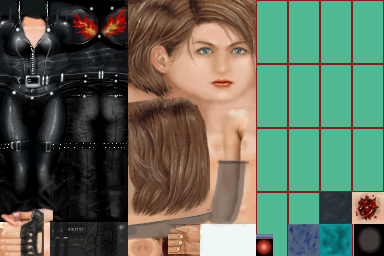
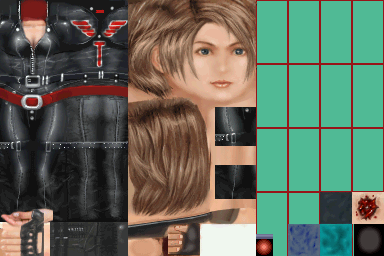
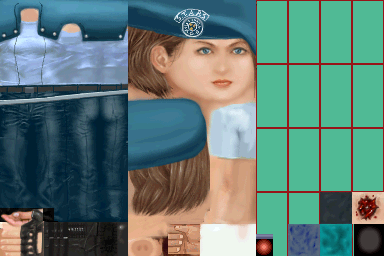
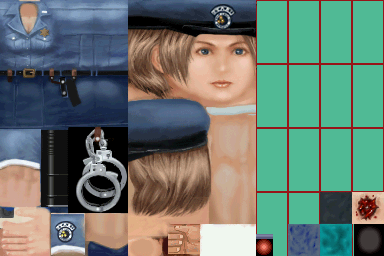
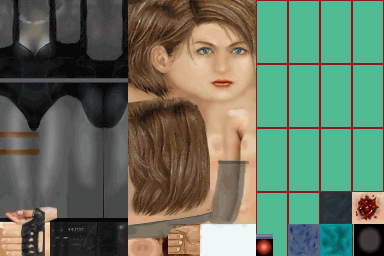
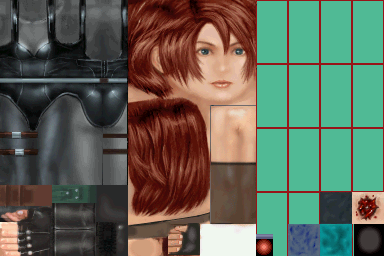
Early versions of Jill Valentine's 3D models are in the game's data, with unfinished textures. The files are dated 2-3 weeks before the final ones.
In-between versions of the alternate costumes can be found in the Japanese Sample Version.
Regional Differences
Title Screen & Menus
| Biohazard 3: Last Escape | Resident Evil 3: Nemesis |
|---|---|
|
|
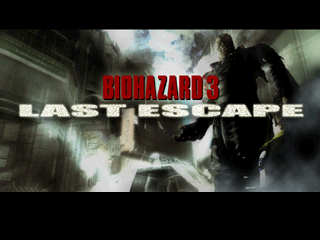
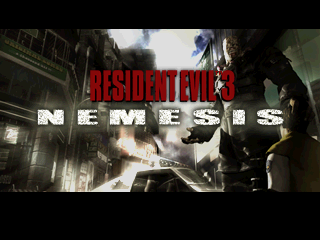
On top of the title name being different, the entire background differs and was improved in the international versions.
| Biohazard 3: Last Escape | Resident Evil 3: Nemesis |
|---|---|
|
|
|
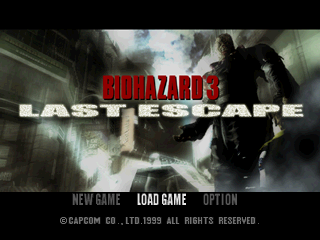
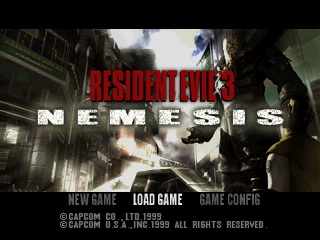
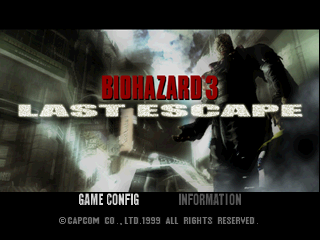
In the Japanese versions there is an "OPTION" sub-menu while in the international versions "GAME CONFIG" is directly accessed from the main menu. "INFORMATION" is missing in the international versions.
This video advertisement for Dino Crisis, another survival horror by Capcom, plays when selecting "INFORMATION" in the Japanese versions. The video is not present in the game's data of the international versions.
Epilogues
| Biohazard 3: Last Escape | Resident Evil 3: Nemesis |
|---|---|
|
|
|
|
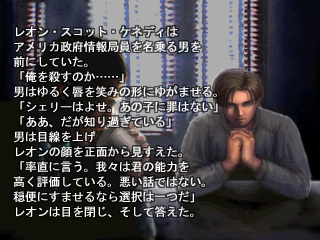
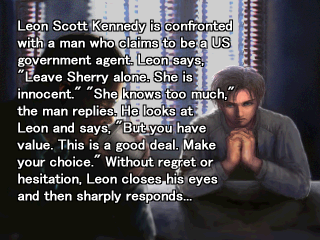
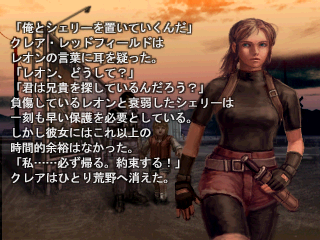
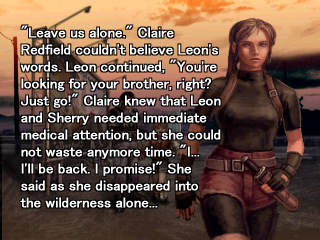
The background art for Leon S. Kennedy's and Claire Redfield's epilogue screens were improved for the international versions.
Map
| Biohazard 3: Last Escape | Resident Evil 3: Nemesis |
|---|---|
The last location of the game was renamed from Disused Plant to Dead Factory for the international versions. Note that all the location names on the map are in English in the Japanese version.
Censoring
| Biohazard 3: Last Escape (Japan) | Resident Evil 3: Nemesis (USA) |
|---|---|
- The zombie head kicking and head crushing are censored in the North American version.
| Biohazard 3: Last Escape (Japan) | Resident Evil 3: Nemesis (USA) |
|---|---|
- Regarding Hunter decapitations during gameplay, contrary to the above it is the Japanese version which is censored. There does not seem to be one PlayStation version which is completely uncensored. Note that the enemy introduction cutscene in which the Hunter decapitates a zombie is not affected by censoring in the Japanese version until the CapKore (1.1) release, only decapitations which occur during gameplay are.
- Some scenes are censored in Europe, such as the Hunter hospital scene where the monster makes its first appearance by decapitating a zombie, as well as the animation for characters kicking ankle-biting zombies' heads off. These would be kept in later re-releases on most subsequent platforms. For instance the Hunter decapitation cutscene is censored in every European and Southeast-Asian Windows version of the game, even the Japanese Sourcenext version. However the North American GameCube version is fully uncensored (zombies head kicking and crushing, Hunter decapitation in cutscene and gameplay).
- The German release of the game was further censored (no gore, grey blood, enemies disappear immediately when killed, and the Mercenaries minigame is almost completely broken as the German version only gives the player extra time for killing animal enemies like the dogs or crows, making it impossible to get a good ranking).
Misc.
- The difficulty settings are labelled "Light Mode" and "Heavy Mode" in the Japanese version, and "Easy Mode" and "Hard Mode" in the international versions. The Japanese version is overall a bit easier than the international versions regardless of the difficulty setting, as enemies have less health and do less damage.
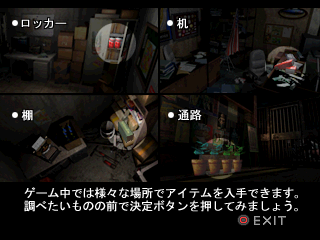
| Japanese | Translation |
|---|---|
| ゲーム中では様々な場所でアイテムを入手できます。 調べたいものの前で決定ボタンを押してみましょう。 |
Items can be acquired in many places throughout the game. Press the confirm button in front of the object you want to investigate. |
A tutorial on how to pick up items. In the Japanese versions this tutorial appears when starting a new game in "Light Mode". No such tutorial is present in the international versions and no translated version of the screen exists in the game's data.
- The control schemes differ between the Japanese version and the international versions, exactly like it does in Resident Evil 2, down to how turning on/off auto-aim works. The only difference is that Resident Evil 3: Nemesis has the quick-map button which was missing in Resident Evil 2. However, Biohazard 3: Last Escape is still missing the Pause feature that is present in the international versions of both games.
Revisional Differences
There are two Japanese PlayStation versions: Version 1.0 and Version 1.1. Version 1.1 would become the base of every subsequent port. Version 1.1 fixed a few things:
- In the 5th time you encounter Nemesis at the park, there was a glitch where you could get Nemesis to get stuck in a certain corner. This was fixed in Version 1.1.
- In Version 1.0 the Music Box puzzle was randomized. In Version 1.1 the Music Box puzzle solution is always the same. This was presumably done for people who had hearing problems who had a hard time figuring out the puzzle as the puzzle relies on audio memorization.
| Biohazard 3: Last Escape, v1.0 | Biohazard 3: Last Escape, v1.1 |
|---|---|
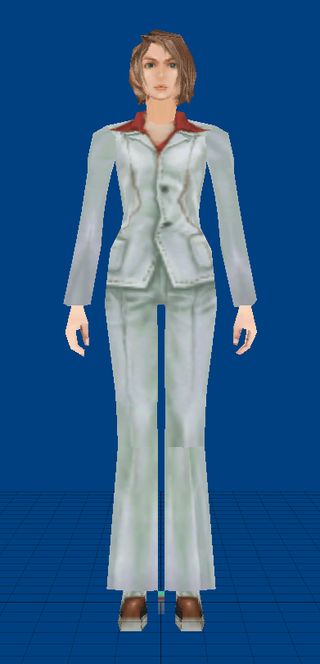
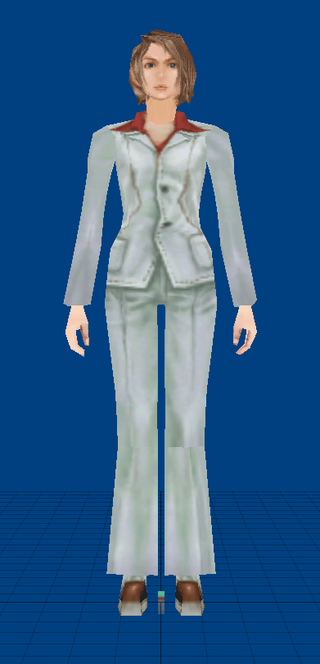
- The model for this alternate costume was fixed in v1.1. In the original version, the heels are below ground level and can often be seen clipping through the shadow. In v1.1 the legs are shorter to remedy that.
Easter Eggs
Dino Crisis
| PlayStation | Windows |
|---|---|

|
|
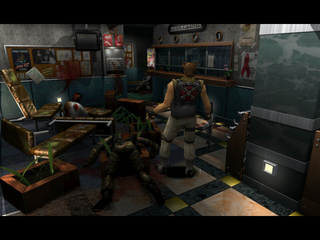
Screenshot of the Windows version provided so the Easter egg can be seen better thanks to the high resolution background.
Two posters of Dino Crisis can be seen briefly during a cutscene. The poster on the left is an advertisement with the release date of the game, and the one next to it corresponds to the background of the congratulations screen at the end of the game. Dino Crisis and Resident Evil 3: Nemesis have a lot in common: both are survival horror games developed and published by Capcom and first released on PlayStation in 1999, two-three months apart. Many developers, both on the developing and publishing sides, worked on both games.
Also, one of Jill's unlockable model/costume was made to ressemble Regina, the protagonist of Dino Crisis.
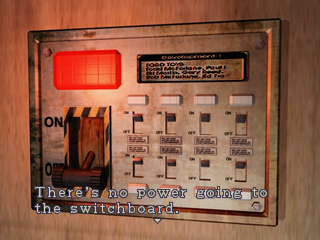
The two games share another Easter egg: the developers in the two games would often detail parts of the backgrounds (signs, posters, etc.) by filling them with nonsensical text, as the texts can't be read in the PlayStation versions due to the low resolution. However, the texts are revealed when playing the higher resolution Windows version. In the lobby of the newspaper office in Resident Evil 3: Nemesis, the sign on the control panel of the shutter reads:
TODD TOYS. Todd McFarlane. [...] Bob McFarlane.
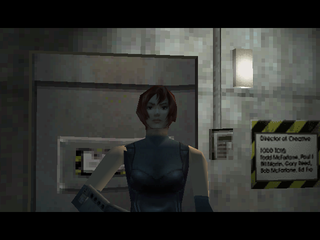
A reference to McFarlane Toys, a company which did make action figures based on the Resident Evil series. The very same text can also be read on the sign next to the door of the antenna control room in Dino Crisis.
| Resident Evil 3: Nemesis (Windows) | Dino Crisis (Windows) |
|---|---|
|
|
The sign itself has yellow and white stripes and is used several times in Dino Crisis. The very same sign can also be found in a couple of places in Resident Evil 3: Nemesis.
Finally, both games feature similar gameplay mechanics: the player can perform a quick 180° turn (something which was not possible in the previous survival horror games by Capcom), there are semi-randomized pick-up items, and throughout both games the player is asked to choose between two different decisions, the results of which lead to different gameplay and story outcomes. Both games also have a similar "fake-out" involving the main enemies and helicopters in FMV cutscenes, midway through the games, which reference the ending of the first Resident Evil, and also both have a second helicopter which can be used at the end of the game.
YUKI
| PlayStation | Windows |
|---|---|
|
|
|
|
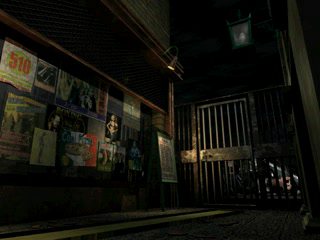
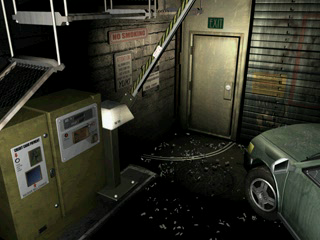
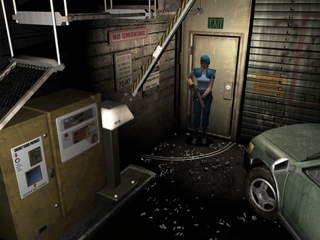
Screenshots of the Windows version provided so the Easter egg can be seen better thanks to the high resolution background.
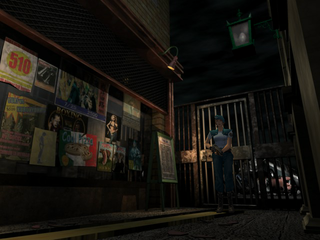
The word YUKI can be read on a poster in the alley as well as on a sign in the garage. It is the first name of one of the background designers, presumably signing his work.
- Pages missing developer references
- Games developed by Capcom
- Pages missing publisher references
- Games published by Capcom
- Games published by Eidos Interactive
- PlayStation games
- Pages missing date references
- Games released in 1999
- Games released in September
- Games released on September 22
- Games released in November
- Games released on November 11
- Games with unused characters
- Games with hidden developer messages
- Games with unused graphics
- Games with unused items
- Games with regional differences
- Games with revisional differences
- Stubs
- To do
- Articles needing translation/ja
- Resident Evil series
Cleanup > Articles needing translation > Articles needing translation/ja
Cleanup > Pages missing date references
Cleanup > Pages missing developer references
Cleanup > Pages missing publisher references
Cleanup > Stubs
Cleanup > To do
Games > Games by content > Games with hidden developer messages
Games > Games by content > Games with regional differences
Games > Games by content > Games with revisional differences
Games > Games by content > Games with unused characters
Games > Games by content > Games with unused graphics
Games > Games by content > Games with unused items
Games > Games by developer > Games developed by Capcom
Games > Games by platform > PlayStation games
Games > Games by publisher > Games published by Capcom
Games > Games by publisher > Games published by THQ Nordic > Games published by Crystal Dynamics > Games published by Eidos Interactive
Games > Games by release date > Games released in 1999
Games > Games by release date > Games released in November
Games > Games by release date > Games released in November > Games released on November 11
Games > Games by release date > Games released in September
Games > Games by release date > Games released in September > Games released on September 22
Games > Games by series > Resident Evil series
