Справка:Содержимое/Изображения
Всё, что вы должны знать про загрузку, добавление и оформление изображений.
Contents
Руководство по изображениям
Одна из основных целей TCRF - это аккуратная документация и сохранение неиспользованного контента. В отличии от других вики и веб-сайтов, мы имеем строгие рекомендации, регулирующие качество и формат изображение, выложенное участником. Изображения должны быть перепредставлены . Это значит, что они не должны быть увеличены, зафильтрованы, поправлены, с налеплённым водяным знаком или закомпрессированы в любых случаях за совсем некоторыми исключениями.
Основное
- No JPEGs. More information as to why can be found here.
- Please take your screenshots using PNG format. Don't try to convert JPEGs to PNGs. This only serves to make the file much larger and has zero impact on image quality.
- Exception: If a texture or other graphic was originally stored as a JPEG, and you can cleanly extract it from the game, you can upload it in its original format and mark it with the {{alreadyJPEG}} template.
- If getting a PNG screenshot is not currently feasible, upload the original JPEG and mark it with the {{replaceimage}} template.
- No screenshots of text editors, hex editors, or file listings.
- Embed the data directly in the article as text, or if it is very large, upload it.
- Optimize PNGs before uploading them.
- Large and/or high-color PNGs need to be optimized in order to reduce file size.
- To optimize PNG file sizes, try using PNGGauntlet, PNGCRUSH, or IrfanView (via the PNGOUT plugin). Linux users try Trimage.
- When using these programs, ensure they preserve gamma information in their respective settings. For example, for PNGGauntlet go to Tools > Options and check Preserve Gamma Information in the PNGOUT tab and Preserve PNG metadata in the DeflOpt tab. When using PNGOUT either as a standalone tool or with PNGGauntlet, always set Color Type to RGB+Alpha. Having Color Type set to Default compromises the original color data when optimizing a PNG.
- Don't recompress existing images unless the file size reduction would be significant, and image quality would not be affected. The wiki automatically archives older versions of all files, and these can quickly add up and eat precious disk space.
- Do not use Microsoft Paint to create PNGs.
- Some browsers (e.g. Firefox) appear to render colors improperly in PNGs saved with Paint.
- Make sure the image is clean.
- No watermarks, emulator messages, or other non-game images or text.
- When downsizing images, make sure to not use the resize function in Paint, which blurs the images when downsizing it. Manually resize it instead.
- Use descriptive filenames.
- Include either the full or abbreviated title of the game. This helps make files easier to identify, and prevents future filename conflicts.
- Example: An image from Super Mario Bros. 2 should be called SMB2-smiley.png or SuperMarioBros2-smiley.png, not Smiley.png.
- Include either the full or abbreviated title of the game. This helps make files easier to identify, and prevents future filename conflicts.
- Use the most accurate emulator available for a given system.
- This is especially true of newer, more complex consoles whose emulators tend to be updated and improved on a regular basis as knowledge of the hardware increases.
- Try not to use visibly obvious hacks when taking screenshots.
- Example: Don't change the appearance of the player character using hacks.
- For image comparisons, use the same emulator with the same settings whenever possible.
- Using different emulators can cause subtle brightness, color, or texturing differences (especially in newer games), which are undesirable in image comparisons.
- Tag the image appropriately.
- Instructions for tagging images can be found here.
- Avoid large images.
- Images larger than 100MP (100,000,000 pixels) fail to generate thumbnails. This translates to images larger than 10000x10000, 20000x5000, etc.
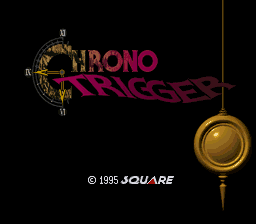
Заглавные экраны
- Take title screenshots with an emulator or in-game screenshot function at the console's native resolution.
- A list of native resolutions for various consoles, including instructions on how to take screenshots in various emulators, can be found here.
- For the sake of consistency, please use 256×240 for NES/Famicom screenshots.
- Use the original version of a game's title screen (without DLC or expansion packs) whenever possible.
- Changes made to the title screen after a game's release should be documented as revisional differences.
- If a game's title screen changes very frequently (as is the case with some mobile games), it is acceptable to use the latest version.
- No box art, promotional art, etc.
- No watermarked images from other websites.
- For old games that have no real title screen, upload the first gameplay screen that appears after you power on the console.
Ripped Graphics
- Upload textures and graphics at their original resolution.
- You can resize very small images by using the instructions in the Formatting section.
Скриншоты
Для полной информации, см. Help:Contents/Taking Screenshots (англ.).
NOTE: All NES screenshots must be taken with the same palette file for consistency. Please see this page for more information.
- Don't take screenshots from video footage.
- Don't take screenshots from online web streams, such as YouTube videos. These tend to suffer from lossy video compression.
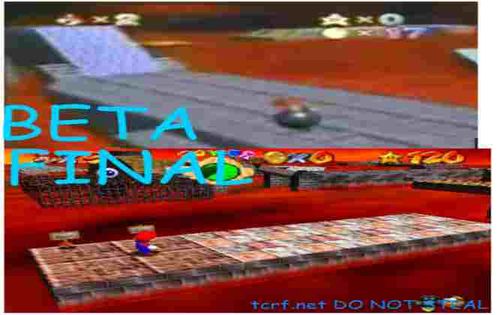
- Exception: Video captures may be used to illustrate how leftover content was once used in unreleased demo or prototype versions of games (such as trade show demos), but only if the content still exists within the final game (example).
- Take screenshots with an emulator or in-game screenshot function at the console's native resolution.
- A list of native resolutions for various consoles, including instructions on how to take screenshots in various emulators, can be found here.
- For the sake of consistency, please use 256×240 for NES/Famicom screenshots.
- When using Kega Fusion for Genesis/Master System/Game Gear screenshots, set "Output Stage" to "Raw" in the Extras tab of the configuration dialog to prevent the image from being resized and filtered. Also note that images will need to be converted to PNG before they can be uploaded to the wiki.
- Some consoles use video modes that rely on the display device to resize the image. If a screenshot at its native resolution is much taller than it is wide (e.g. 320×480) or vice-versa, causing excessive distortion, resample the image to 4:3 using a high-quality filter (Lanczos is recommended) before uploading. IrfanView is a good choice for Windows users.
- When picking a resolution of a screenshot for a PC game, use your common sense.
- Try referencing the most common screen resolutions at the time of the game's release, and the game's system requirements (older games often used to list the compatible screen resolution(s)).
- Additionally, older games are generally displayed in the 4:3 aspect ratio while newer ones are displayed 16:9 aspect ratio. However, for newer games, do not upload screenshots larger than 1080p unless relevant detail would be lost otherwise.
- Feel free to use a lower resolution if it still shows sufficient detail, or if higher resolutions introduce unwanted scaling artifacts.
- Don't crop out parts of screenshots.
- Exception: Nintendo DS and 3DS gameplay screenshots can be cropped if one of the screens does not contain relevant information (for example, item/status screens). Title screen shots should show both screens, unless one of the screens is completely blank.
- Exception: If the game has a solid inventory window, such as Super Mario Bros. 3, you are uploading a large number of these screenshots, and the window contains irrelevant information, you can crop this out.
- Don't alter the screenshot.
- This includes adjusting or adding contrast, brightness, filters, or watermarks.
- When demonstrating something such as a hidden message that utilizes extremely similar colors to the background, upload two copies of the image—one normal, and one with the changes—and then use the Compare template to show the difference between the two.
Scans
- Only upload scans if they illustrate something that is unused, but still in the game.
- If it's not in the game anymore, don't upload it.
- Exception: Scans that show content cut from games are fit for prerelease pages.
Gifs
- While large gifs are allowed, gifs that are larger than 12.5MP (that is, height x width x frames being larger than 12,500,000) will not animate unless opened. Try to limit gifs to below this limit where possible.
Личные изображения
Хоть и изображения, которые предназначены для вашей личной страницы, не являются субъектом для тех же рекомендации по качеству, но они должны быть именованы и тегированны.
- Your username must be added to the filename. TCRFEditorGuy-Photo.jpg is acceptable; Photo.jpg is not.
- Add the {{personalimage}} tag to the Summary box.
- Images should be of a reasonable file size. Uploading a 10 MB PNG of your favorite sunset probably isn't necessary.
Uploading Images
- Click "Upload file" under the Toolbox heading on the left sidebar.
- You can also click here.
- Choose a filename and enter it into the Destination Filename box.
- Example: OoT-Redead.png
- Write a description of what you're uploading in the Summary box.
- Example: "A Redead from Ocarina of Time."
- Tag the image appropriately.
- Example: {{screenshot|Nintendo 64}}
Once you've uploaded a file, it will appear on its own page. (Example) Here you can see the file name, the date it was uploaded on, who uploaded it, and which articles link to it.
NOTE: Due to image caching, when uploading a new version of an image, you may need to refresh the page once or twice afterwards in order for it to appear properly. Do not reupload the same file multiple times!
Tagging Images
Images must be tagged with their system and type. Put this information into the Summary box on the Upload File page (or, if an image has already been uploaded without the necessary information, click "edit" at the top of the image's page). Tagging an image will place it into a category. You can use more than one tag.
- Replace "system" with the proper name of the platform, and "game" with the title of the game the image belongs to! Examples: {{screenshot|PlayStation 2}}, {{conceptart|Super Mario Bros.}}
| Code: | Description: | Category: |
| {{alreadyJPEG}} | For use on images that were already in JPEG format in a game's files. | Already a JPEG |
| {{conceptart|game}} | Concept art, for use on Prerelease pages. | Concept Art |
| {{debugscreen|system}} | Screenshots of debug modes. | Debug Mode Screenshots |
| {{development-image|game}} | Development images, for use on Development pages. | Development Images |
| {{editor|system}} | Images taken from game data editors/viewers.
|
Editor Images |
| {{map|system}} | Fully ripped maps of areas or stages. | Maps |
| {{miscellaneous|system}} | Miscellaneous images related to a game. For use when no other tag suits the image. | Miscellaneous Images |
| {{mockup|system}} | Images assembled from a game's resources that don't represent actual gameplay. These images are sometimes featured in prerelease footage and often depict situations that cannot happen during the game, or attempt to make the game look as exciting as possible. It's sometimes difficult to recognize whether a screenshot is a mockup, so if you're unsure, just use the {{screenshot}} category instead. |
Mockup Images |
| {{modelrender|system}} | Model assets rendered with third-party tools rather than in-game. | Model Renders |
| {{personalimage|username}} | Images you are uploading to put on your User Page. These images should include your username in the file name.
|
Personal Images |
| {{prerelease-image|game}} | Prerelease images, for use on Prerelease pages. | Prerelease Images |
| {{rippedgraphic|system}} | Graphical assets that were ripped directly from the game, or cropped from full-size screenshots. These can include sprites, backgrounds, models, textures, and fonts. |
Ripped Graphics |
| {{scan|system}} | Scans of printed material, including pictures from magazines. | Scanned Images |
| {{screencap|system}} | Images that have been captured from a video capture device connected to a real console. This should only be done when a game or console cannot be (or has not yet been) properly emulated, as the process tends to produce noisy images with oddball sizes. | Screen Captures |
| {{screenshot|system}} | Full-size game screenshots, usually taken directly from an emulator. | Screenshots |
| {{subpageicon|series}} | Images uploaded purely to be icons for subpages. | Subpage Icons |
| {{titlescreen|system}} | Title screens. | Title Screens |
| {{wikiimage}} | Internal wiki images. Most users shouldn't need to use this. | Wiki Images |
Formatting Images
Используйте этот код для добавление изображения в вашей статье:
| Код: | [[File:Filename.png]] |
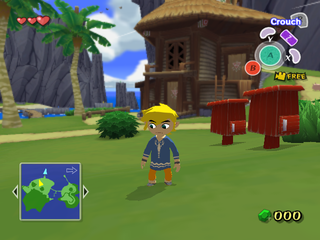
[[File:TWW_OutsetIsland1.png]]
Размер
Resize images by adding the desired width in pixels. You can do this with the px tag.
- For pixel art, use exact multiples of the original size, as TCRF uses nearest-neighbor resampling to prevent blurring.
| Код: | [[File:Filename.png|??px]] |
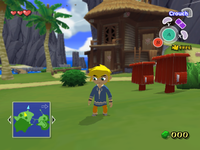
[[File:TWW_OutsetIsland1.png|200px]]
Alignment
Change the alignment of your image by adding left, right, or center:
| Код: | [[File:Filename.png|??px|right]] |
[[File:TWW_OutsetIsland1.png|200px|right]]
Transparency
If your image has a transparent background that's hard to see on bright backgrounds you might want to darken the background behind the image. You can do this by using the {{imgcolor}} template. You use it as such:
| Code: | {{imgcolor|[[File:Needs-bgcolor.png]]}} |
Here is a comparison with and without using {{imgcolor}}.
| Plain image | With {{imgcolor}} |
|---|---|
 |
You can also use other colors, including any named CSS color:
| Code: | {{imgcolor|[[File:Needs-bgcolor.png]]|black}} |
| Code: | {{imgcolor|[[File:Needs-bgcolor.png]]|blue}} |
| Code: | {{imgcolor|[[File:Needs-bgcolor.png]]|magenta}} |
| black | blue | magenta |
|---|---|---|
The {{imgcolor}} template also has other features, such as alignment and padding. For more information, see the {{imgcolor}} template page.
Spacing Issues
If text isn't wrapping properly around bobs, images, or embedded videos, use a {{clear}} tag to force unrelated content below them. For example, a {{clear}} tag has been added to the end of this section to prevent the text in the Comparisons section below from wrapping around the image on the right.
| Код: |
| {{clear}} |
Comparisons
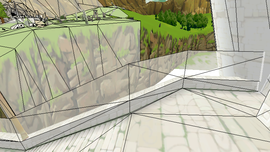
Compare two different screenshots like this:
| Code: | {{compare|
| leftt = Heading A
| rightt = Heading B
| left = [[File:Filename.png|??px]]
| right = [[File:Filename.png|??px]]
}}
|
| Japanese Version | Other Versions |
|---|---|
 |
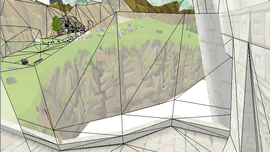 |
{{compare|
| leftt  = Japanese Version
| rightt = Other Versions
| left   = [[File:TWW-HyruleWallsJ1.png|270px]]
| right  = [[File:TWW-HyruleWallsU1.png|270px]]
}}
If more columns are needed:
{| class="wikitable" style="margin: auto;"
! Heading A
! Heading B
! Heading C
|-
|[[File:Filename A.png]]
|[[File:Filename B.png]]
|[[File:Filename X.png]]
|}
If more rows are needed:
{| class="wikitable" style="margin: auto;"
! ''Heading A''
! ''Heading B''
|-
| [[File:Filename A.png]]
| [[File:Filename B.png]]
|-
| [[File:Filename A2.png]]
| [[File:Filename B2.png]]
|}
Галереи
Вы можете создать галерею, используя этот код:
| <gallery widths="64" heights="64" perrow="3"> File:Filename.png|Описание изображения A |
widths: длина каждой картинки
heights: ширина каждой картинки
perrow: сколько изображении появятся на каждой строке
<gallery widths="64" heights="64" perrow="3">
File:DKCBanana22.png|Описание изображения A
File:DKCBanana2C.png|Описание изображения B
File:DKCBanana42.png|Описание изображения C
File:DKCBanana4A.png|Описание изображения D
File:DKCBanana4E.png|Описание изображения E
File:DKCBanana5E.png|Описание изображения F
</gallery>

