Development:Pokémon Red and Blue/Unused Maps
This is a sub-page of Development:Pokémon Red and Blue.
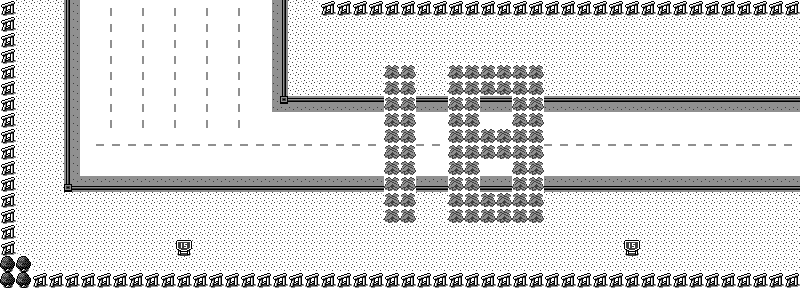
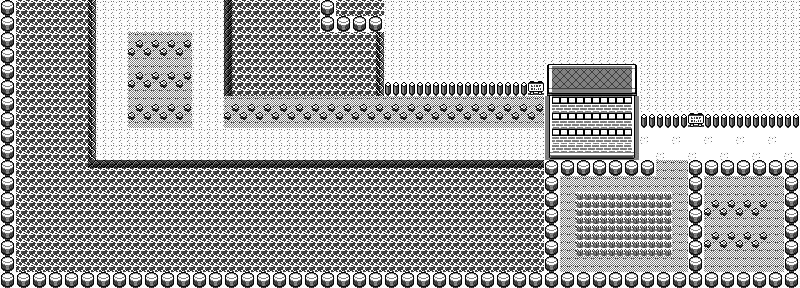
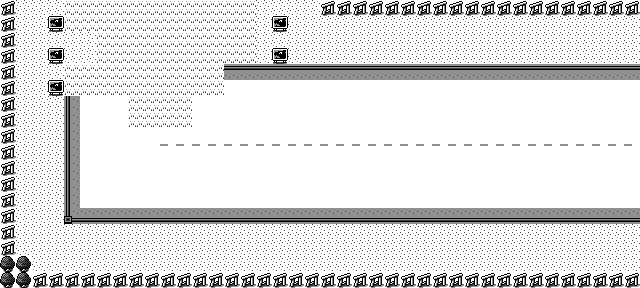
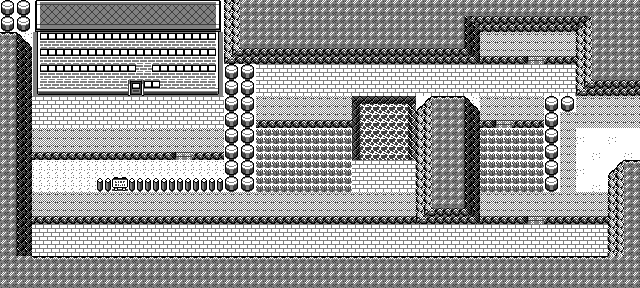
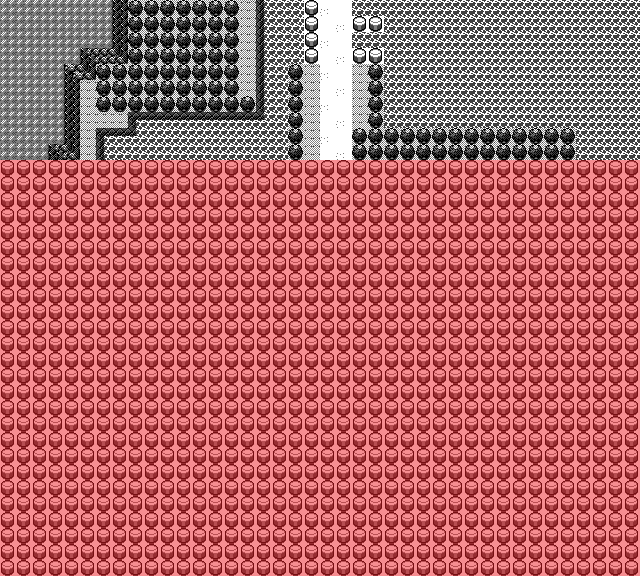
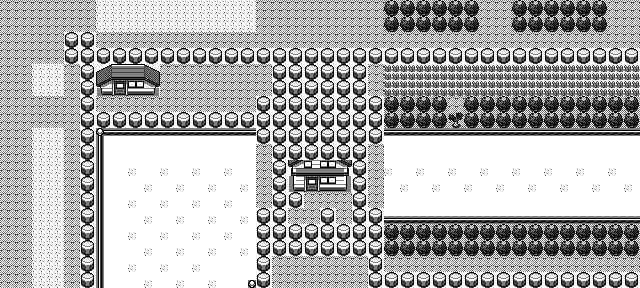
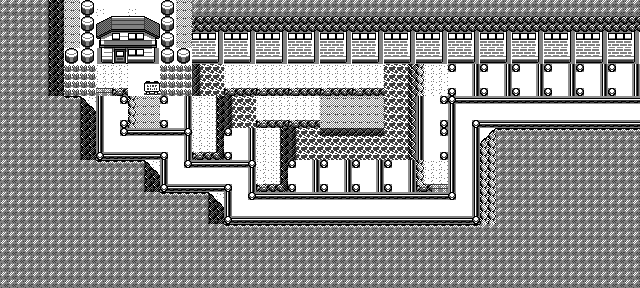
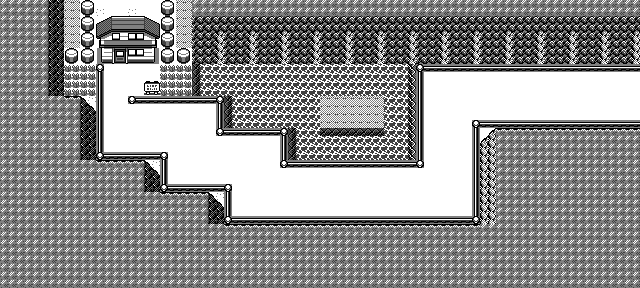
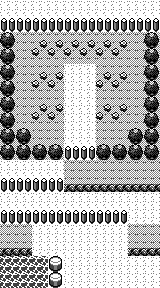
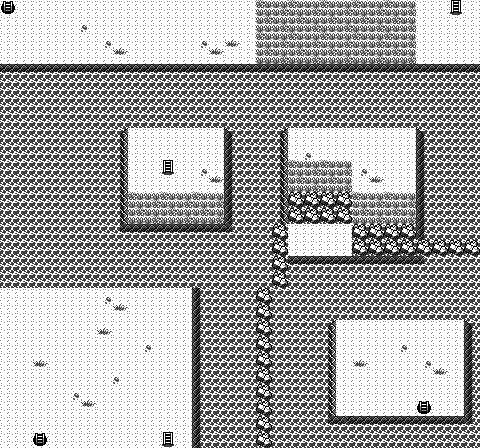
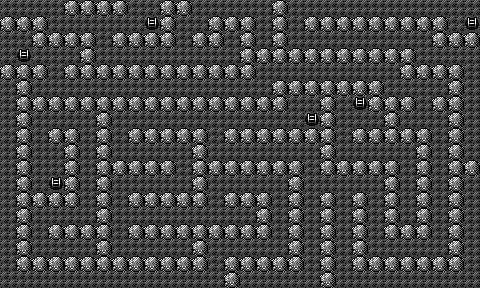
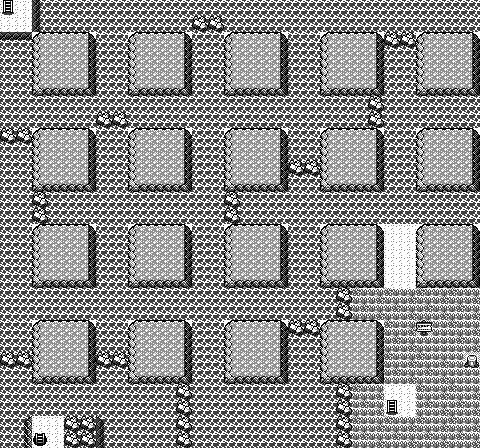
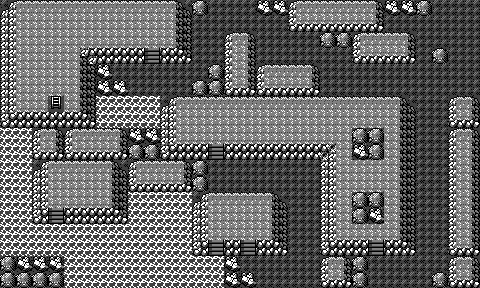
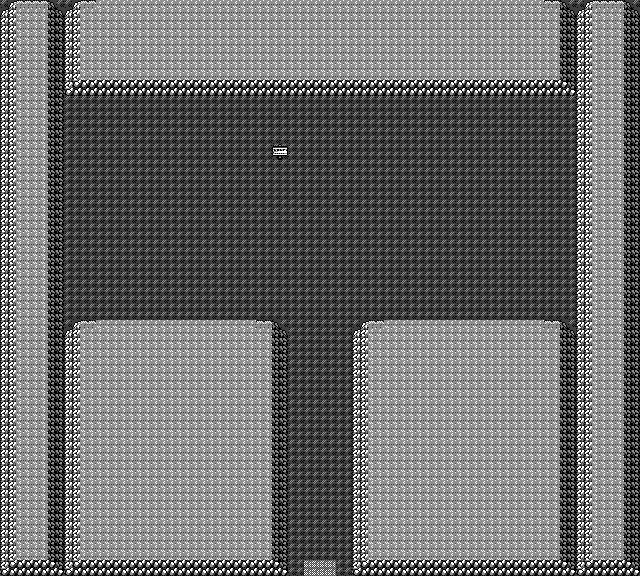
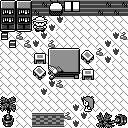
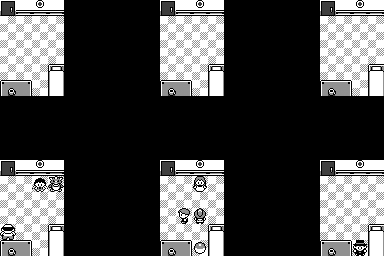
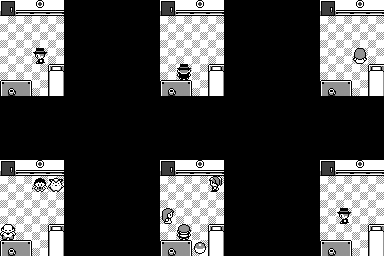
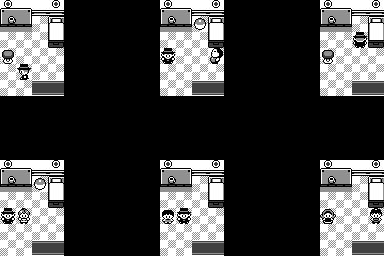
A large amount of maps were archived in the source code, albeit with a lot of them being subject to what was either corruption, or incorrect parameters. Despite this, these maps give us an incredibly informative glimpse regarding how the region of Kanto evolved over time.
Contents
- 1 "Version 1"
- 1.1 Overview
- 1.2 Exteriors
- 1.2.1 Pallet Town
- 1.2.2 Route 1
- 1.2.3 Viridian City
- 1.2.4 Route 2
- 1.2.5 Pewter City
- 1.2.6 Route 3
- 1.2.7 Route 4
- 1.2.8 Cerulean City
- 1.2.9 Route 24
- 1.2.10 Route 25
- 1.2.11 Route 9
- 1.2.12 Route 10
- 1.2.13 Lavender Town
- 1.2.14 Route 5
- 1.2.15 Route 6
- 1.2.16 Vermilion City
- 1.2.17 Route 8
- 1.2.18 Route 7
- 1.2.19 Celadon City
- 1.2.20 Route 11
- 1.2.21 Route 12
- 1.2.22 Route 13
- 1.2.23 Route 14
- 1.2.24 Route 15
- 1.2.25 Route 16
- 1.2.26 Route 17
- 1.2.27 Route 18
- 1.2.28 Fuchsia City
- 1.2.29 Route 19
- 1.2.30 Route 20
- 1.2.31 Cinnabar Island
- 1.2.32 Route 21
- 1.2.33 Route 22
- 1.2.34 Route 23
- 1.2.35 Indigo Plateau
- 1.2.36 Saffron City
- 1.2.37 Scrapped Town
- 1.3 Interiors
- 2 "Version 2"
- 2.1 Overview
- 2.2 Exteriors
- 2.2.1 Pallet Town
- 2.2.2 Route 1
- 2.2.3 Route 2
- 2.2.4 Route 3
- 2.2.5 Route 4
- 2.2.6 Cerulean City
- 2.2.7 Route 24
- 2.2.8 Route 25
- 2.2.9 Route 9
- 2.2.10 Route 10
- 2.2.11 Lavender Town
- 2.2.12 Route 5
- 2.2.13 Route 6
- 2.2.14 Vermilion City
- 2.2.15 Route 8
- 2.2.16 Route 7
- 2.2.17 Celadon City
- 2.2.18 Route 11
- 2.2.19 Route 12
- 2.2.20 Route 13
- 2.2.21 Route 14
- 2.2.22 Route 15
- 2.2.23 Route 16
- 2.2.24 Cycling Road North/Route 17
- 2.2.25 Fuchsia City
- 2.2.26 Route 19
- 2.2.27 Route 20
- 2.2.28 Cinnabar Island
- 2.2.29 Route 21
- 2.2.30 Route 22
- 2.2.31 Route 23
- 2.2.32 Indigo Plateau
- 2.2.33 Saffron City
- 2.3 Interiors
- 2.4 Dungeons
- 3 Miscellaneous
"Version 1"
Overview
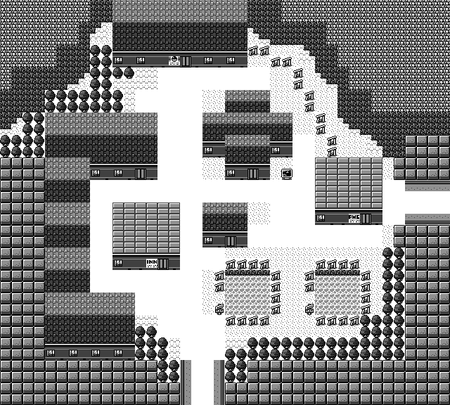
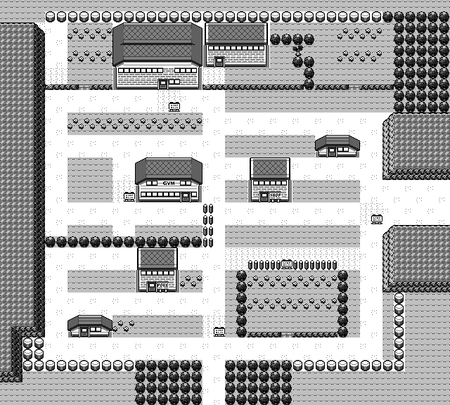
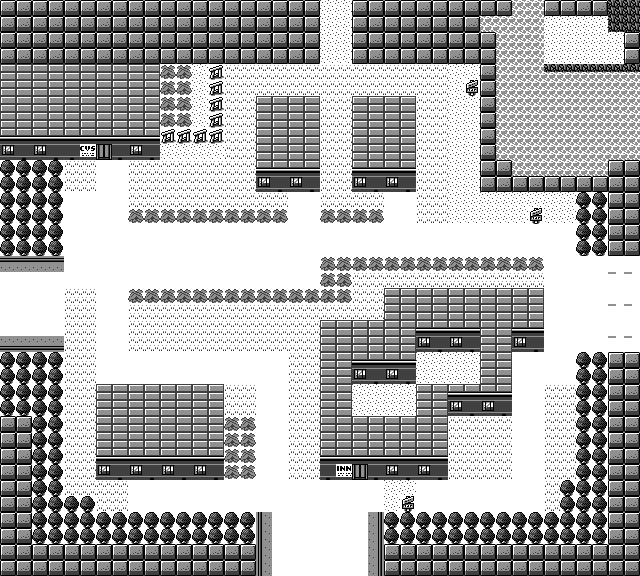
The earliest known iteration of Kanto, which appears to date back to around 1992. While the overworld layout had already been established, many of the routes at this point are just blank roads, and several cities have practically nothing noteworthy in them. The tileset used is much simpler and cruder than in later iterations, with perspective gone awry, and a radically different art style. The Makai Toushi SaGa inspiration is in full force here.
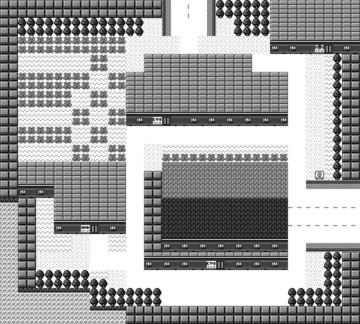
Though in surprisingly good shape, this early Kanto does however contain instances of maps using the wrong blocks. The first one is a building chunk with "CVS" sign on it, which, given its placement, was likely a duplicate of block 1A that was later overwritten. The second is less clear, but may have been a duplicate of block 56. The third block was definitely where the "CVS" block was meant to be used. As for the fourth block, it is unique to the north-most mall building in Vermilion City, and was likely a scrapped wall type.
| Block ID | Incorrect Block | Proper Block |
|---|---|---|
| 55 | ||
| 5F | ||
| 60 | ||
| 61 |
Exteriors
Pallet Town
| Early Map
TOWN01.DAT |
Final Map
NTOWN_01.MAP |
|---|---|
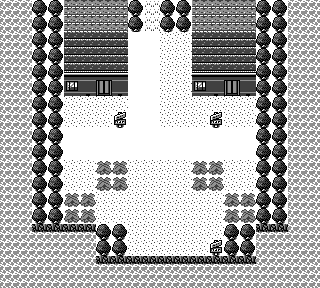
Only contains two small buildings, meaning that Professor Oak's lab is absent, with him either living with his family, or having his lab in another city. The map is also surrounded by water on all sides, instead of just having a beach to the south. Trees also border the town, as opposed to the final games' bollards. Tall grass is also found inside the town, as well as a few other cities throughout Kanto, though it's likely they were just purely decorative weeds.
Route 1
| Early Map
ROAD01.DAT |
Final Map
NROAD_01.MAP |
|---|---|
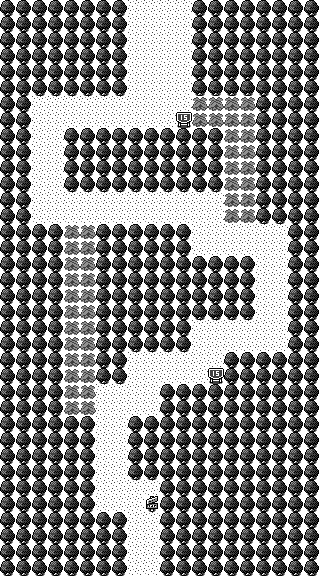
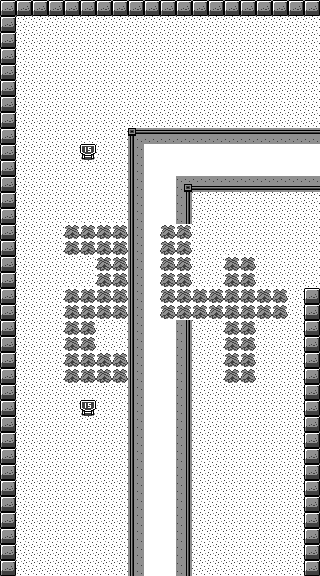
Is more densely wooded, features less tall grass, and has a more natural curvy path. Also worth noting is that across this iteration of Kanto are a series of numbered signs, with them likely intended to display the current route's number. However, they all state "15", likely because the other number tiles had not been implemented yet. Numbered route signs wouldn't reappear until years later, in Pokémon X and Y, but have appeared in every game since.
Viridian City
| Early Map
TOWN02.DAT |
Final Map
NTOWN_02.MAP |
|---|---|
The overall layout is the same, though the body of water is missing, and the way to Route 22 is blocked off by fences. As for the wooded area, it is found in the upper-right corner of town as opposed to the upper-left one, and its shape seems to indicate it had originally been designed to hold items.
Interestingly, the roads exiting town are paved, while Route 1 and 2 are completely grassy. This is perhaps a leftover from an even earlier iteration of Kanto, where Route 1 and 2 were still placeholder paved roads.
Route 2
| Early Map
ROAD02.DAT |
Final Map
NROAD_02.MAP |
|---|---|
The lower half of this route is the most different, featuring more tall grass as well as a river and bridge that are nowhere to be seen in the final games. There is a clearing where Viridian Forest is found in the final game, and the entrance to Diglett's Cave is quite a bit more imposing. Neither houses nor gates are present in this iteration.
Pewter City
| Early Map
TOWN03.DAT |
Final Map
NTOWN_03.MAP |
|---|---|
While the layout is somewhat similar, this area is very different. A large C-shaped building is placed where the Gym is in the final, and the flower patch is instead two bodies of water. The paved road oddity from Viridian City is also present here. There are mountains to the north of the city, like in HeartGold and SoulSilver.
Route 3
| Early Map
ROAD03.DAT |
|
|---|---|
| Final Map
NROAD_03.MAP |
The first of the placeholder routes. Indeed, virtually all of the early routes are wide empty roads, the later ones styled after highways, with the corresponding route number written in tall grass (though Route 3 notably lacks the latter aspect).
Route 4
| Early Map
ROAD04.DAT |
|
|---|---|
| Final Map
NROAD_04.MAP |
A placeholder for Route 4. Its latter half lacks pavement, let alone any hint of Mt. Moon.
Cerulean City
| Early Map (Original)
TOWN04.DAT |
|---|
| Early Map (Corrected) |
| Final Map
NTOWN_04.MAP |
Far fewer houses and less water, with its only notable feature being a rather odd-looking, pretzel-shaped Inn. There is also no entrance to Cerulean Cave; instead, there is an odd barren island in the top-right corner of town.
Route 24
| Early Map
ROAD24.DAT |
Final Map
NROAD_24.MAP |
|---|---|
A placeholder for Route 24.
Route 25
| Early Map
ROAD25.DAT |
|
|---|---|
| Final Map
NROAD_25.MAP |
A placeholder for Route 25. Like the final game, this iteration terminates in a dead-end.
Route 9
| Early Map
ROAD09.DAT |
|
|---|---|
| Final Map
NROAD_09.MAP |
A placeholder for Route 9.
Route 10
| Early Map
ROAD10.DAT |
Final Map
NROAD_10.MAP |
|---|---|
A placeholder for Route 10, with Rock Tunnel nowhere to be seen.
Lavender Town
| Early Map (Original)
TOWN05.DAT |
Early Map (Corrected) | Final Map
NTOWN_05.MAP |
|---|---|---|
|

|
|
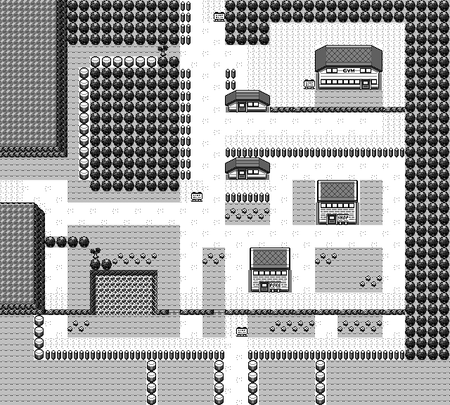
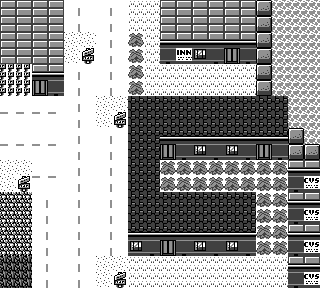
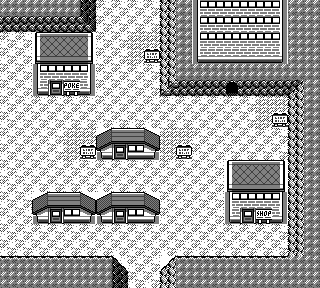
Has a completely different layout, lacking the iconic Pokémon Tower and many of the houses. It looks more like a typical drive-by town, with a minuscule convenience store and an overgrown hotel. Appears to have once been open to the sea to the east; in the final games, the closest source of water is south of Lavender, with impassable mountains directly east.
Route 5
| Early Map
ROAD05.DAT |
Final Map
NROAD_05.MAP |
|---|---|
A placeholder for Route 5.
Route 6
| Early Map
ROAD06.DAT |
Final Map
NROAD_06.MAP |
|---|---|
A placeholder for Route 6.
Vermilion City
| Early Map (Original)
TOWN06.DAT |
Early Map (Corrected) | Final Map
NTOWN_06.MAP |
|---|---|---|
|
|
|
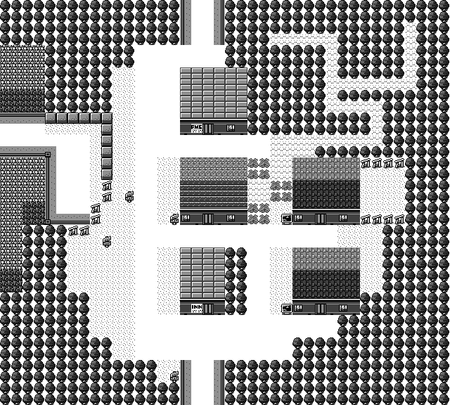
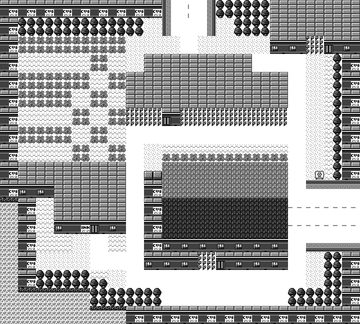
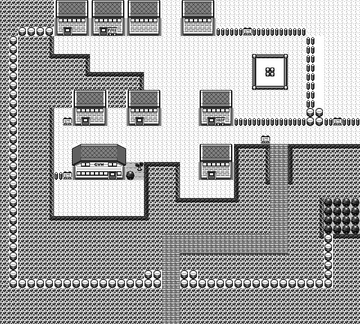
Has a completely different layout, lacking the harbor and featuring quite a lot of tall grass. Appears to have been conceptually switched with Celadon City, as this version of Vermilion features two convenience stores (later reworked into a single department store), as well as what is likely Celadon Condominiums (as seen by the GF logo by the entrance of town).
Route 8
| Early Map
ROAD08.DAT |
|
|---|---|
| Final Map
NROAD_08.MAP |
A placeholder for Route 8.
Route 7
| Early Map
ROAD07.DAT |
Final Map
NROAD_07.MAP |
|---|---|
|
|
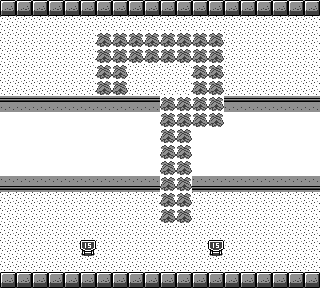
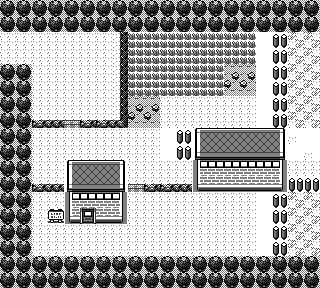
A placeholder for Route 7.
Celadon City
| Early Map (Original)
TOWN07.DAT |
Early Map (Corrected) | Final Map
NTOWN_07.MAP |
|---|---|---|
|

|
|
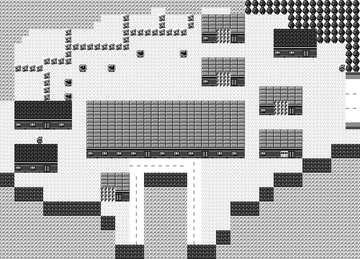
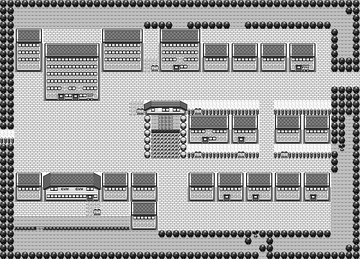
Has a completely different layout, lacking the department store and many other buildings. Appears to have been conceptually switched with Vermilion City, as here the town is seen sporting what is likely a harbor; it is also surrounded by water, while the final city is completely landlocked. Oddly enough, this town features no less than three department stores.
Route 11
| Early Map
ROAD11.DAT |
|
|---|---|
| Final Map
NROAD_11.MAP |
A placeholder for Route 11 that lacks the secondary entrance to Diglett's Cave.
Route 12
| Early Map
ROAD12.DAT |
Final Map
NROAD_12.MAP |
|---|---|
A placeholder for Route 12.
Route 13
| Early Map
ROAD13.DAT |
|
|---|---|
| Final Map
NROAD_13.MAP |
A placeholder for Route 13.
Route 14
| Early Map
ROAD14.DAT |
Final Map
NROAD_14.MAP |
|---|---|
A placeholder for Route 14. The road here features striped lanes.
Route 15
| Early Map
ROAD15.DAT |
|
|---|---|
| Final Map
NROAD_15.MAP |
A placeholder for Route 15.
Route 16
| Early Map
ROAD16.DAT |
|
|---|---|
| Final Map
NROAD_16.MAP |
|
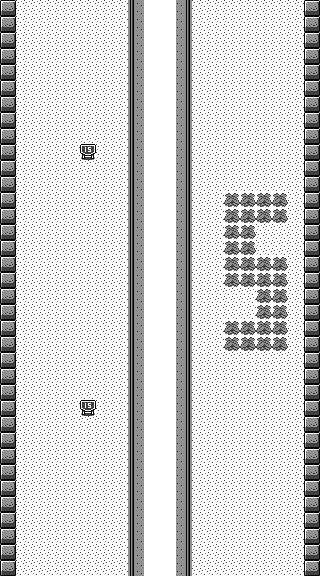
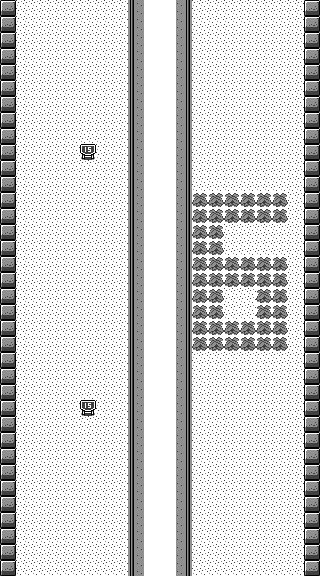
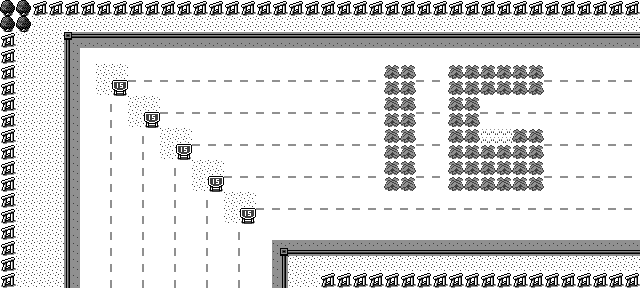
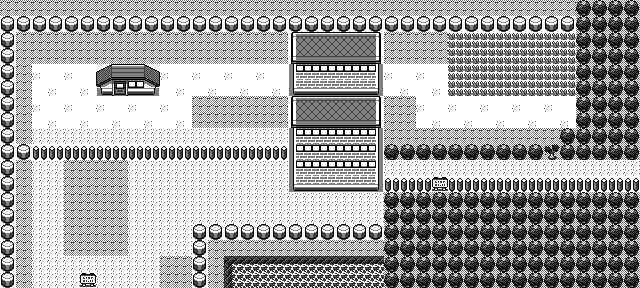
The first of the highway-themed placeholder routes. This one has a somewhat crude "6".
Route 17
| Early Map
ROAD17.DAT |
Final Map
NROAD_17.MAP |
|---|---|

|

|
The second highway placeholder route. Compared to most of the routes, this one didn't change much in the final games. It lacks usual tall grass route number.
Route 18
| Early Map
ROAD18.DAT |
|
|---|---|
| Final Map
NROAD_18.MAP |
The last highway placeholder route.
Fuchsia City
| Early Map (Original)
TOWN08.DAT |
Early Map (Corrected) | Final Map
NTOWN_08.MAP |
|---|---|---|
|
|
|
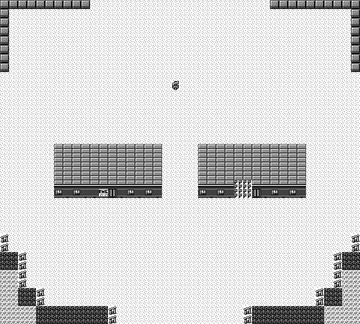
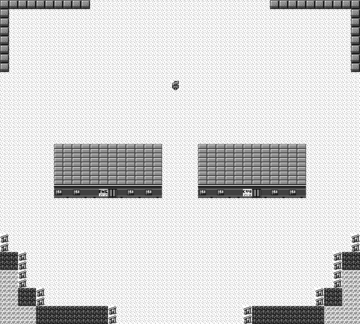
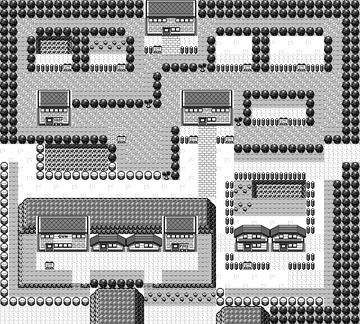
Completely empty aside from two buildings. While it lacks any hint of a Safari Zone, the northern half of town is oddly open, which would make sense as a previous Kanto layout had a route north of town.
Route 19
| Early Map
ROAD19.DAT |
Final Map
NROAD_19.MAP |
|---|---|
|
|
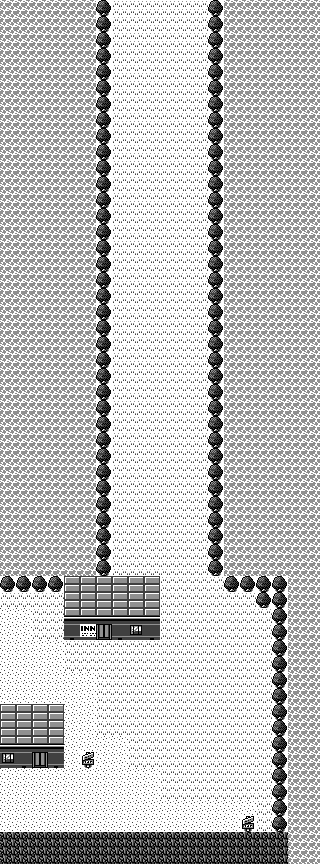
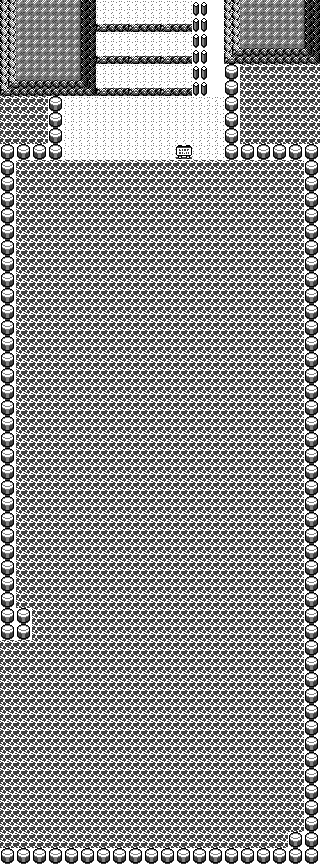
An early version of Route 19. This version of the route is land-based, whereas the final version is a sea route which only features a very small northern shore. Also present are two buildings; while the final games have none here, Yellow would add the Summer Beach House on this route.
Route 20
| Early Map
ROAD20.DAT |
|
|---|---|
| Final Map
NROAD_20.MAP |

|
An early version of Route 20. Only features a tiny isle in lieu of the Seafoam Islands. Interestingly, there are no bollards restricting the player's path, also the case with other sea routes.
Cinnabar Island
| Early Map
TOWN09.DAT |
Final Map
NTOWN_09.MAP |
|---|---|
|
|
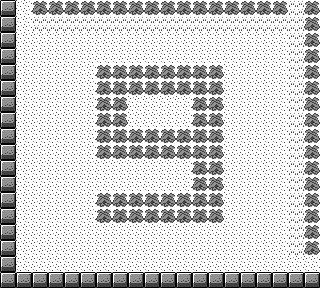
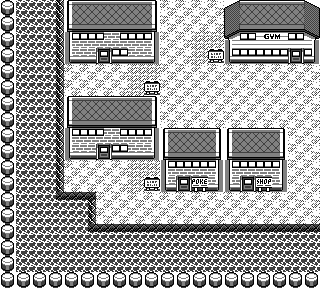
A placeholder for Cinnabar Island, using the number 9, its corresponding number as seen in the Capsule Monster design documents. This is reflected in it being the ninth Fly landmark.
Route 21
| Early Map
ROAD21.DAT |
Final Map
NROAD_21.MAP |
|---|---|

|

|
An early version of Route 21, featuring many small islands instead of a few piers. Interestingly, starting with FireRed and LeafGreen, this route would ultimately end up sporting a series of small islands.
Route 22
| Early Map
ROAD22.DAT |
|
|---|---|
| Final Map
NROAD_22.MAP |
A placeholder for Route 22, with the Route 23 side being more overgrown than the Viridian City side.
Route 23
| Early Map
ROAD23.DAT |
Final Map
NROAD_23.MAP |
|---|---|

|

|
A completely different earlier iteration of Route 23, consisting of a winding mountain path (which would explain why the final area it leads to is called a "plateau"). It has no water or man-made structures, and even Victory Road is missing. The concept of the game's final boss being at the end of a mountain climb would be used in Generation II.
Indigo Plateau
| Early Map
TOWN10.DAT |
Final Map
POKECEN.MAP |
|---|---|
|
|
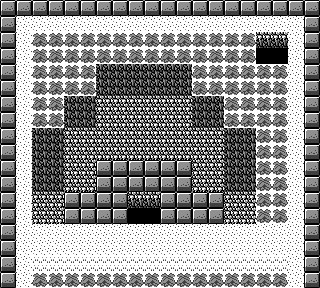
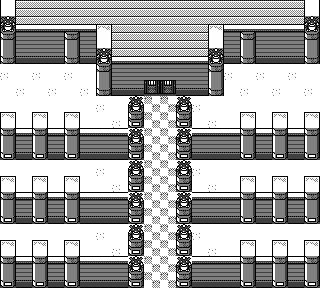
Another wildly different design, with a large cave entrance instead of the final games' League building. The League had definitely not been conceived yet; if anything, the dungeon that would have been found here is closer to what the Victory Road would end up being. A small hole can also be seen in the upper-right corner, perhaps originally intended to give the player access to a portion of the cave system below.
Saffron City
| Early Map
TOWN11.DAT |
Final Map
NTOWN_11.MAP |
|---|---|
Completely empty, being little more than a partially blocked-off crossroad.
Scrapped Town
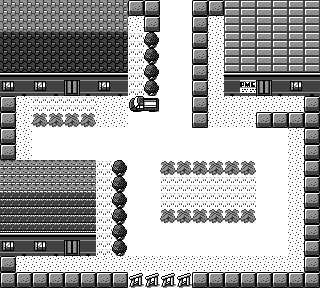
TOWN12.DAT is a town that was scrapped early in development, and likely corresponds to the area referred to as "C" in the design documents. What was appears there as a city the size of Saffron is depicted as a tiny Pallet-esque town, with the purpose of this area still as unclear as it was before. Given the glaring discrepancy with the design docs, it's possible that the original "C Town" map was actually overwritten by the one we see here. This would make sense, as this area actually looks a lot like an intermediary form of Pallet Town, with two houses, an important building, and even a grass patch in basically the same spot as in the final games. The fences down south would then theoretically block access to Route 21, just like how Route 22 is gated-off in Viridian City.
Notably, this is also the only place in this iteration of Kanto with a truck. This exact graphic would make its way into final game, found offscreen in the Vermilion City harbor.
Interiors
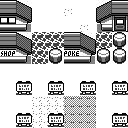
Poké Mart (Standard)
| Early Map
SHOP1DAT |
Final Map
SHOP.MAP |
|---|---|
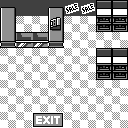
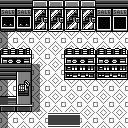
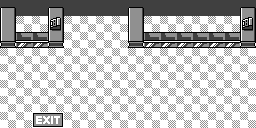
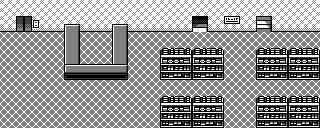
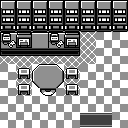
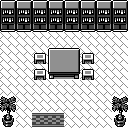
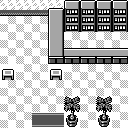
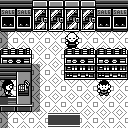
An early Poké Mart with far fewer shelves, as well as a counter that is in front of the entrance instead of beside it.
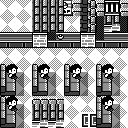
Poké Mart (Large)
| Early Map
T6S2.DAT |
Final Map
DEPT2F.MAP |
|---|---|
A larger version of the Poké Mart, seemingly intended for the Vermillion City department store. Ultimately reworked into the upper floors of the Celadon City department store.
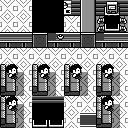
Champ Cup
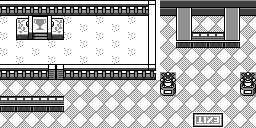
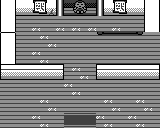
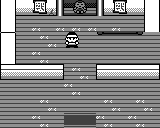
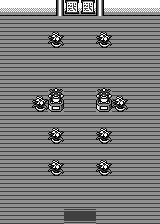
Found under CHAMPCUP.MAP is the original incarnation of Pokémon Gyms. This is supported by numerous details found in the source code, such as the internal name for the Gym tileset being "CHAMPCUP_TYPE". Moreover, internal names for the overworld sprites reveal that Lance's spot was originally occupied by an NPC type known as "Judge", whose role would have likely been that of the anime's battle judges.
"Version 2"
Overview
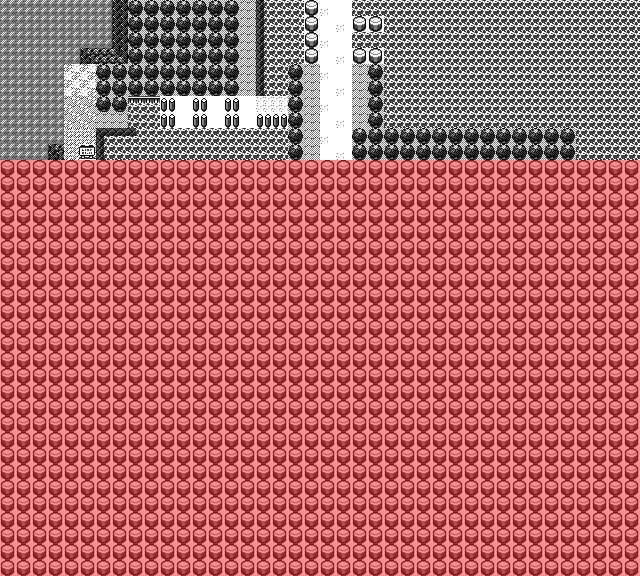
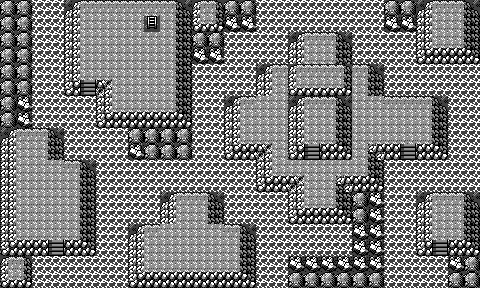
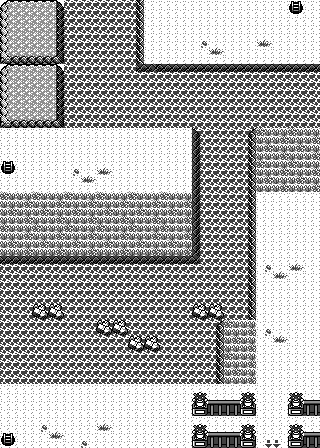
Compared to the "V1" overworld, this iteration of Kanto, which appears to date back to around 1994, lacked any sort of exterior blocksets or tilesets; using the ones from the final games renders most areas as almost completely indecipherable. This isn't helped by some blocks appearing to have been placed incorrectly during map design, or that some buildings were clearly still placeholders. A handful of maps are also partially missing, sometimes even completely (in the case of Viridian, Pewter, and Route 18), perhaps due to memory corruption or incorrect parameters. Red bollards are used here to denote missing map portions. In most cases, the file names are identical to the final maps, but with a different extension. As a result, only exceptions have their filenames listed here.
With a little restoration work, a number of interesting differences can be noted. It's worth noting that because no tileset exists for these, the final Red and Green tileset is used here instead. As for the blockset, a possible reconstruction of the early one used by these maps will be provided below.
| Early Blockset | Final Blockset |
|---|---|
Exteriors
Pallet Town
| Early Map (Original) | Early Map (Corrected) | Final Map |
|---|---|---|
|
|
|
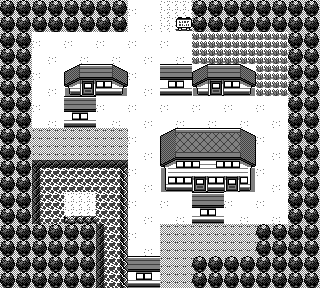
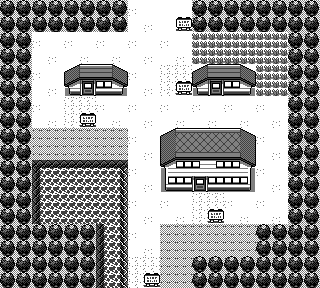
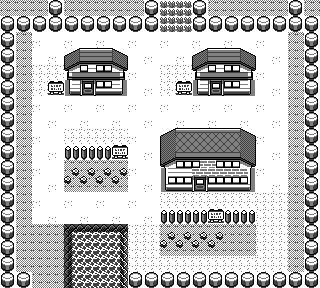
Closer to final than Version 1's layout. It's still bordered by trees, has tall grass, smaller houses, and lacks the bollards blocking the path to Route 21.
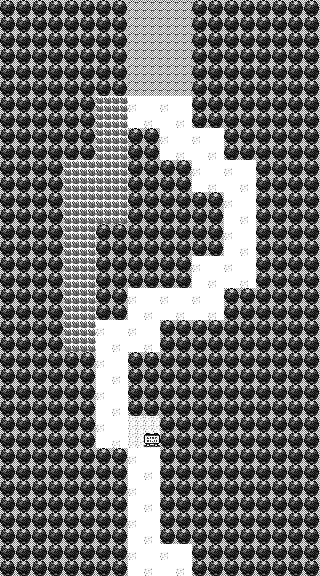
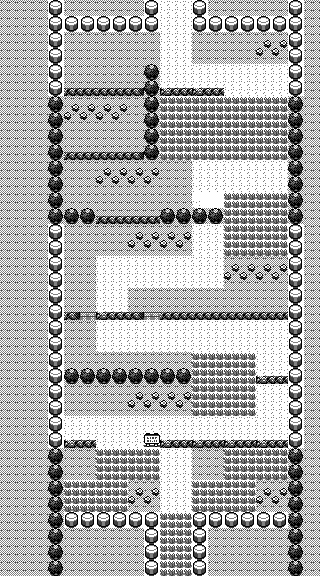
Route 1
| Early Map (Original) | Early Map (Corrected) | Final Map |
|---|---|---|
|

|
|
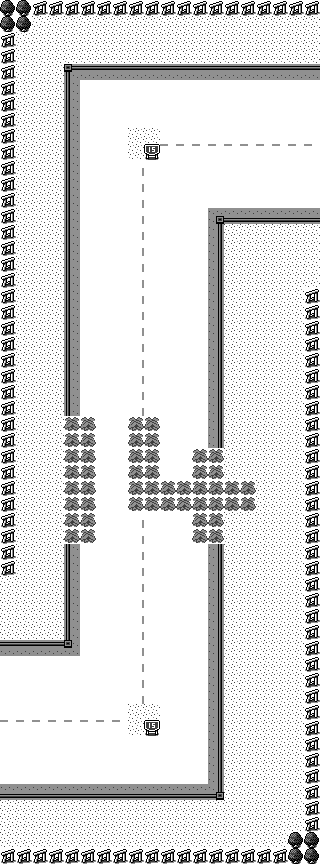
A different, long, winding path that has one less wild grass patch when compared to V1, and thanks to the tileset, has an even more natural look as well.
Route 2
| Early Map (Original) | Early Map (Corrected) | Final Map |
|---|---|---|

|

|

|
Now has cuttable trees, though cutting them leads to smaller, separate areas instead of the shortcut past Viridian Forest and to Diglett Tunnel. Viridian Forest is missing as well, though it's likely hinted at by the doorless building.
Diglett's Cave is also represented by a house here, but it had a proper cave entrance in V1. It could be because the requisite tiles weren't made yet.
Gate Houses don't seem to be implemented yet, and it's possible the extra houses served as Gate Houses in their stead.
Route 3
| Early Map | |
|---|---|
| Corrected Early Map | |
| Final Map |
The first partly missing map. The tiles on the right appear to be shuffled, likely unintentionally. Other than that, the visible layout is nearly identical to the final, though it has fewer ledges, a paved road, and more tall grass.
Route 4
| Early Map | |
|---|---|
| Corrected Early Map | |
| Final Map |
Less hilly, and it seems to treat Mt. Moon as an optional dungeon, like Gold and Silver's Mt. Mortar, as the route leads directly to Cerulean City. This means not only can you just walk past the dungeon, the entrances are spaced further apart.
Cerulean City
| Early Map |
|---|
| Corrected Early Map |
| Final Map |
Almost entirely missing, the remaining map shows a similar layout to final, though lacking the exit from the Route 25 shortcut. Compared against Route 24, that shortcut doesn't exist yet.
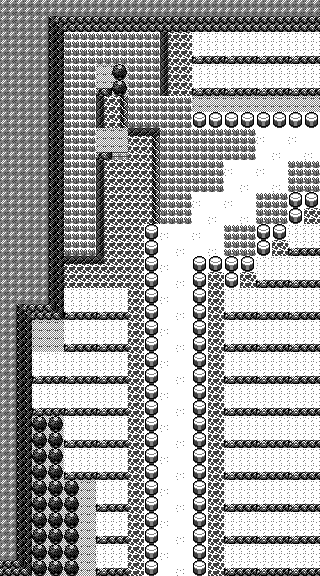
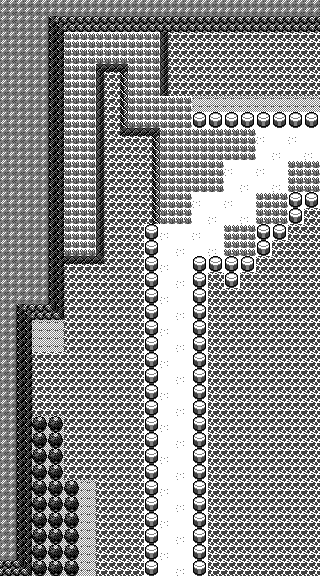
Route 24
| Early Map (Original) | Early Map (Corrected) | Final Map |
|---|---|---|
|
|
|
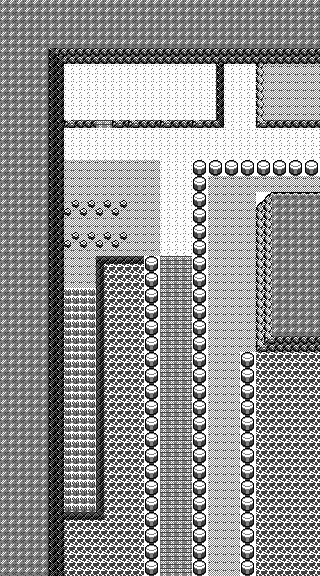
Wholly surrounded by water, the wild grass starts on the north end of the route and continues on both right and left sides of the water. The Route 25 shortcut is completely missing, though there's the beginnings of a small path above the bollards in the northern section.
Route 25
| Early Map | |
|---|---|
| Corrected Early Map | |
| Final Map |
Much simpler, entirely surrounded by water, and lacking the tree maze and pond. Bill's Cottage is there, though smaller, but the much rumored Garden gap behind it is missing.
Route 9
| Early Map | |
|---|---|
| Corrected Early Map | |
| Final Map |
A much simpler, paved straight road, and not a winding mountain path. Water is present, in three spots, on the north side of the map. The tree blocking you from accessing it early isn't present, meaning you could have walked through to Rock Tunnel, though good luck without Flash.
It also features a small area blocked by trees. Likely, this was meant to be a hidden item.
Route 10
| Early Map (Original) | Early Map (Corrected) | Final Map |
|---|---|---|

|

|

|
Very close to final, with a cave entrance where the Power Plant should be. The patch of grass is covered by Rock Tunnel here. The Pokémon Center appears to be a Rest House, and the Pokémon Tower extends further north into this map.
Lavender Town
| Early Map (Original) | Early Map (Corrected) | Final Map |
|---|---|---|
|
|

|
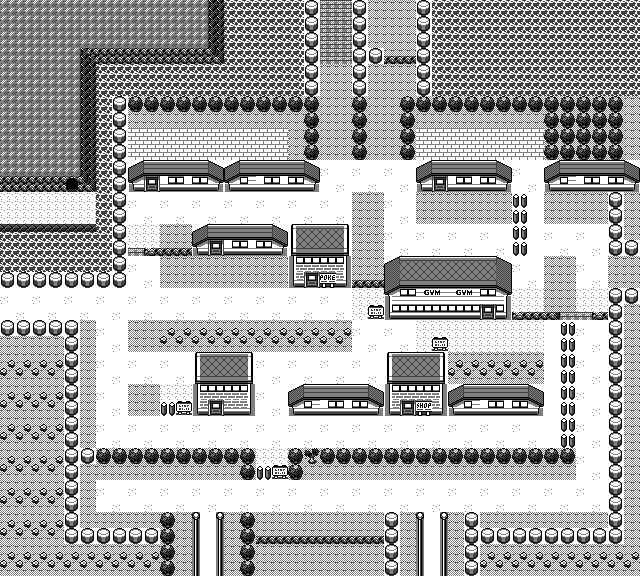
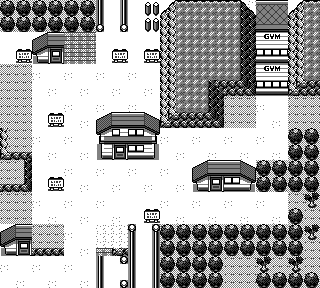
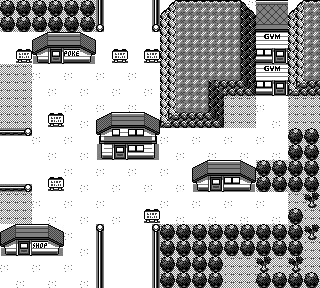
Much closer to the final, with way more signs though. It's possible these acted as Developer Notes, containing basic details as they worked on the maps, or as event switches for the main quest.
The Pokémon Tower is made out of Gyms, stacked one ontop another, and is slimmer compared to the extension visible on Route 9, suggesting Route 9 was made later.
Another cut tree path is on the south edge of the map. It could have deposited the player onto a Route 12 sidepath, as there is a matching Route 12 entrance in this version, or stored a hidden item.
Route 5
| Early Map (Original) | Early Map (Corrected) | Final Map |
|---|---|---|
|
|
|
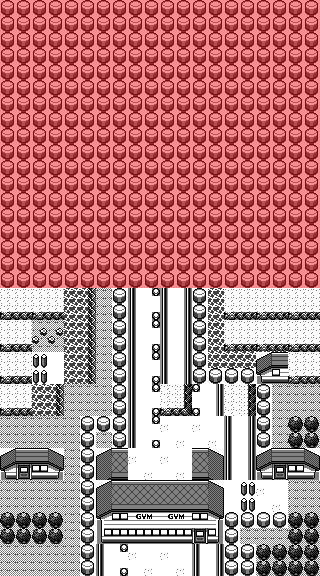
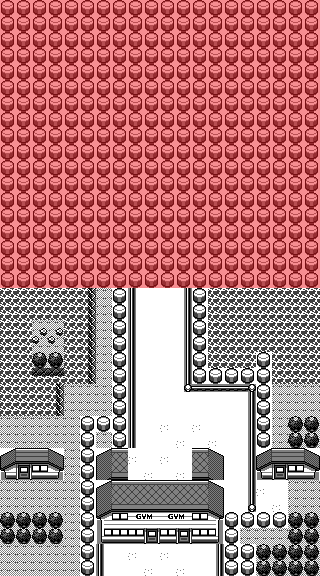
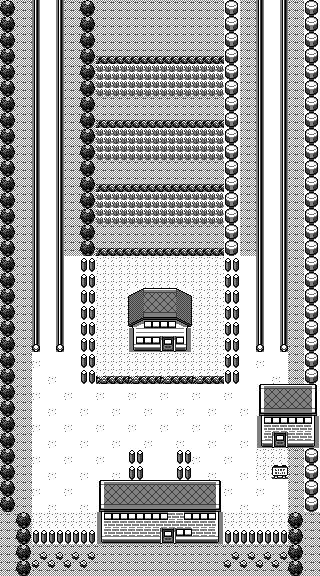
Partly missing, though this one has an interesting placeholder design for the Gate House. Along the west side is the likely entrance to the cut Underground Path for Routes 5 to 7.
This map, and Route 9's map, both suggest Cerulean City had a deluge more water to the south it than it does in the final.
Route 6
| Early Map (Original) | Early Map (Corrected) | Final Map |
|---|---|---|
|
|
|
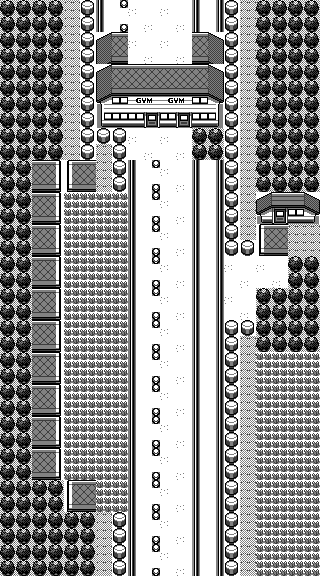
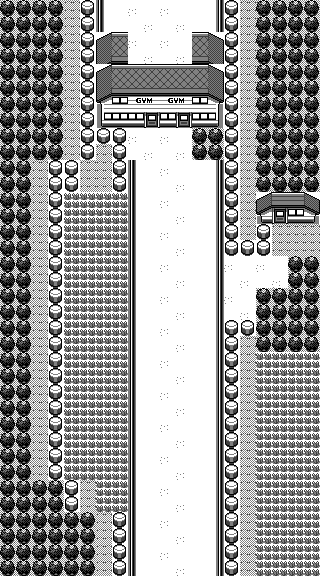
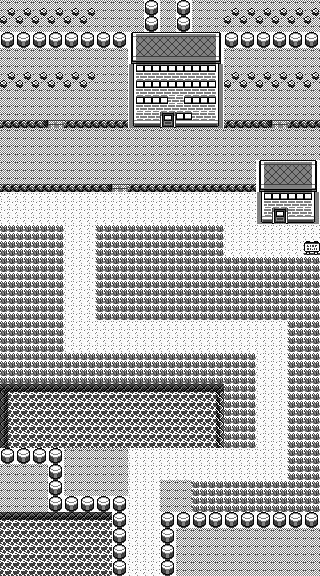
A simple straight paved road. Features a redundant alternate path which leads directly to Vermillion City's Pokémon Center, but there is blocked by a cuttable tree.
Vermilion City
| Early Map | Corrected Early Map | Final Map |
|---|---|---|
|
|

|
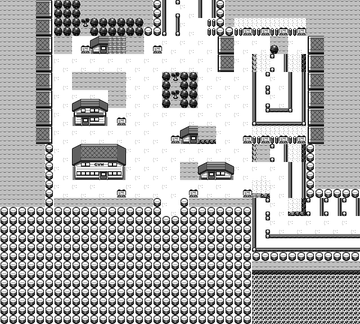
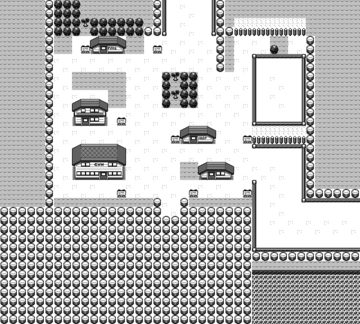
Barebones, and lacks the Fishing Guru's house. Has less water overall, and the Gym isn't blocked by a cut tree.
The bollards filling the bottom seem to be a harbor placeholder, which is on a separate map in the final. The Machop Building Plot is present.
Route 8
| Early Map (Original) | |
|---|---|
| Early Map (Corrected) | |
| Final Map |
Has a somewhat similar layout, but lacks the ledges and enclosed patch of tall grass. Instead, features little ponds that are nowhere on the final map.
Route 7
| Early Map (Original) | Early Map (Corrected) | Final Map |
|---|---|---|
|
|

|
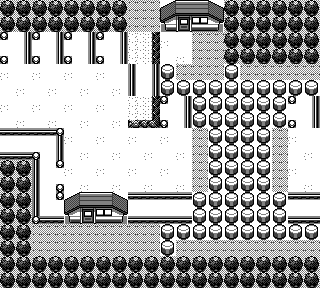
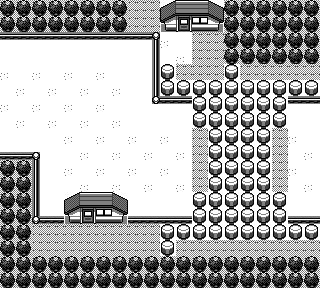
Nearly identical to final, though lacking the tall grass and with an extra house. It's likely the entrance to the cut Underground Path between Routes 5 to 7.
Celadon City
| Early Map (Original) | Early Map (Corrected) | Final Map |
|---|---|---|
|
|

|
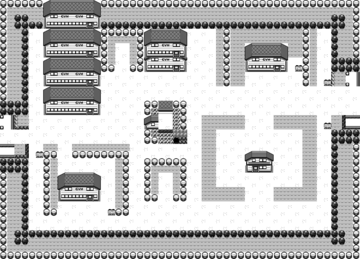
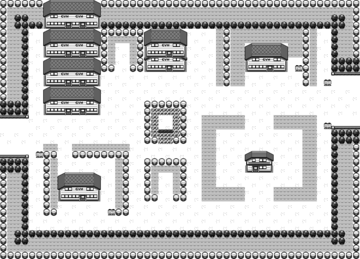
The beginnings of the final's layout. It's lacking in houses, but the hidden route in the North is present, though inaccessible. It lacks cuttable trees, and maybe the Game Corner, as well.
Route 11
| Early Map | |
|---|---|
| Corrected Early Map | |
| Final Map |
No winding path through the grass, and has two errantly placed pier blocks. Diglett's Cave on this side is, once again, represented by a house, and the Gate House is clearly there, though with a placeholder.
Route 12
| Early Map (Original) | Early Map (Corrected) | Final Map |
|---|---|---|

|

|

|
The northern border is made of bollards and trees, instead of mountains like the final. There exists a small gap to the east of the road, a possible exit from Lavender Town.
The route is made up entirely of road instead of piers and water. The Gate House is an entirely made of bollards, and while the northern route continues for some time past it, it ends with the two columns of trees blocking a crossroads past four rock formations.
The gaps between the formations are too wide for a Pokémon to block them, suggesting that Snorlax wasn't the progression stopper he is in the final.
The south end of the route looks to be mildly corrupted, though the two columns of trees continues downwards after the formation.
It should be noted that with no water, there is no Fishing Guru house.
Route 13
| Early Map (Original) | |
|---|---|
| Early Map (Corrected) | |
| Final Map |
Still similar to V1, straight and without Silence Bridge, or the long grass in the northeast. It has cliffs, at least.
Route 14
| Early Map (Original) | Early Map (Corrected) | Final Map |
|---|---|---|
|
|
|
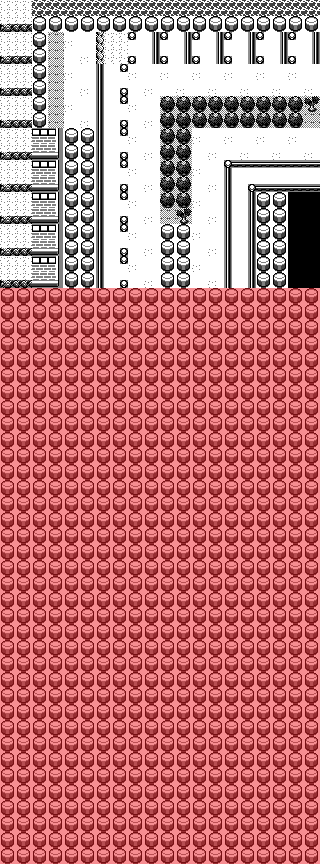
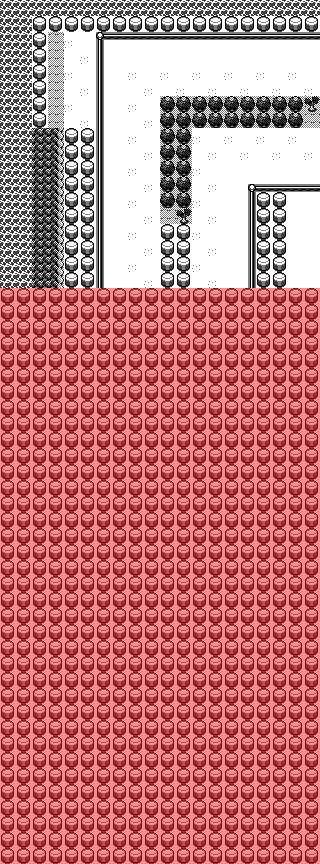
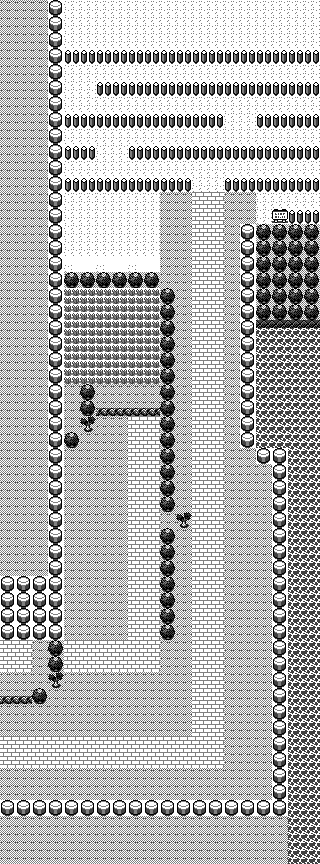
Another nearly corrupted map. What isn't visible is the other half of Silence Bridge. Looks to be a functional placeholder route, like V1.
Route 15
| Early Map (Original) | |
|---|---|
| Early Map (Corrected) | |
| Final Map |
It is surrounded by water to the North, and lacks both tall grass and the split path.
Route 16
| Early Map (Original) | 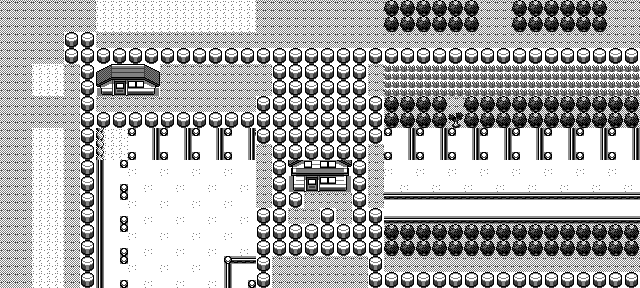
|
|---|---|
| Early Map (Corrected) | |
| Final Map |
Same idea as final. More spacious, making it impossible for a single Pokémon to block progress.
Cycling Road North/Route 17
| Early Map (Original) | Early Map (Corrected) | Final Map |
|---|---|---|

|

|

|
Opens up on the eastern side, lining up closely with the scrapped Road 9-3 from the concept pitch. Hints that this was built on outdated reference material, before being corrected.
Route 18's map is lost, overwritten with a duplicate of Route 17.
Fuchsia City
| Early Map (Original) | Early Map (Corrected) | Final Map |
|---|---|---|
|
|

|
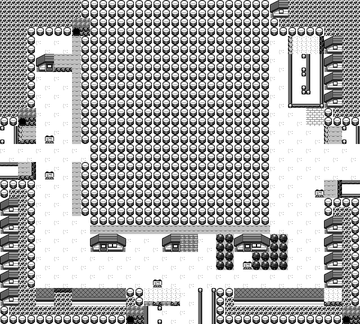
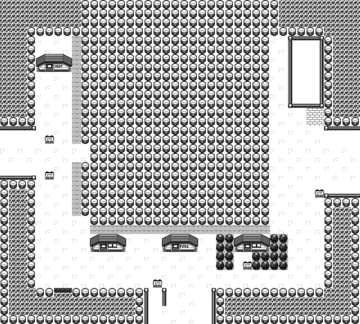
Surrounded by water and lacks in both houses and the Gym. The Warden's House, and Bill's relative's house are already there.
No exhibits are visible, though there is a giant bollard placeholder suggesting the Zoo, and maybe Safari Zone, was meant to be inside a dedicated building, before moving it all outside.
Route 19
| Early Map (Original) | Early Map (Corrected) | Final Map |
|---|---|---|
|
|

|
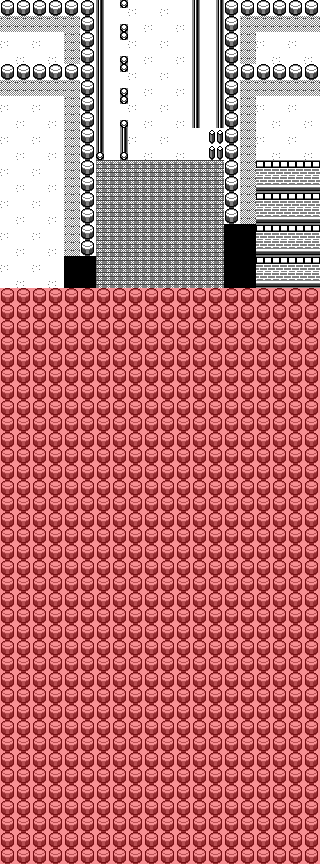
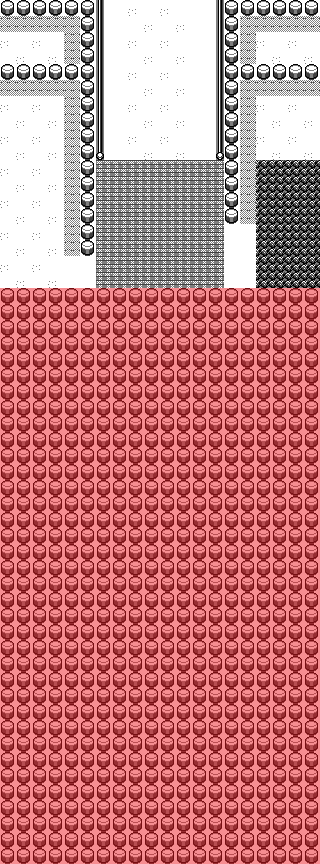
Not that different from V1, though the pier and cliff wall could be seen as an improvement over the water in V1.
Route 20
| Early Map (Original) | |
|---|---|
| Early Map (Corrected) | |
| Final Map |
The bollard formations are varied, Cinnabar Island's coastline is visible on the map with a beach and pier, and instead of the Seafoam Islands, there stands what looks to be a lighthouse. The lighthouse idea is supported by the Pokémon Tower tileset featuring what resembles a light source, and by Gold and Silver, with the Olivine Lighthouse.
Cinnabar Island
| Early Map (Original) | Early Map (Corrected) | Final Map |
|---|---|---|
|
|

|
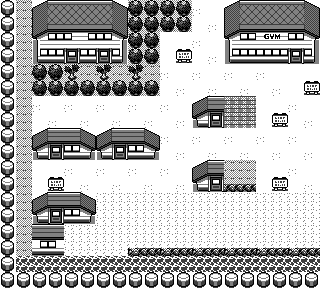
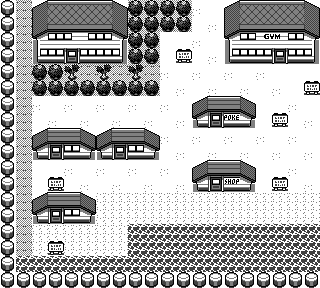
The basic layout is here, but features more houses, more signs, and more land overall. The likely entrance into the Pokémon Mansion is blocked by cuttable trees. Makes sense, being an abandoned building, but likely changed because the player would be stuck on one of the trees when exiting.
Route 21
| Early Map (Original) | Early Map (Corrected) | Final Map |
|---|---|---|

|

|

|
Features a beach, as well as a house on a small island, both elements that are nowhere to be seen in the final route. The tall grass patch near Pallet Town is also missing.
Route 22
| Early Map (Original) | |
|---|---|
| Early Map (Corrected) | |
| Final Map |
The general layout is there, but the pond is larger, covering a third of the route, and there is less tall grass.
Route 23
| Early Map (Original) | Early Map (Corrected) | Final Map |
|---|---|---|

|

|

|
A rather boring straight road, only featuring a central pond with two islands on it, and lacking Victory Road in any shape or form. Decorative walls are already present, though crudely implemented. This map and Indigo Plateau would be given a unique tileset later.
Indigo Plateau
| Early Map (Original)
NTOWN_10.DAT |
Early Map (Corrected) | Final Map
POKECEN.MAP |
|---|---|---|
|
|

|
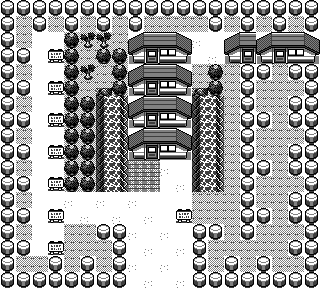
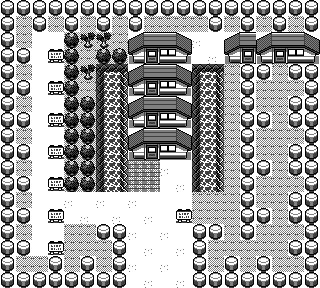
Resembles its Gold and Silver counterpart more than its original Red and Green one. Features an additional house on the side that is not present in the final games, perhaps the entrance to Victory Road, as it was absent from Route 23.
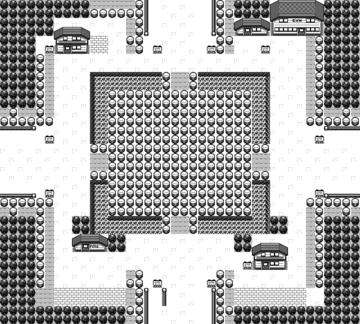
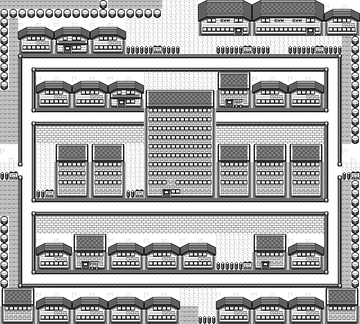
Saffron City
| Early Map | Corrected Early Map | Final Map |
|---|---|---|
|
|
|
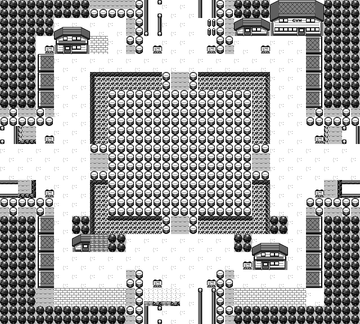
A very different layout. Silph Co. has a large bollard formation as a placeholder, though it's way larger than the final Silph Co. building. It's also surrounded by a moat.
The final opts to shrink Silph Co. down, removing the moat, and adding in far more houses, making this city look more like a city.
Interiors
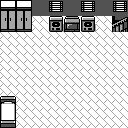
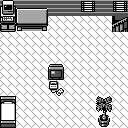
Player's House
| Early Map
ROOM2F.DAT |
Final Map
ROOM2F.MAP |
|---|---|
|
|
| Early Map
ROOM1F.DAT |
Final Map
ROOM1F.MAP |
|
|
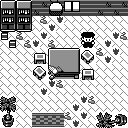
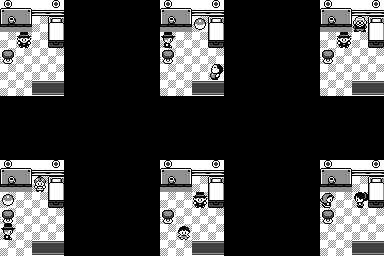
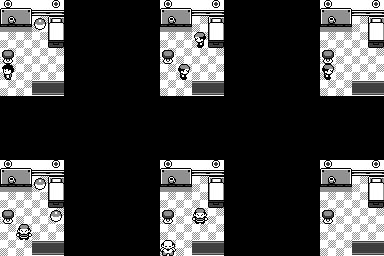
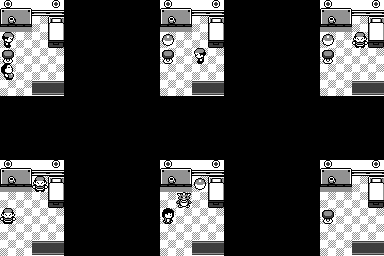
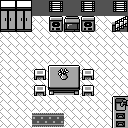
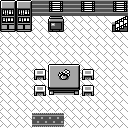
An early version of the player's house. Mostly identical to final aside from the bedroom being emptier, and the downstairs having more furniture. The PC and desk are also missing.
Prof. Oak's Lab
| Early Map
SCHOOL.MAP |
Final Map
OHKIDO.MAP |
|---|---|
|
|
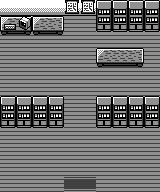
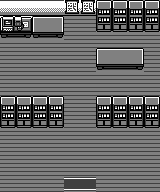
Visually identical to final aside from the tileset difference. Interestingly, while the internal tileset name and map name don't specify who the school belongs to, many of the script files contain a common function to handle blacking out after a lost battle. A comment in this function reads "to okido school(losing)". While this may seem odd at first, it makes sense when you consider the unused Prof. Oak Trainer class refers to him as a teacher in the Japanese script.
Burglarized Home
| Early Map
ARASARE.MAP |
Final Map
MINKA_C.MAP |
|---|---|
|
|
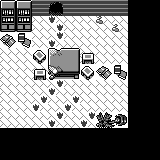
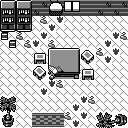
The burglarized house in Cerulean City is similar to the final, just lacking a potted plant, the entrance carpet, windows, and differently arranged debris. The map is one block higher and wider than the final, but the extra space isn't used for anything.
Fighting Dojo
| Early Map
DOJO.MAP |
Early NPC Data
T0TR0201.SXY |
Final Map
DONATA.MAP |
Final NPC Data
T11R0201.SXY |
|---|---|---|---|
An early iteration of the Fighting Dojo that is shorter vertically, with a unique floor design and a Buddha statue. This map also has some incorrect tiling. The Poké Balls are missing entirely, there is no sign data for the scrolls, and only one NPC is present, likely the Karate Master. Regardless, this NPC is not programmed as a trainer, and he uses the original sprite for the Black Belt class. The warp data, meanwhile is identical to the final, aside from being placed two tiles higher.
Garden
A scrapped map only referred to as NIWA.MAP. Likely a test map of sorts to see how decorative maps could be built.
Cage
| Map
ORI.MAP |
NPC Data
T08R1201.SXY |
|---|---|
|
|
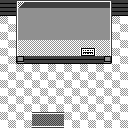
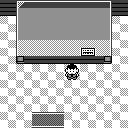
A map which, according to its script data, would have been found in Fuchsia City. This could mean that the zoo outside the Safari Zone started out as a series of indoor displays. Corresponding NPC data tells us that a standard male NPC would have been found here, spinning around in place. This NPC would likely tell us about the Pokémon found behind the glass, though no such Pokémon is actually present here.
There is also sign data defined for this map, but it is found out of bounds at X:2 - Y:14. The exit warp leads to the previous exterior map, likely Fuchsia in this case, at warp 12. This map was later overwritten by the Fishing Guru's house in Vermilion City.
Old Man
A cut map interior which is only known internally as JISAN.MAP, literally "Old Man". While this name is quite vague, as it turns out, the house atop the Celadon Mansion is known internally as "The All-Seeing Old Man's Shack" (お見通しじいさんの小屋). Perhaps there was once an arcade of sorts atop Game Freak's headquarters?
House Type 4
House types 1 through 3 are used, leaving MINKA_D.MAP, consisting simply of a table with a row of bookshelves, unused.
Rest House Type 2
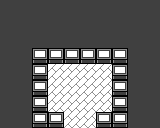
SKOYA_2.MAP is a scrapped room type with a counter and some chairs. SKOYA_1.MAP is the map for the Safari Zone rest houses, so this was likely a scrapped second variant.
Broken Room
| Map (Original) | Map (Corrected) |
|---|---|
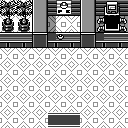
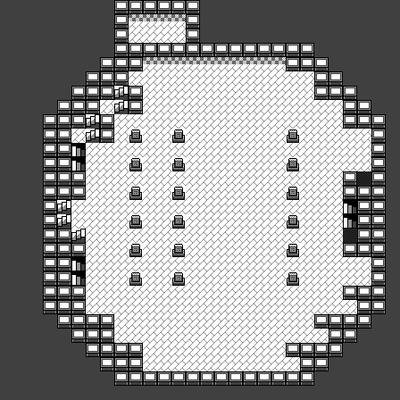
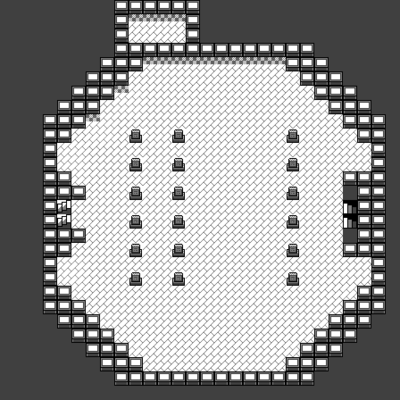
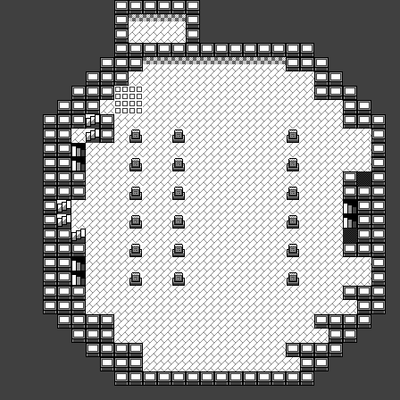
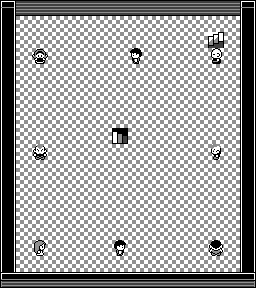
Found under TRAINING.MAP is a rather odd elongated map. At first glance, it doesn't look right regardless of what tileset is assigned to it (the overworld tileset is used here as an example). It likely suffers from incorrect parameters, as removing the last few blocks (which are 00) reveals that this map perfectly fits the standard 4x4 room dimension. This map may actually be the original Inn/Pokémon Center interior, as using the corrected V2 Inn blockset actually matches pretty well with the layout seen here. However, some of the blocks appear to have been shifted around, and as such reconstructions of the original layout (using the pointers from the final blockset for clarity's sake) will be provided below:
| Layout | V2 Blockset (V2 Tileset) | V2 Blockset (Final Tileset) | |
|---|---|---|---|
| Original Arrangement |
03 00 01 02 |
||
| Possible Arrangement |
0E 10 01 02 |
Pokémon Gyms
| Map | |||
|---|---|---|---|
| Gym 1 (DOJO_01.MAP) | Gym 2 (DOJO_02.MAP) | Gym 3 (DOJO_03.MAP) | Gym 4 (DOJO_04.MAP) |
| Gym 5 (DOJO_05.MAP) | Gym 6 (DOJO_06.MAP) | Gym 7 (DOJO_07.MAP) | Gym 8 (DOJO_08.MAP) |
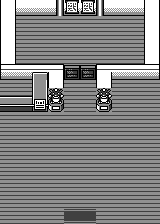
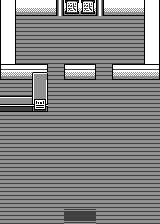
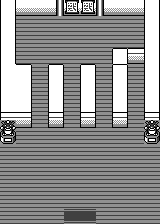
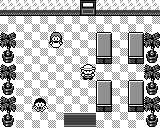
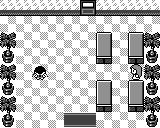
Incredibly early iterations for the different Gyms. The Viridian and Pewter Gyms have identical maps, which appear to have served as something of a template design. Interestingly, Fuchsia's and Cinnabar's appear to have been swapped around (with the doors going to Blaine, and Koga instead getting the invisible walls).
Corresponding early script data exists for this map, found under T08R0901.SXY. The NPC layout consists of a Game Boy kid, four CoolTrainers, the Gym Coach, and a Youngster and his Pokémon serving as the Gym Leader, as well as two "Judges". The latter would have likely opened the door to let you confront the Leader once all the other trainers had been defeated. This NPC type was probably scrapped due to being redundant, with its sprite ID later overwritten by Lance.
Despite undoubtedly being a Gym, none of the NPCs here are actually set to behave as trainers. The entrance maps are set to warp ID 9 (the final Fuchsia gym instead using warp 6). A nearly identical NPC arrangement exists for Saffron City in T0TR0301.SXY. While largely the same as Fuchsia's, proper door sprites were added, as well as the exit leading to warp 2, the same as in the final Saffron Gym. Both scripts also have sign data for the sign by the counter.
Finishing up the Gyms is a map known simply as "BOSSDOJO.MAP". The internal name for Giovanni's overworld sprite is "Boss", so this was definitely intended for him, meaning that while the latter was likely not a Gym Leader, he still had his own unofficial Gym/lair.
Underground Path 5-6
| Early Map
DGN04.MAP |
Final Map
NUKE5_6.MAP |
|---|---|
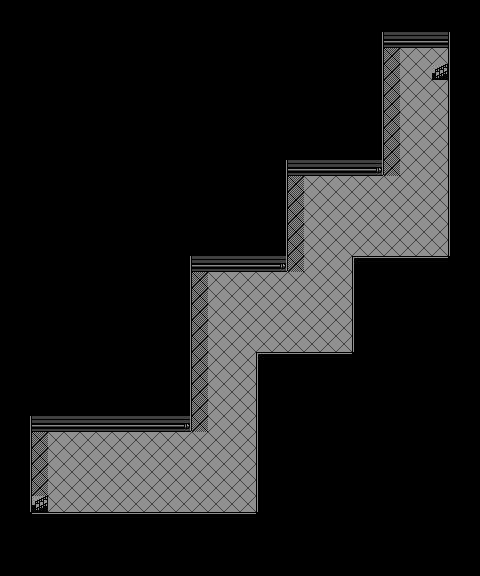
Identical to final, aside from having an extra straircase, though it's unclear where those stairs would have lead to. Perhaps when the Underground Path 5-7 was scrapped, this warp was added to take the player to the now-orphaned Route 7 entrance before it was scrapped altogether. The map row that featured the stairs was removed entirely in the final games, causing a graphical issue at the bottom of the map due to its height not being updated.
Underground Path 5-7
A scrapped secondary Underground Path, found under DGN05.MAP, which would have connected Route 5 to Route 7. Its gate entrance is present in early iterations of both routes. The final games ultimately replaced this area with a secondary underground path connecting Routes 7 and 8 (DGN06.MAP).
Dungeons
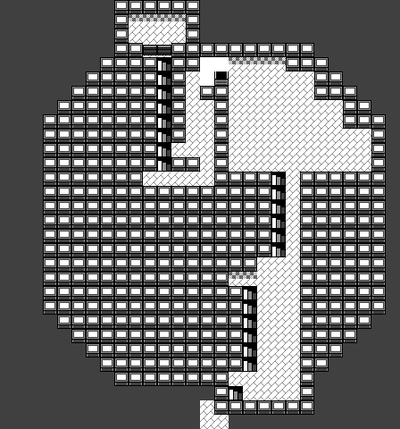
Rocket Hideout
- Map
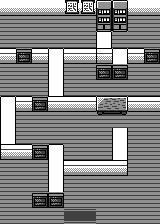
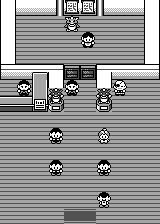
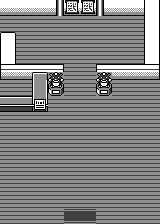
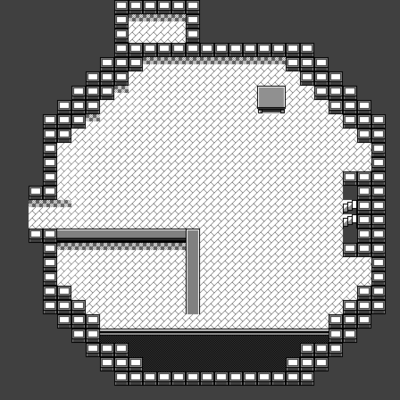
Three cut maps which were part of Team Rocket's Hideout in Celadon City. It's possible the hideout once featured "rooms" on separate maps, not unlike how the S.S. Anne handles its cabins. Remnants of these maps still remain in the final game.
Pokémon Tower
| Early Map (Original)
TOWER1F.MAP through TOWER7F.MAP |
Early Map (Corrected) | Final Map
NT_1F.MAP through NT_7F.MAP | |
|---|---|---|---|
| 1F | |||
| 2F | |||
| 3F | |||
| 4F | |||
| 5F | |||
| 6F | |||
| 7F |
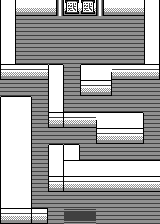
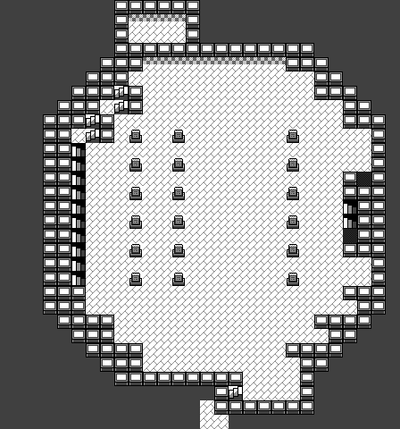
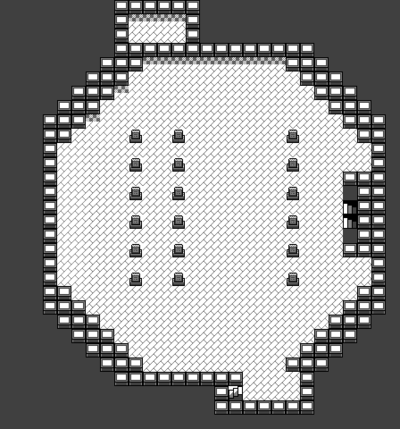
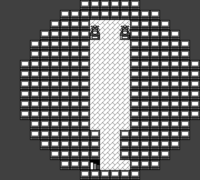
The Pokémon Tower here features much larger maps, and uses an earlier version of the blockset. Floors 3 and 4, interestingly enough, are copies of floor 2, which causes some inconsistencies when it comes to the ascending and descending stairs.
As seen on the other early Pokémon Tower maps, an elevator was once present in the building. NT_EL.MAP represents a midpoint in design: it shows that the elevator stuck around even after the layout of the tower was redesigned, and was even given its own map file, which it didn't have in the earlier iteration. It even has its own event file, T05R0208.SXY, with the exit containing warps to the base floor, warp IDs 4 and 5. It was ultimately scrapped, and Mr. Fuji simply warps you to the Pokémon House once you rescue him.
Seafoam Islands
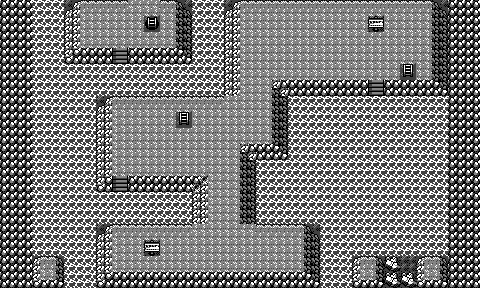
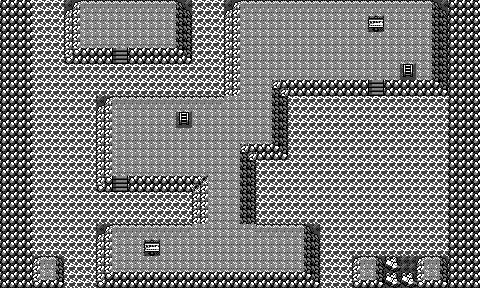
MDUN_6.MAP, a scrapped floor for the Seafoam Islands, which makes it "B5F". Likely the original map containing Articuno, before it was moved to B4F.
| Mock-Up | Final Map |
|---|---|
Interestingly, the position of the ladder leading to this scrapped area matches up with the fourth basement's lone island, which in the final games is where Articuno is present.
Cerulean Cave
| Early Map
TORI_1F.MAP / TORI_B1.MAP / TORI_B2.MAP |
Final Map
END01.MAP / END02.MAP / END03.MAP | ||
|---|---|---|---|
| 1F | 1F | ||
| B1F | 2F | ||
| B2F | B1F | ||
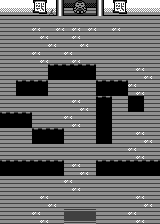
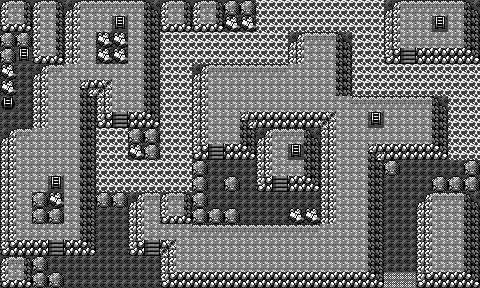
Cerulean Cave, also known as the "Unknown Dungeon", once sported a radically different design that made use of what later became the Safari Zone tileset. Its identity is confirmed by the map header of the script files for Cerulean Cave's floors, which has an identical "map data address" to these early maps. Not only is each floor's layout completely different, but so is their ordering. Even the legendary Pokémon found here is different, with early encounter rates telling us that Moltres once roosted here instead of in Victory Road.
Interestingly, in the script file for Cerulean Cave 1F (T04R0701.DMG), there is an additional comment reading "Thunder Live Dungeon". "Thunder" is the Japanese name for Zapdos, which likely meant that once Moltres was relocated, Zapdos was next in line to fill the role of the resident legendary bird.
Victory Road
| Early Map
DGN02.MAP |
Final Map
IWA_2F.MAP |
|---|---|
|
|
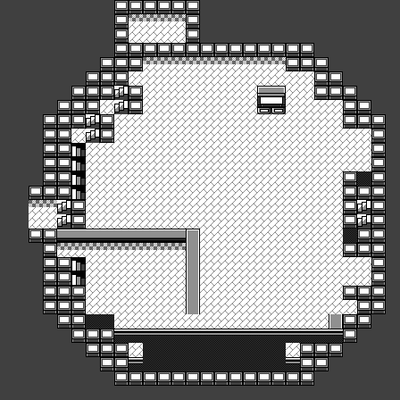
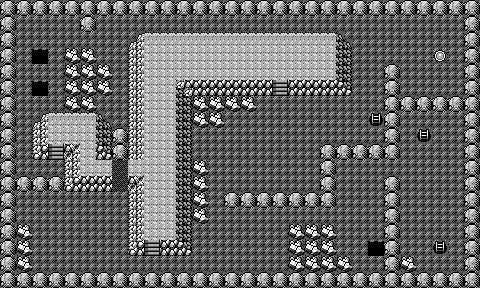
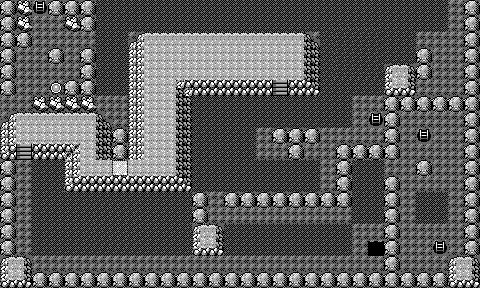
The original design for Victory Road 3F, which also seems to make use of an early iteration of the cave blockset. Much of the rubble was removed, a switch was moved across the room, the two holes were removed, blocks where Strength boulders could be pushed were marked, and an upwards ladder and pressure switch were added. Incidentally, the Gold and Silver version of this map actually includes a hole in just about the same area as seen in this early map.
Moltres Dungeon
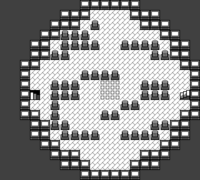
A scrapped map only referred to as "FIRE_DUN.MAP" internally. Likely a placeholder map thrown together prior to Moltres being moved to Victory Road. In the final games, Moltres lacks its own room and is simply found on Victory Road 3F. This map also uses an unused cave blockset, which allows for the nicer-looking entrance seen here.
Silph 2
| Map | |||
|---|---|---|---|
| Floor 1 | Floor 2 | Floor 3 | Floor 4 |
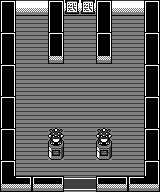
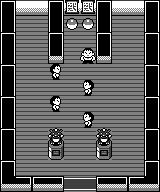
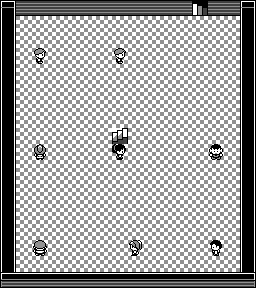
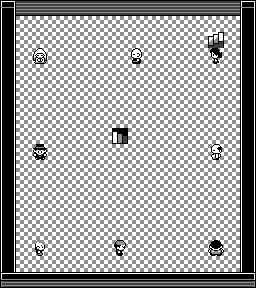
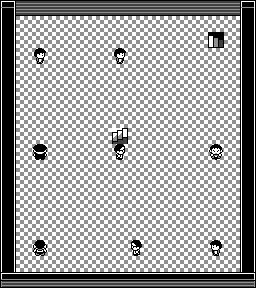
A dungeon so nice, Game Freak made it twice! This secondary area would have been accessible via an extra staircase in the Silph Co. lobby, and consists of a gauntlet where the player would have to defeat Trainers as they ascend. Thankfully, while no map can be found for these floors in the leaks, we do have their corresponding script files. A such, the maps provided above are mock-ups.
All of the Trainers here use the first roster of their Trainer class, definitely as a placeholder, as it creates some serious whiplash in difficulty progression as-is. NPC data exists in D10R0201.SXY through D10R0204.SXY, from 1F to 4F. The Trainers are, in order from left to right:
Floor 1: Bug Catcher, Youngster, Lass, Misty, Super Nerd, Brock, Jr. Trainer♂, Jr. Trainer♀.

Floor 2: Channeler, Gambler, Erika, Gentleman, Hiker, Lt. Surge, Sailor, Fisherman.

Floor 3: Pokémaniac, Engineer, Rocket, Silph Chief, Biker, Koga, Scientist, Jack.

Floor 4: Beauty, Rocker, Blaine, Swimmer, Cue Ball, Sabrina, Burglar, Bird Keeper.
Some interesting things to note about the Trainers:
- Brock uses the Youngster sprite instead of the Super Nerd sprite, possibly reflecting his earlier design.
- The Jr. Trainers have their sprites mixed up.
- The Channeler, Engineer, Burglar, and Scientist all use otherwise unused rosters for their respective Trainer classes.
- The Hiker doesn't use the "burly man" sprite, but rather uses the same "balding man" sprite as in Generation II.
- Koga uses the CoolTrainer♂ sprite, rather than his unique final sprite.
- Blaine uses the "Gambler" old man sprite, rather than his final sprite.
- While the Cue Ball on floor 4 was given a different sprite to fit being indoors, the Biker on floor 3 was not.
Interestingly, the stairs in the back of the first floor are set to take you to T11R0611, a map which doesn't actually exist. Its name closely resembles T11R0601, which is Silph Co. 1F; the final elevator map is D10R0111, suggesting that this map was renamed at some point. While no data for a fifth floor is known to exist, the fourth floor's warps refer to it, so it would have likely consisted of the remaining trainer classes, i.e. the Blackbelt, Juggler, Psychic, Giovanni, Tamer, CoolTrainer♂, CoolTrainer♀, and either the Rival or Professor Oak. The sixth floor, meanwhile, has wild encounter data which includes none other than Mewtwo, meaning that this is where it would have originally been found before it was ultimately moved to Cerulean Cave. Remnants of all six maps remain in the final games.
Pokémon League HQ
| Map | File Name | Notes |
|---|---|---|
|
SILF_B1.MAP
D14R0101.SXY |
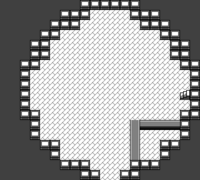
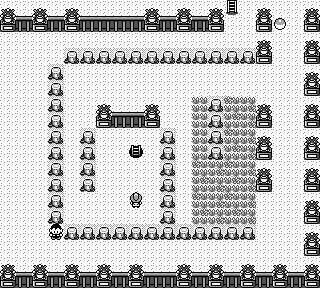
*The first floor has Viridian Forest's rates, but looks closer to the Safari Zone. *The door to Lorelei's room in the Pokémon League lobby once lead here. *The first Trainer is unused Cooltrainer♂ roster 4. *The second Trainer is unused Cooltrainer♀ roster 4. *The itemball contains TM17 Submission. *The music header labels this map as "tokiwa no mori" (Viridian Forest). *The border block is set to 02 (large tree block). |
|
SILF_B2.MAP
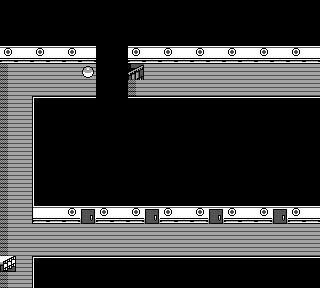
D14R0102.SXY |
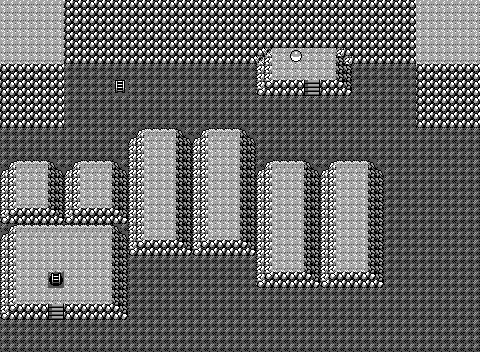
*The second floor is based after Mt. Moon. *The itemball contains a Max Potion. *The music header labels this map as "otsukimiyama" (Mt. Moon). *The border block is set to 02 (large boulder block). |
|
SILF_B3.MAP
SILF_B3A.MAP SILF_B3B.MAP D14R0103.SXY D14R0110.SXY D14R0111.SXY D14R0112.SXY D14R0113.SXY |
*The third floor is based after the S.S. Anne, with four cabins. *To advance, the player would have to find the right door, at the risk of fighting a Trainer. Only the fourth and farthest door would lead to progress. *The Trainers include unused Cooltrainer♂ roster 8, unused Gentleman roster 4, and unused Cooltrainer♀ roster 8. Regardless of the choice, each room holds an itemball (a Full Heal, Protein, Guard Spec., and a Hyper Potion respectively). *The itemball outside contains TM43 Sky Attack. *As the S.S Anne normally does not have any wild Pokémon encounters, the ones on the main floor are completely original. *The music header labels this map as "santoannu" (S.S. Anne). *The border blocks are all set to 0C (black void block). |
| / | SILF_B4.MAP
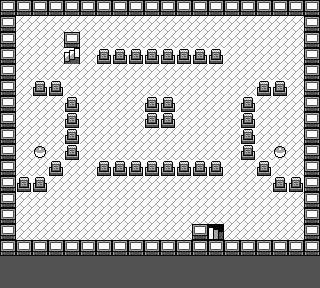
D14R0104.SXY |
*The map/script for this floor is lost, as it was overwritten by Victory Road 1F. *The wild encounters show that this floor was based after the Rock Tunnel. *The music header labels this map as "iwayama doukutsu" (Rock Cave). Interestingly, the Victory Road 2F and 3F maps are known in the source code as IWA_1F.MAP and IWA_2F.MAP, with the Rock Tunnel maps known as NEWIWA1.MAP and NEWIWA2.MAP. This seemingly reveals that the Victory Road maps were originally intended for Rock Tunnel. |
|
SILF_B5.MAP
D14R0105.SXY |
*The fifth floor is based on Pokémon Tower. *No trainers here, only two itemballs. *They contain a Full Restore and TM10 Double-Edge respectively. *The music header labels this map as "pokemon tower". *The border block is set to 02 (full square block). |
|
SILF_B6.MAP
D14R0106.SXY |
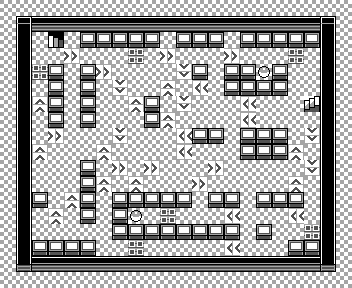
*The sixth floor is based on the Rocket Hideout, with a spinning tile puzzle. *Two itemballs here: a Max Potion near the top, and a Revive near the bottom. *The music header labels this map as "rocket dan" (Team Rocket). *The border block is set to 35 (full square block). |
|
SILF_B7.MAP
D14R0107.SXY |
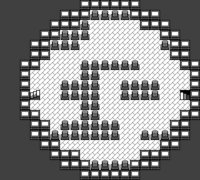
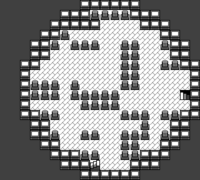
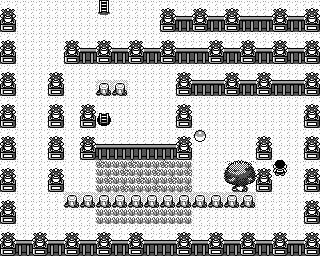
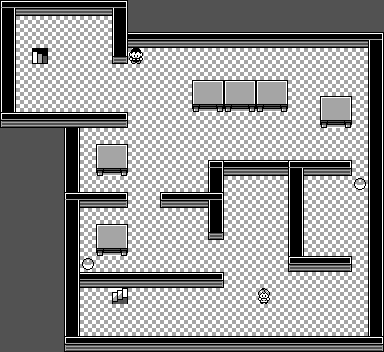
*The seventh floor is based on the Safari Zone, featuring a lot of statues. *The Trainer here has a behavior not seen anywhere in the final Generation 1 games: turning around. This Trainer is unused Tamer roster 6. *The itemball contains an Escape Rope, which indicates that there was nothing locking you out from using one in this dungeon. *A Hidden Max Elixer is located on the bottom left corner of the large tree. *The music header labels this map as "safari". *The border block is set to 02 (large tree block). |
|
SILF_B8.MAP
D14R0108.SXY |
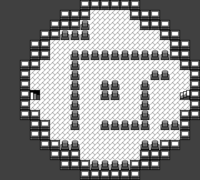
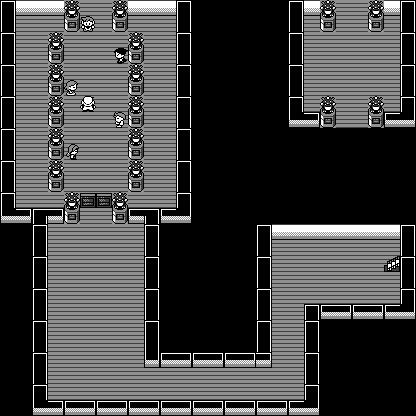
*The eighth floor is based on the Pokémon Mansion, with a touch of Silph Co. *The wild encounters do however parallel the early Pokémon Mansion rates. *The female Trainer is unused Cooltrainer♀ roster 7. *Likewise the male Trainer is unused Cooltrainer♂ roster 7. *The itemball to the left of the room, near the table, contains a Max Revive, and the other one contains an HP Up. *The music header labels this map as "biru" (Building). *The border block is set to 01 (gray void block). |
|
LASTBOSS.MAP
D14R1414.SXY |
The ninth and final map, which is identical to Lance's room. *The script data reveals that the player would have to battle the Elite Four members back to back, before facing the Champion. *Blue was ultimately moved to a separate map, and here always uses roster 1, regardless of the starter Pokémon chosen, likely as a placeholder. *The warp data is interesting, the Hall of Fame warps being missing, and the entrance to this room being found at X:4 - Y:18, instead of X:10 – Y:18. *This likely reflects an earlier iteration of this map. There is also sign data for this map, though its placement is odd, being found right below Agatha. While it doesn't follow the typical naming conventions, the script file suggests the map's filename was changed. It used to follow the naming scheme of the previous floors, SILF_B9. The border block is set to 03 (black void block). |
The Pokémon League is shown as having a dungeon consisting of several basement floors which, as denoted by their designs and wild encounter data, are based after dungeons found earlier in the game. Bizarrely, most of the maps have file names that suggest they were basement floors of Silph Co., but the map table file has them in a section clearly meant for the League HQ building, and Silph's maps are completely separate. All of these maps have remnants in the final game.
Miscellaneous
A handful of maps made some time closer to the games' release.
Indigo Plateau
| Early Map (Original)
NTOWN_10.MAP |
Early Map (Corrected) | Final Map
POKECEN.MAP |
|---|---|---|
|
|

|
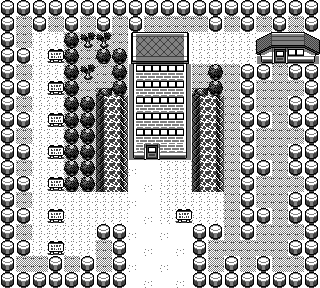
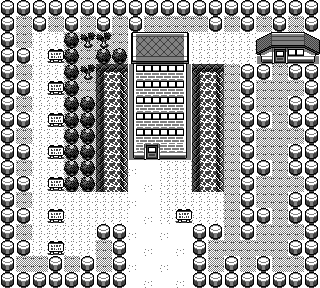
A later iteration of the early Indigo Plateau map, still using the tower design and lacking its unique tileset. While the blockset is visibly closer to final, the pond block oddity is still here.
Gatehouse
| Early
T09R0601.SXY |
Final
R02R0501.SXY |
|---|---|
A surprisingly interesting script, which is listed as a location on Cinnabar Island ("Town 9"). This map likely made use of the original gate house blockset. This is supported by there only being entrance mat data, which suggests that the door in the back was a later addition. The aforementioned warp data is set to take you to warp 6 of the previous exterior map, with the final Cinnabar Island only having five warps funnily enough.
The NPC data, meanwhile, is similar to the gate house leading to Viridian Forest, though with an extra NPC. Here, the two female NPCs only face down, while the Fishing Guru is set to spin around randomly. Lastly, this map's border block differs from the regular forest gates, using block 0F instead of block 0A, with the former not looking right, even when looking at the early gatehouse blockset.
Burglarized House
| Early
T04R0102.SXY |
Final
T04R0101.SXY |
|---|---|
An early version of the burglarized house in Cerulean City. The two owners are missing, and the Rocket Grunt is inside the home instead of hiding in the backyard. This Grunt is also spinning around randomly, though this one is assigned the first team ID of the Rocket Grunt class, instead of the fifth.
Otherwise, the flavor text for the hole in the wall ("TEAM ROCKET left a way out!") is missing entirely. As for the warp data, the hole one doesn't exist, and the entrance carpet data is at X:9 - Y:4 and X:9 - Y:5, instead of X:7 - Y:2 and X:7 – Y:3. This places the warps outside of the map's boundaries, though an early version of the house just so happens to be one block longer/wider (although that extra space just consists of empty void).
Lastly, for some reason the early warps here lead to… the final version of the burglarized house.
Fuchsia City Office
| Early
T08R1001.SXY |
Final
T08R0701.SXY |
|---|---|
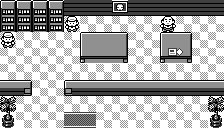
|
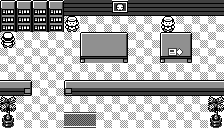
|
An early version of Fuchsia City’s Safari Zone Office. The Warden was later moved to a different map, being replaced by another park employee. Moreover, all the NPCs here are all set to walk about randomly, instead of just sitting in one spot. The exit warps were also changed, ultimately from warp 10 to warp 7.
S.S. Anne Cabins
| Early
D03R0111.SXY through D03R0124.SXY |
Final
D03R0108.SXY through D03R0110.SXY | |
|---|---|---|
| First Set (1F) |
||
| Second Set (2F) |
||
| Third Set (B1F) |
Early iterations of the S.S. Anne cabin scripts. The warp data is at the same X/Y coordinates for each cabin of a given set, which suggests that while grouped together in the final games, originally each cabin was an individual map (though for simplicity's sake the data will be laid out like the final games). Only the last three cabins are accounted for on the first floor, but as seen with the warp IDs (5, 6, and 7), this is definitely due to the first three (2, 3, and 4) having been overwritten by the finalized cabin set scripts. The first floor has repositioned NPCs, with the little girl having a monstrous Pokémon as opposed to a cute one. The second floor is mainly identical, with NPCs shifted around and a missing old man. The basement, meanwhile, lacks the Machop, and has a middle-aged NPC in lieu of the Fisherman trainer. The grouping of the maps in the final games was likely done to save space, as at one point, the S.S. Anne had a whopping 14 cabin scripts dedicated to it, as opposed to just three.
The following objects also have different attributes:
- First Set:
- The middle-aged man wanders around instead of spinning in one spot.
- The little girl and her Pokémon both spin around, instead of just facing down.
- The itemball contains a Paralyz Heal instead of TM08.
- The Youngster trainer is assigned roster 06, instead of 08.
- The Lass trainer is mistakenly assigned the Youngster class, and her roster is 02 instead of 0B.
- The Gentleman NPC spins around instead of walking around.
- Second Set:
- The first two Gentleman NPCs walk around instead of facing down.
- The first itemball contains a Carbos instead of a Max Ether.
- The Gentleman trainer is assigned roster 04, instead of 05.
- The Lass trainer is assigned roster 03, instead of 0C.
- The third Gentleman NPC spins around instead of facing down.
- The two female NPCs spin around instead of facing in a given direction.
- Third Set:
- The Super Nerd NPC walks around instead of facing right.
- The first itemball contains an Iron instead of TM44. The other two itemballs are not properly defined, and thus don't contain anything.
- Only one Sailor is finalized, the next two use roster 01 as a placeholder, and the last two are defined as NPCs and not trainers.
- The Fisherman trainer is a spinning middle-aged NPC. Above the latter's sprite label is a commented-out Cooltrainer♂ label, suggesting an even earlier sprite change.
Victory Road
2F
| Early
R23R0201.SXY |
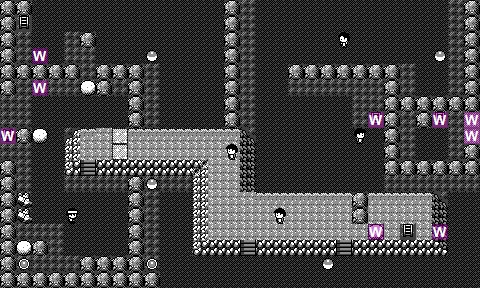
|
|---|---|
| Later
D23R0101.SXY |
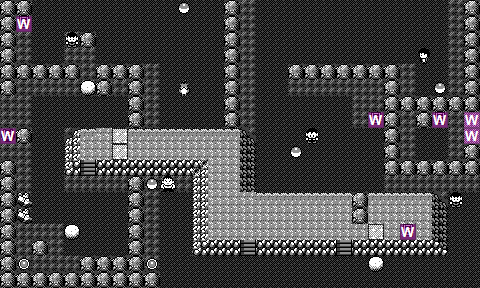
|
| Final
R23R0101.SXY |
|
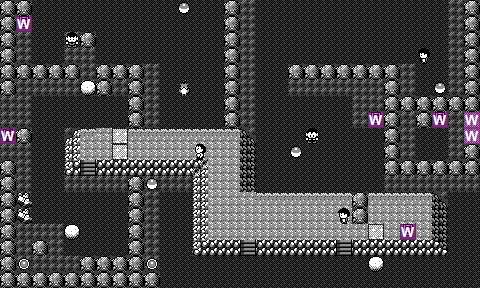
Two early iterations of Victory Road 2F's script. The first version here has a rather different layout, namely lacking Moltres, with an extra boulder in its place. The border block also differs, using block 02 instead of block 7D. A few of the Trainers are set to turn around: something none of the Trainers in the final Generation 1 games do. Moreover, all trainers here use the first roster of their trainer class as a placeholder. As it turns out, the second Juggler (the one by the stairs, then the itemball) started off as a Jack.
There is also a good amount of differences relating to the warps: the warp to the first floor is instead an exit to Route 23, which makes sense as the "Victory Road 1F" originally didn't exist. The warp normally blocked behind the Strength switch is also at Y coordinate 0B instead of 19. Interestingly, this matches better with the third floor's ladder plan, with that particular one more to the right of the exit ladder, instead of to the left. There are also three extra warps that were removed in the final, the first later converted as the 3F ladder leading to Moltres. Their placement matches DGN02.MAP, and seem to suggest they were either once necessary for the falling holes to function, or just to mark where the player should land after dropping down one. The third floor's hole also takes you to a different spot here, with its coordinates being X:0E - Y:17 instead of X:10 – Y:16, which is likely a mistake as it is placed right inside a Strength boulder.
The second version likely only exists as a result of a typo, as absolutely nothing else even hints to the existence of a "D23". Essentially finalized, aside from the Blackbelt and Juggler being in different spots. The itemball containing TM17 Submission contains a Hyper Potion in both of these early iterations.
3F
| Early
D08R0102.SXY |
Final
D08R0101.SXY |
|---|---|
|
|
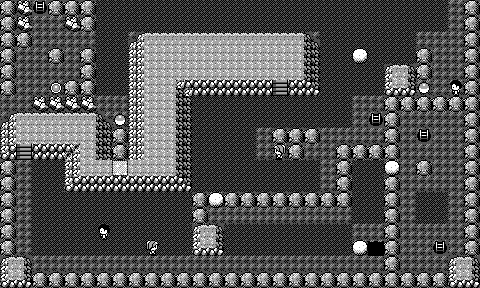
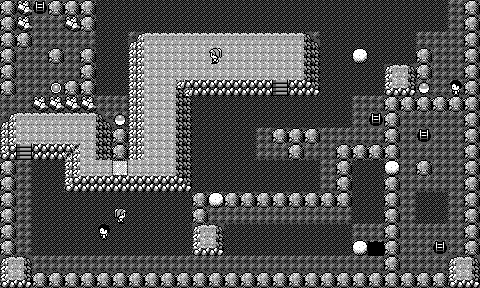
Early NPC event data for Victory Road's third floor. Bizarrely, the warps take you to the final version of this map. Otherwise identical to final, aside from the position of some trainers, and the contents of one of the itemballs changing from a Rare Candy to a Max Revive.
Saffron City
| Early
TOWN11NO.SXY |
Final
TOWN11.SXY |
|---|---|
|
|
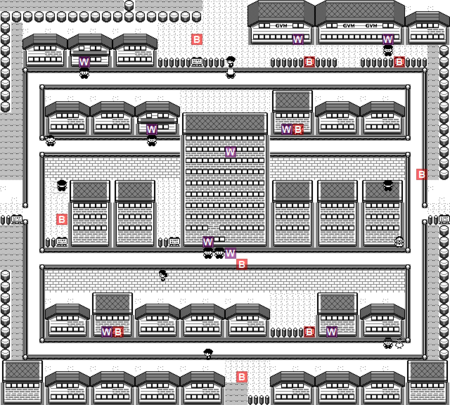
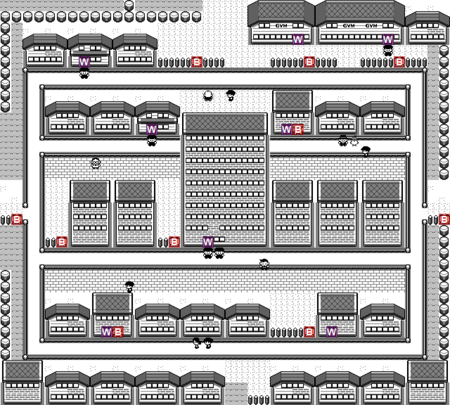
An unusual, alternate version of Saffron City's script file. All the signs and NPCs are there, but not necessarily in their final spots. Interestingly, the Scientist and one of the Rockets are clearly placed inside a building, suggesting that this script is from a slightly earlier iteration of the map. The following NPCs also have different attributes:
- The Scientist went from spinning around to walking randomly.
- The Gentleman went from spinning around to facing down.
- The Pidgeot went from spinning around to facing down.
- The "Juggler" went from walking left/right to facing up.
Compared to the final map, this one also has happens to have two extra warps to Silph Co. 1F, but their placements seem completely arbitrary.
Copycat's House
An early version exists in T0TR0101.SXY. It is devoid of any NPCs, and only has exit warps, lacking a second floor entirely.
Silph Co. 1F
| Early
T0TR0601.SXY |
Final
T11R0601.SXY |
|---|---|
|
|
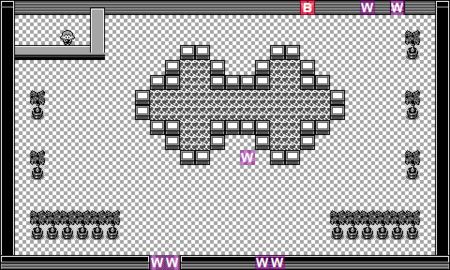
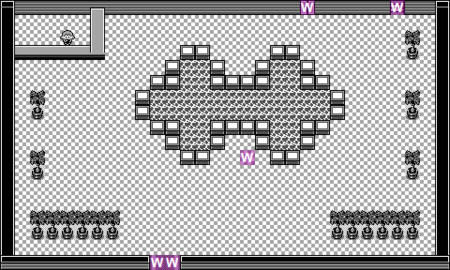
An early version of Silph Co. 1F's event data exists in T0TR0601.SXY. The main difference lies within the warp data. Two extra entrance warps are present, suggesting that Silph Co. once had two entrances, not unlike the Celadon Dept. Store. Moreover, here, an extra warp is present by the 2F stairs that would take you to Silph 2 1F, which was obviously removed when that dungeon got scrapped. There is also sign data for this map, though for some reason it is found in the exact same spot as the elevator. The "secretary", meanwhile, is in the same spot, but she's set to spin around in one spot, instead of only facing down.
Still on the topic of Silph Co., there exists a script file under D10R0112.SXY which describes the event data for a map that was later cut. All that can be gleaned from it is that it contained warp data at X:7 - Y:7, with it leading to the second warp of Silph Co. 11F.
Saffron Poké Mart
| Early
T0TR0501.SXY |
Final
T11R0501.SXY |
|---|---|
An earlier version of Saffron City's Poké Mart, which in the final games changed the old man to a young man, and the young man to a Lass.
Saffron Pokémon Center
| Early
T0TR0701.SXY |
Final
T11R0701.SXY |
|---|---|
|
|
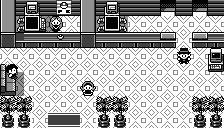
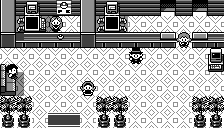
An earlier version of Saffron City's Pokémon Center script, matching the final one aside from the missing Cable Club attendant, and the Gentleman being shifted more to the right.
