Bionicle Heroes
|
|
| Bionicle Heroes |
|---|
|
Developer: Traveller's Tales
|

Bionicle Heroes is a game with nice graphics and lame gameplay that features the characters and setting from the 2006 Toa Inika era of the series with other non-canon enemies from different eras. Just be careful with your eyes as the world of Voya Nui is suffering from a serious case of next-generation bloom.
Contents
Unused Graphics
There are several placeholder graphics from a prototype of the game. These include two sets of icons for the Toa, one set with the Voya Nui island logo with a colored border, and another depicting BIONICLE Hordika from 2005. There are also placeholder health bar and sniper scope graphics.

Whenua
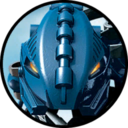
Nokama

Onewa
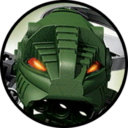
Matau

Vakama

Nuju

Black icon

Blue icon
Brown icon
Green icon

Red icon
White icon

Health bar outline

Health piece

Sniper scope graphic


Developer Messages
There are several .txt files with long messages from the developers.
Wacky.txt
Facts:
------
Some of the games golden constractions are based on MoC's from the Rahi book (title to be added)

It took 20 people 10 months to make the game.

The game originally started life as a FPS.

There are over 200km of real estate in the game.

There are over 44 actual Bionicle characters in the game.

There are over 500 constractions in the game.

The critters in the game were actually built in lego prior to being built electronically.

Real bionicle fans from fan forums helped create the huge number of bionicle themed collectibles in the game.

Over 1000 doughnuts were eaten during development

There are (approximately) 308,436 lines of C/C++ code in the game

Bionicle sounds like Barnacle when said quickly

Several Bionicles were actually harmed during the making of this game.

Several older Bionicle toys had to be tracked down on EBay for the artists to use as reference.

Over (insert large impressive number here) Bionicle pieces had to be flown over from Denmark to help the team make Bionicle Heroes!

Bionicle swords actually make for excellent desert knifes... a bit tricky to clean though!

if you rearange the letters in bionicle, you get, nice boil


Team members claims to fame:
---------------------------
One member of the team regularly wore Patrick Stewart's (Alias Jean Luc Picard from TV's Star Trek) old shoes to work during the making of Bionicle.
i once sat on roy castle's knee
i once ate an earthworm for a five pound bet in high school but never got given the fiver.... -->mug.
I'm wearing your momma's slippers whilst typing this.


Previous titles from team members:
---------------------------------
Quake 2
Wargasm
Toy Story 2
Muppet Racemania
Galleon
Finding Nemo
Lego Star Wars
Haven
Lego Soccer
Barbie race and ride
Black & White 2
Chronicles of Narnia
F1 Grand Prix
World Rally Championship
Blade
Crash Bandicoot - Wrath of Cortex
Buzz Lightyear of Star Command
Leander
Puggsy
Emperor - Battle for Dune
FA Premier League Football Manager '99 and 2000
IndyCar Series 1+2
Fussball Flipper
UEFA Champion's League 2000/01
world championship snooker
Mat Hoffman Pro BMX
Conker Live and Reloaded


Unrelated training from staff:
---------------------------
Building Engineer
Car designer
Ninja
Formula 1 test driver


Strange previous jobs:
----------------------
Strawberry picker
Lettuce Packer
runner
Valve Cleaner in a Chemical Factory
Make magnets for tv tubes.  (thats a tube like what they used to have in teles... not your flat screen thing your dad just bought you)
Welder
Laser Quest Supervisor
niggles.txt
This is a place to note anything that you notice needs doing - whether AI, geometry, terrain issues, cutscenes, etc.
Please initial your comments so we can easily get more info if needed.

CUTSCENES
--------------
objects like the toa masks should not be drawn during cutscenes. EC

WEAPON EFFECTS
--------------
If you hold down fire with the blue weapon for an extended period of time whilst moving close to a wall the beam starts to seperate and spreads across the screen in all directions. EC

GENERAL
-------
when you lose the brown mask his weapon drops to the floor and is also occassionally drawn in his hands at the same time. EC

If you hold fire and press left or right on the right stick the toa plays the strafe anims but doesn't strafe. EC

The blue technics pieces should be vibrant blue like the blue studs in LSW - AP

when jumping it is possible to land in silly places by holding down fire and poiting in different directions.  i hazzard a guess that it is the straffe controls which
conflict with the jump direction. - CM

red toa dies while standing on lava - turned into brown toa and could still move around the lava area - CM

when the game is paused, animaed scene objects (using the animLib attributes) do not pause. - CM


A.I.
----
When the Vahki performs his ground smash area attack he is flung up in the air, along with everyone else. Shouldn't he be the only one who is still? EC

The Visorak do NOT use their spinners?  Or if they do then not enough. - CM

Creatures don't ever seem to want to avoid attacks.  Most noticable on the Vahke who just stand there and take it. - CM

CHRISS - we have the wrong AI creatures for the first difficulty level

HUB
---
The portal splines are too close to the walkways leading up on the sides .Rotating the camera while at the edge makes the scene disappear.     KW


DESERT1
-------
No terrain on the two derricks - CP

The blend layer at the base of the first building is not shadowed. Also, some of the buttresses don't cast shadows. - CP

You can fall out of the level inside the first building, in the corner just to the right of the exit door. - CP

There is a cactus that blows in the wind just after the first building you pass through. The rocks at it's base also blow in the wind. - CP

The windows in the final building that Vorahk shoots out of are very small. Can we lose the center pillar and extend the floor out a bit so he can step out onto a balcony to do his attacks please? - CP

There's no terrain on the back wall of the final building, so bullets and missiles that enter the windows never detonate. - CP

Bad terrain in the bonus gateway on the right of the boss arena - you can climb over it to get in, but can't get out. - CP


DESERT2
-------

Portal volume too close around first interior room - CP


DESERT3
-------

The doorway into the boss area MUST reseal once the player has entered the room - AP

DESERT4
-------

JUNGLE1
-------

JUNGLE2
-------

Terrain object on the sniper door in the underground tunnel is flagged as visible geometry instead of terrain. - CP

When you climb out of the underground tunnel, there is a waterwalk with a blue mask on the far side. Surely it should be on the near side? - CP

JUNGLE3
-------

JUNGLE4
-------

MOUNTAIN1
---------

MOUNTAIN2
---------

MOUNTAIN3
---------

MOUNTAIN4
---------

STRONGHOLD1
-----------

STRONGHOLD2
-----------

STRONGHOLD3
-----------

STRONGHOLD4
-----------

VOLCANO1
--------

VOLCANO2
--------

VOLCANO3
--------

VOLCANO4
--------

There is a bush floating above the rocks in the middle section ...

WATER1
------
Some of the clifftop in the start area is portaled away. Start the level and bring up the debug menu straight away to see what's missing - CP


WATER2
------

WATER3
------

WATER4
------
Grass is all floating in midair... - CP
Game Setup Documentation.txt
This doc explains how to set up various game elements in the config files.

[] - brackets optional parameters
<> - brackets params which you should replace with the relevant name


-----------------------------------------------------------------------------------------
TOA ABILITIES	- ChrisS, ChrisP, ChasM
-----------------------------------------------------------------------------------------

Jump Ability ( Landing Pads )

Define the area that the player can jump from ( a spline ), call if "EnterAbilityJumpTest1" for instance

Define the landing spot
    Create a two point spline called "AbilityDirJumpTest1", 1st point ( flashing one in the editor ), is the landing spot, place it exactly on the ground if you want the player to land at that point,
    2nd Point, is used to determine how steep the player will take off ( not land ), the steeper it is the steeper the jump, the 2d direction is irrevelent, just the steepness that counts
    The landing spot will act as a point of interest when appropriate so the camera will try to get it on screen

Fire/Water ability

We use splines ( called "EnterAbilityFireTest1" ), to define a fire area, you can only enter this if you are the red guy, and within these areas you cant change toa. These areas can overlap if it will make it easier.
 The splines MUST be made in a clockwise manner, as I also generate edge collision from them to block the player when not red


Water ability is the same, substitute Water for Fire in above


Climb ability

We use a spline ( called "EnterAbilityClimbTest1" for example ), to define the area you can begin a climb,
we then use a 2 point spline ( called "AbilityDirClimbTest1" ) to describe the direction towards up the wall, ideally this should be 45 degrees pointing at the wall and upwards. In the editor, the flashing point should be the lower one. This spline is also used to restrict the Climb button to work only when facing the wall.

We also use a spline called "ExitAbilityClimbTest1", when the player is withing this standing on the ground almost vertically they will exit climb wall mode

Edge collsion splines are ignored except special wall edge ones ( pairs of splines called WallEdgeAMatchingName & WallEdgeBMatchingName ), see end of volcano 2
as an example


This bit below needs reworking!!!!


They will be detected by the game and used with the default settings. Some abilities can
have their settings altered by adding a line to the CONTROL section of the appropriate
Level.cfg (found in the level folder):

	ABILITYJUMP	<spec_object_name>	<fw>	<up>	[ hidden <shootable_name> ] [ progress ]
eg.	ABILITYJUMP	abilityGreen2		0 	10	hidden fallenstruts3

This sets the jump point called "abilityGreen2" to fling the player straight upwards by 10 metres.
It also sets it as hidden until the shootable called "fallenstruts3" is destroyed.
NB: The shootable name is the name given in the CFG file, not the name of the special object!
Vortexes are special cases of shootables, so they can be used to hide ability points.


Climb Strafe Mode canbe set up as follows

	For Climb mode we have
	ABILITYCLIMB AbilityBlack2 VerticalStrafe
	ABILITYCLIMB AbilityBlack2 VerticalDownStrafe
	ABILITYCLIMB AbilityBlack2 NOStrafe
	ABILITYCLIMB AbilityBlack2 SplineStrafe SplineNameLeft SplineNameRight

Where SplineNameLeft and Right refer to the edges of movement ( for the centre of the toa ), the code uses these splines
to determine the strafe direction ( so it can go round corners etc ), The two splines DONT have to have the same number of points
The code uses all the points, not just the knots, ideally spaced about 4 meters apart


Adding "progress" flags this ability as a game critical one, so it will appear on the radar.

For Fire and Water areas, we use a slightly different method.  An icon is placed at the location
of special objects called:

	abilityBlue*	(enter water)
	abilityRed*	(enter fire/lava)

When in either red or blue ability mode the player is then able to walk over the relevant splines with the
following naming convention:

	edgeANotWater*	(collision spline except when blue player)
	edgeANotFire*	(collision spline except when red player)

To exit an ability we need to describe an area with a spline and name it in the following way:

	exitAbilityBlue*	(exit water walk mode)
	exitAbilityRed*		(exit fire/lava walk mode)
	exitAbilityBlack*	(exit climb mode)

You can still define these spline-based abilities as "hidden" and "progress" in the CFG like this:

eg.	ABILITYFIREWALK		abilityRed1	progress hidden BigRockShootable
eg.	ABILITYWATERWALK	abilityBlue1	progress hidden BigRockShootable
eg.	ABILITYCLIMB		abilityBlack1	progress hidden BigRockShootable


------------------------------------------------------------------------------------------
VORTEXES	- ChrisP
------------------------------------------------------------------------------------------

Vortexes are a special case of a shootble object. They are placed in Maya just like shootables,
and set up in the CFG file.

In Maya, you must place a plinth special object (See MikeS) on the ground and a dummy vortex
object (a cube will do) about 1 metre above it.

In the Level.cfg, add a shootable description in the CONTROL section like this:

  	SHOOTABLE	Vortex*
		VORTEX		[BOMB]
  		OBJ		Vortex_Locator0*
		OBJ		Plinth_VortexA_*
		LEGOPICKUPS 	40 50
		DETONATEPART	VortexPlinth
    		HITS		90
		MAXTARGETRANGE	30
		FORCEFIELD	forcefieldplane
		TARGETABLE
	END

VORTEX tells the game to play the vortex VFXs (see Kenny) at the position of the first OBJ.
VORTEX BOMB would tell it to trigger the elemental smartbomb when fully "charged"

The first OBJ must be the dummy object representing the vortex. This is what the player will
target and shoot at. The second OBJ is the plinth.

DETONATEPART specifies the PART3D effect to trigger when the vortex explodes. Unlike normal
shootables, this will trigger at the position of the second object (the plinth).

HITS is the number of individual lego bullets that must hit the vortex to detonate it. It
ignores the damage amount set on the bullets.

FORCEFIELD gives it the name of a special object to turn OFF on detonation. You can also
trigger cutscenes and send AI messages from vortexes the same as any other shootable.

TARGETABLE makes the vortex targetable so the player can easily shoot it.


------------------------------------------------------------------------------------------
CONSTRACTION/PUZZLE SETUP	- ChrisP
------------------------------------------------------------------------------------------


The puzzle cutscenes must be added to Level.cfg in the usual way.
Then you also need to add this bit in the CONTROL section (along with shootables):

	PUZZLE	BridgeCar
		CUTSCENE 1	"makecarpart1"	20.0f
		CUTSCENE 2	"makecarpart2"	20.0f
		CUTSCENE 3	"swapcar"	0.0f auto resetfirst
		CUTSCENE 4	"gocar"		20.0f nohold
	END

Each actionable cutscene must have a function locator to indicate the hotspot for triggering
the cutscene. The number after the cutscene name is the radius within which the hotspot is
actionable.

You can trigger any cutscene, but if you don't do them in the correct order, the errant cutscene
rewinds back to the start. When the level resets, they ALL return to their start positions.

The player camera will follow the hotspot locator during the cutscene, but only while the action
button is held. This allows the player to stop halfway through a constraction, turn and shoot things
even though the constraction is still rewinding.

PUZZLE PARAMETERS:
==================

RESETTOCHECKPOINT <CheckpointName> = if Checkpoint 'CheckpointName' hasn't been reached then reset this puzzle when player dies.
	This causes the puzzle to reset when the player goes back to CheckPoint040, or any prior to that.
	Useful for lifts minecars etc, where the puzzle needs reseting to allow game progression.

COLOUR <colour> = puzzle only actionable by specified colour: GOLD, RED, BLACK, BLUE, GREEN, BROWN (default), WHITE, PIRAKA_BLACK, etc.

CUTSCENE PARAMETERS:
====================

AREA <area_name> = with this you can only trigger this constractable segment when within a spline names area_name, useful for lifts, minecarts etc

NOBUTTON = use with AREA, allows puzzles to trigger when player enters an area. Useful for resetting lifts etc.

HOPSCALE <HopScale> <HopAngScale> = if hopscale not present, these are assumed to both be 1.0, set both to 0 for no hopping
	hopping is the jiggling of the cutscene pieces to indicate it can be constracted,

AUTO = don't wait for the player to trigger it (so no locator required!) Allows you to chain cutscenes together.

HIDEHOTSPOT = don't show the trigger hotspot until puzzle has progressed enough for this cutscene to
be actioned.

NOHOLD [duration] = does not require the button to be held throughout the cutscene. Duration is the
length of time you DO have to hold it (defaults to 0 if not specified). This allows you to set up
cutscenes that must be held down for the first second, but will complete by themselves after that point.

DELAYEDPICKUP <duration> = Will delay when the pickups are created from a puzzle. Should really only be
used alongside NOHOLD. duration is how many seconds to wait until spawning the pickups, a value of 100.0f
will always spawn the pickups at the end.

REPEAT = Cutscene can be actioned repeatedly, but will only spawn LEGO the first time. This prevents
any further progress of the puzzle, so only use on the final segment.

HIDDEN <shootable_name> = Trigger hotspot is not shown until <shootable_name> has been destroyed.
Useful for hiding puzzles under or behind things.

HIDDENALL <shootable_name> = As above, except the cutscene is not even drawn until the shootable
is destroyed. Useful for making puzzles out of carefully set up "debris" from shootables.

RESETFIRST = reset this BEFORE other cutscenes. Useful for cutscenes which hide/unhide LODs or
such like, to make sure they reset to the correct state. You shouldn't need this, hopefully.

LEGOPICKUP <min> <max> = number of lego pickups to spawn when this segment is completed.

SPAWNMASK	Colour   spawns a mask of the appropriate colour

CANISTER NumCanisters [NumBonusCanisters]

ZAMORSPHERES NumSilver [NumGold] [NumBlack]

------------------------------------------------------------------------------------------
PUZZLES Becoming Shootables Chris S
------------------------------------------------------------------------------------------

This might get a bit complicated!!!


GOAL!!!!
========

To allow a puzzlesegment to generate a shootable composed of the pieces in the cutscene
To use a default makeup for the shootable, or to allow more control where required
To be compatable with the existing systems


1st
In the cutscene command add the command

BECOMESHOOTABLE InitShootName UniqueShootName

This makes the cutscene segement become a shootable of type InitShootName, with a unique name of UniqueShootName

What this means!!!
==================

The InitShootName refers to the shootable type it is to become, and must match a shootable in the cfg ( should
you want ultimate control ), or be set to "default*"

The UniqueShootName is used to replace any wildcards in the init name ( and is required even if no wildcards are present )

EXAMPLE!!!
==========

BECOMESHOOTABLE Default* WoodPile

This generates a shootable called DefaultWoodPile, with a standard num of lego created and a generic part effect on destruction

MORECONTROL!!!!
===============
Instead of Default* add into the cfg a shootable description, just like any other except that we also add
the command RefOnly ( which tells the cfg not to automatically generate shootables from this info, but to use
it for reference only )

This allows us to change the number of hits, lego generated, effects used or anything normally set by a shootable
It also means we can add extra objects and specify replacement objects, much like any other shootable, using the
UniqueShootName as the wildcard.


MORE + DIFFERENT CONTROL
========================

In the cutscene used to generate the shootable,

	any object who's name includes
"NoShoot", will not be added to the shootable ( and will therefore be left unscaved ),

	any object who's name begins with
"TargetMe", will be make the 'locator' for the shootable


------------------------------------------------------------------------------------------
PLANTABLES/GROWABLES Or shootables becoming puzzles- Pete A
------------------------------------------------------------------------------------------
:Used to turn a shootable into a puzzle or a cutscene then a shootable

Creating plantables/growables is almost exaclty the same as Puzzles becoming Shootables. First of all you need to make a puzzle structure as you would for a normal puzzle, then simply place a REFONLY command in the structure. The only snag is the cutscenes specials must be placed at the origin and invisible.

	PUZZLE shoot2Puzz
		REFONLY
		SPAWNYOFFSET	-0.9
		CUTSCENEBEGIN s2c
			RATE			25.0
			STAGE			1
			RADIUS			10.0
			ZAMORSPHERES	15 5 1
			BECOMESHOOTABLE Default* Explode
		END
	END

There are a few optional parameters that can be placed in here

SPAWNYOFFSET <float> - Simply adjust the Y offset of the current growable
					(if you want the cutscene to start underground?)
RATE <float> - The speed the cutscene plays at
AUTO 	  	 - As soon as the shootables destroyed the puzzle solves itself


Once you've created the reference puzzle you need to link it the shootable it grows from; this is done simply by the command SPAWNPUZZLE <refpuzzlename>.

	SHOOTABLE 	Bio_Shrubs*
		OBJ	BIO_Shrub*
    	DETONATEPART	Shrub
		HITS		20
		ZAMORSPHERES	5 2 0
		MAXTARGETRANGE	15
		HEALTHPICKUP	0.1
		SPAWNPUZZLE		shoot2Puzz
		SPAWN 0 2 APHID DRAGONFLY
		DETONATESFX STRUC_DEST_MED
	END

Theres one optional parameter on the list
S2CLOOP <int> - allows you to shoot->Puzz->shoot->puzz..etc <int> times, if no value or 0 is put as a parameter it will loop infinatly. The loop will always end on the shootable

==========================
Growable Splines - Pete A
==========================

Now you can place your very own garden of growables throught the level…

All you need to do is to place a spline in your level with the name Grow_NAME (i.e. Grow_1 Grow_2 Grow_lots). Then open the level.cfg and create a new shootable, its exactly the same as any other shootable but with three extra commands

SPLINE <spline_name>? What spline to plant these on
REBUILD <cutscene_name>? What cutscene is used for the shootable/rebuildable
RESPAWNTIME <Min seconds> <Max Seconds> ? Random respawn time value

So an example structure would be

		SHOOTABLE	Thingy
			SPLINE Grow_1
			REBUILD shoot2constract_vPipes
			RESPAWNTIME 20 40
			DETONATEPARTICLE	Shoot_Explode1
			HITS		50
			ZAMORSPHERES	10 2 0
			MAXTARGETRANGE	20
			SPAWN 0 1 APHID
			DETONATESFX STRUC_DEST_MED
		END

The growables will always vertically snap to the terrain, if you don’t want them to do that put NORAYCAST in the list of options


------------------------------------------------------------------------------------------
CONTEXT SENSITIVE MOVEMENT	- ChasM
------------------------------------------------------------------------------------------


When it is necessary to switch player movement from free roaming to straffe controls we define the movement area with
splines (Maya/editor) in the CONTROL section of the level.cfg as follows:

	CONTEXTMOVE 	bananaman
		BOUNDS 		enterRoom
		TARGETBOUNDS	enemiesInHere
		FRONT		straffeFront
		BACK		straffeBack
		EDGE		straffeEdge

		SETMESSAGE		Set a 'message' when entering this mode
		WAITSTARTMESSAGE 	Don't start straffe until message is set
		WAITENDMESSAGE 		Don't end straffe until message is set
	END

BOUNDS = when the player crosses this spline they will be pushed into the bounding area defined by the three splines
for front, back and edge

TARGETBOUNDS = the player is released from the straffe controls when all targets in this area are dead.

FRONT = spline describing the front edge of the straffe movement area

BACK = spline desribing the back edge of the straffe movement area

EDGE = a spline desribing the edge(s) of the straffe movement area.  If more than one edge is required then use the same
spline but bring it around the back of the 'BACK' spline and up the other side.  Finally, it DOES matter which direction edge splines
are facing; they need to be draw from left to right if in front of the player.

NB. the corresponding points on the 'front' and 'back' splines dictate the direction in which the player will be facing.
In the first diagram below, 'O' is a point on a spline.  As the player moves from left to right between theses two splines they will
gradually turn from facing left, to looking straight ahead in the middle, to facing right.  In the second diagram, the player
will always face forwards:

	straffeFront		1) x-----------------x		2) x-----------------x

	straffeBack		      x-----------x		   x-----------------x


Typical layout below.  Note that the BOUNDS and TARGETBOUNDS splines can have as many or few points in as necessary (the
fewer the better) and they can be left open as they are in the diagram.

	x--------------------------------x TARGETBOUNDS
	|
	|
	|
	|
	|
	|
	|
	|
	x--------------------------------x


	x--------------------------------x BOUNDS
	|
	|     x                    x EDGE
	|     |                    |
	|   x-+--------------------+-x FRONT
	|     |                    |
	|     |                    |
	|     |                    |
	|     |                    |
	|   x-+--------------------+-x BACK
	|     |                    |
	|     x--------------------x
	|
	x--------------------------------x


------------------------------------------------------------------------------------------
Checkpoints	- ChrisS
------------------------------------------------------------------------------------------


The placement of the checkpoints is obviously a design issue, but the method of putting them in is thus

define an area with a spline, (maya or editor ), call this CheckpointXXX where XXX repesents some unique alphanumerical name/number, these will also be used to sort them into order so I suggest
using 010 020 030 etc, as this allows us to insert ones in the middle at a later time

then place a special obj ( maya only ), or a two point spline (maya/editor)( 1st point location, 2nd point determines direction ),

When the player enters a checkpoint area, and is not currently in straffe section mode, then if the checkpoint has is further into the level ( determined by the above sort ), it will become the new checkpoint, where the player will return upon loss of mask.


In the Cfg for the level we can add the default masks for a checkpoint -- See StartMask below


NoRespawn Splines ( splines named NoRespawnxxxx ), define areas where the last safe position ( where we would respawn the player to upon mask loss ), arn't updated.
The system already wont update this when climbing, jumping fire or water walking, but this gives extra control

Why would I need this????
	Walking over an island in the water then loosing your mask whilst in the water, you would otherwist respawn on the island with no way of getting the blue mask again
	You might have a bonus area reached by a jump, water fire or climb area. With this you wont be forced to lay a mask so the character doesn't get stuck there without the correct mask


TBD...


------------------------------------------------------------------------------------------
Context Camera	- ChrisS
------------------------------------------------------------------------------------------

Context camera system allows 'help' for the autolook system

CONTEXTCAMERA <Name>
	BOUNDS 	<AreaEffectName>			;; only within thes area spline does it do anything
	[SPLINE 	<SplineName>]			;; this optional parameter describes a spline that tells the camera where to look
							;; ahead for the floor data ( so it looks up/down correctly ), this can be useful
							;; in tight windy corridors
	[CAMDIST 	<ScalVal>]			;; Limits the max cam dist 1.0 by default, try about 0.5 suitable for tight corridors
END


------------------------------------------------------------------------------------------
Points of Interest	- ChrisS
------------------------------------------------------------------------------------------

Create a special obj called CamPoixxxxxx, when there is a line of sight between this nd the player, the camera system will try and take account of this
use this to bring to attention objects that are normaly not quite visible enough
if you stick Areaxxxxx in the name, then the Poi will only be visible from within that area ( spline ), stick the area command at the end of any others as anything after it in the name
will be need to match the spline name
if you sticl NoRay in the name then raycasts will be ignored

points of interest will 'help' the camera, the camera wont ( anymore ), look directly at the poi, but will try to make it appear on screen, which is much better


------------------------------------------------------------------------------------------
Ai placement and creature sets
------------------------------------------------------------------------------------------

Use the ai editor to path the level and place creatures according to the designs. When placing a creature assign it to a set in the editor. Creature sets are controlled by the creature manager. You set the params for creature sets in an ai level script using the CreatureSet command...

CreatureSet
	set=n[1:15]						the creature set we are setting params for
	state=[activate,deactivate,respawn]			the state we are setting a trigger for
	obj=[name of shootable,puzzle,movecontext or n[1:15] 	for creature set id] 	set the object we are monitoring for this state
	val=n							the state is true when the value of the object matches val

some examples are

        CreatureSet "set=1" "state=activate"    "val=1"                                     ;; Initially active set

        CreatureSet "set=2" "state=activate"    "obj=1"                     "val=0"         ;; Activate when all creatures in set1 are dead
        CreatureSet "set=2" "state=respawn"     "obj=Vortex1"               "val=1"         ;; Stop respawn when vortex triggers

        CreatureSet "set=6" "state=activate"    "obj=set6"                  "val=1"         ;; Activate when player is in area set6
        CreatureSet "set=6" "state=respawn"     "obj=vortexBridge"          "val=1"         ;; Stop respawn when vortex triggered
        CreatureSet "set=6" "state=deactivate"  "obj=preMineCartStraffe"    "val=1"         ;; Deactivate when player enters strafe section


------------------------------------------------------------------------------------------
Character System CFG
------------------------------------------------------------------------------------------

I've added a plugin interface to the charsys which allows systems to be added which extent the basic charbase functionality. Initial there is a SFX and Particle (PTL) plugins and a VFX plugin will follow shortly.


SFX Plugin

Add the following to your charbaseInit() args list.
CB_CHARMODULE, charsfxmodule,

You will then be able to use the SFX poi handler to play sfx.
ACTIVATEPOIONCE left_foot 3 SFX Footstep	- One shot SFX
ACTIVATEPOIONCE right_foot 18 SFX Footstep	- One shot SFX

ACTIVATEPOI left_foot 0 1 SFX BohrokShieldLp	- Looping SFX


PTL Plugin

Add the following to your charbaseInit() args list.
CB_CHARMODULE, charptlmodule,

You will then be able to use the PTL poi handler to play sfx.
ACTIVATEPOI righthand 0 1 PTL ray_blue	- Add single frames worth of particles at poi (AddVariableShot)
ACTIVATEPOI righthand 0 1 PTL ONCE ray_blue	- Play the ptl effect once at poi (AddFiniteShotDebrisEffect)
ACTIVATEPOI righthand 0 1 PTL LOOPING COUNT 3 ray_blue	- Play ptl effect 3x at poi (AddFiniteShotDebrisEffect)
ACTIVATEPOI righthand 0 1 PTL ATTACHED ray_blue	- Play ptl effect poi (AddDebrisEffect and update key pos)
ACTIVATEPOI righthand 0 1 PTL ATTACHED ONCE ray_blue	- Play ptl effect poi only once (AddDebrisEffect and update key pos)


------------------------------------------------------------------------------------------
Shootable System -- Level.cfg
------------------------------------------------------------------------------------------


LEGOPICKUP <min> <max> = number of lego pickups to spawn when this segment is completed.

SPAWNMASK	Colour   spawns a mask of the appropriate colour

CANISTER NumCanisters [NumBonusCanisters]

ZAMORSPHERES NumSilver [NumGold] [NumBlack]


------------------------------------------------------------------------------------------
StartMask -- Level.CFG
------------------------------------------------------------------------------------------


STARTMASK	Red Black Brown		-- Start the level with red, black & brown also available

STARTMASK	Checkpoint010 Blue Red Green -- Start Checkpoint010 with Ble, Red & Green also available


------------------------------------------------------------------------------------------
Difficulty -- Remap -- Bionicle.Cfg
------------------------------------------------------------------------------------------

The level of difficulty can be set in one of two ways

Via the commandLine using "DiffLevel 12", where 12 indicates the 12th level played ( i.e diff level 12 ) in the range 0 .. num levels
via the Change Difficulty menu option. -- NOTE this will only take effect the next level load, so alter it then change level ( poss back to the one your already on )

In Bionicle.cfg we have

DIFFICULTYREMAP

then
LEVEL	0	Bohrok 1 2		Visorak 1 2		Vahki 1 2
LEVEL	1	Bohrok 1 3
LEVEL	2				Visorak 1 3
LEVEL	3							Vahki 1 3

which describe how the characters progress their difficulty according to the level

so Bohrok 1 3 means EasyBohrok would be type 1, HardBohrok would be type 3


then


CREATUREREMAP Bohrok 	4_kohrak_kal		1_tahnok_kal		2_gahlok_kal		5_pahrak_kal		3_lehvak_kal			6_nuhvok_kal
CREATUREREMAP Visorak	1_vohtarak		2_boggarak		3_keelerak		4_suukorak		5_roporak		6_oohnorak
CREATUREREMAP Vahki	1_nuurakh		2_bordakh		3_vorzakh		4_keerakh		5_zadakh		6_rorzakh

which represent which gfx correspond to which difficulty for each creature type

NOTE that this remapping is disables if you are running the Creature Editior ( or have it available )

ALSO NOTE
	Creatures should be placed Red for easy, Blue for Hard, they are then remapped accordingly on level load


------------------------------------------------------------------------------------------
TINT SPLINES	-  Dunc W
------------------------------------------------------------------------------------------

Tint Splines: Allows various tints to be used on the screen in different areas of the level


On a particular level if tint splines are to be used we must define both 'Tint Colours' and 'Tint Splines' in the level cfg.  A Tint colour
carries a name, a 128 colour ,an alpha modulation type and a burnout level.

e.g. 	TINT_COLOUR Colour1Name 99 23 75 35 MOD 0.75
                    ^--Name     ^--RGBA         ^----Burnout level 0.0 -> 1.0

Tint splines carry a unique name, an Id,  and the names of four Tint Colours to interpolate between over the course of the day-night cycle.

 e.g.   TINTSPLINE 1 COURTYARD Dawn_Rainy Noon_Rainy Evening_Rainy Night_Rainy

                               ^-Colours names in order of Dawn, Noon, Evening, Night

 To activate these tints, splines must also be placed through out the level like so:


 	x--------------------------------x TINT_COURTYARD_OUT
	|
	|    x-----------------------x   TINT_COURTYARD_IN
	|    |
	|    |
	|    |
	|    |
	|    x-----------------------x
	|
	x--------------------------------x

There should be an inner spline for where when the player is standing inside, the tint will be at full strength.  When the player moves towards
the outer spline the tint will fall off.  If there is an 'Everywhere' spline defined (as below), which has a reserved ID of 0, then the screen will tint
according to the Tint Spline's colours whenever the player is not within any of the other splines.

          e.g.   TINTSPLINE 0 EVERYWHERE Colour1Name Colour1Name Colour1Name Colour1Name

                            ^- If ID is zero then this will be used as the everywhere spline, no actual spline needs to be placed

If you wish to have a single tint for the whole of the level, and not have it changed by the day-night cycle,  the set up should be as follows

             TINT_COLOUR Colour1Name 99 23 75 35 MOD

             TINTSPLINE 0 EVERYWHERE Colour1Name Colour1Name Colour1Name Colour1Name

                                     ^-Fill the four slots with the same tint colour to avoid being affected by day-night cycle

If we want a Day/Night transition to happen, there are 4 transition state and 4 static states.

        DAY_NIGHT 40 10 20 10 40 10 20 10

In the above we see the first static state is 40 seconds long, followed by a 10 second transition to the next static state. This static state
then last for twenty seconds followed by a 10 second transition to the next state and so on.

Depending on the order of the colours specified in your tint spline, the above transition combined with the Tint spline below would
translate as follows.

TINTSPLINE 0 OUTSIDE NIGHT SUNRISE NOON SUNSET

>40 seconds of night state,
>10 seconds of transition,
>20 seconds of Sunrise state
>10 seconds of transition,
>40 seconds of Noon state
>10 seconds of transition,
>20 seconds of Sunset state
>10 seconds of transition,

This of course would wrap back round to night after the last transition.  The cycle does not have to begin with night, it just depends on the
order that you give the four colournames in the tintspline.


------------------------------------------------------------------------------------------
Placehold Progress Constractions -  Pete A
------------------------------------------------------------------------------------------
:Used as a placeholder while a gold constraction asset is being waited for

To use simply create a new 2 point spline in the spline editor, give it a name, then in the Level.CFG simply make your Progress Puzzle as normal, but instead of giving it a name, give it the name of the spline you created in the spline editor. Job sorted. When the gold constractions completed, simply delete the spline and rename the progress structure.

------------------------------------------------------------------------------------------
Individual Cutscene Weapon Loading -  Pete A
------------------------------------------------------------------------------------------
;Only load cutscenes/characters when needed (removes the need to global every cutscene and character)

Nice and simple, simply place a CUTSCENE statement in the CharacterAttributes.cfg in the toa specific toa.

CUTSCENE <weaponUpgradeValue> "<reference name>" "<Cutscene file>" "<Character file>" "<SceneFile">
<weaponUpgradeValue> 0-2 depending on level of the toa's weapon, the rest is just like adding a cutscene to the level config.


;;;example, blue toa1
    FACECHARBEGIN
		INCLUDE	Faces/FaceBlue1.cfg
	FACECHAREND

	NEWTOYWEAPONCHARBEGIN	0
		INCLUDE Toy_Weapons/Weapon_Blue_1.cfg
	NEWTOYWEAPONCHAREND

	CUTSCENE 0 "bluebeam_3" "Levels/Testarea/cutscene_assets/bluebeam_3.cu2" "Levels/TestArea/cutscene_assets/bluebeam_3.ghg" ;Cutscene info goes here!

    BulletType		0 Blue1
	WeaponFireDelay	0 0
	WeaponHeat		0 0.013 0.075	; heats up by .05 every shot
	WeaponCool		0 5		; takes 7 seconds to cool Down
;;End random example

If the character needs more than one cutscene simply place NUMCUTSCENES <num of cutscenes> before you use the CUTSCENE command.
Unused Text
svntest.txt is a short text file with strings used for testing something, presumably related to a SVN repository.
test the post commit hook
and again
another
auto commit test
case i test
test
28/06/06
another test
arse
- Pages missing developer references
- Games developed by Traveller's Tales
- Pages missing publisher references
- Games published by Eidos Interactive
- Games published by Electronic Arts
- Wii games
- PlayStation 2 games
- GameCube games
- Windows games
- Pages missing date references
- Games released in 2006
- Games released in November
- Games released on November 14
- Games released on November 24
- Games released in December
- Games released on December 1
- Games with hidden developer messages
- Games with hidden development-related text
- Games with unused graphics
- Games with unused text
- LEGO series
Cleanup > Pages missing date references
Cleanup > Pages missing developer references
Cleanup > Pages missing publisher references
Games > Games by content > Games with hidden developer messages
Games > Games by content > Games with hidden development-related text
Games > Games by content > Games with unused graphics
Games > Games by content > Games with unused text
Games > Games by developer > Games developed by Warner Bros. Games > Games developed by TT Games > Games developed by Traveller's Tales
Games > Games by platform > GameCube games
Games > Games by platform > PlayStation 2 games
Games > Games by platform > Wii games
Games > Games by platform > Windows games
Games > Games by publisher > Games published by Electronic Arts
Games > Games by publisher > Games published by THQ Nordic > Games published by Crystal Dynamics > Games published by Eidos Interactive
Games > Games by release date > Games released in 2006
Games > Games by release date > Games released in December
Games > Games by release date > Games released in December > Games released on December 1
Games > Games by release date > Games released in November
Games > Games by release date > Games released in November > Games released on November 14
Games > Games by release date > Games released in November > Games released on November 24
Games > Games by series > LEGO series