Proto:The Legend of Zelda/FDS Prototype
This is a sub-page of Proto:The Legend of Zelda.
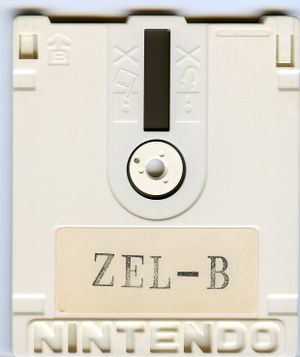
A prototype of Zelda no Densetsu: The Hyrule Fantasy was released by Lost Levels on December 25, 2010.
According to the date of writing on the disk at address 0x2F, this build is dated December 28, 1985, about two months before the game's release. The game at this point is probably fairly late in development: while most of the tweaks to the First Quest between here and the final are difficulty-related, the Second Quest has barely been started.
Contents
Download
| Download Zelda no Densetsu: The Hyrule Fantasy (Prototype)
File: Zelda no Densetsu - The Hyrule Fantasy (Prototype).fds.zip (56 KB) (info)
|
| Download Zelda no Densetsu: The Hyrule Fantasy (Proto, NSF Rip)
File: Zelda no Densetsu - The Hyrule Fantasy (Prototype).nsf.zip (4 KB) (info)
|
Sub-Pages
| Overworld The start of the adventure. |
| Levels 1-4 Rooms leading to different rooms. Yep. |
| Levels 5-8 Attack of the Wizzrobes. |
| Level 9 Ganon is a chump. |
Gameplay Changes
General
- The prologue and item list are not present.
- When a Candle is used in a dark room, the game does not pause while the room lights up.
- It's not possible to hit the Old Men in the prototype.
- The Magical Sword requires eight hearts to obtain. This was upped to 12 in the final.
Bugs
- Hitting a 4-directionally animated enemy (like Moblins) with the Boomerang causes their animation speed to increase dramatically. This was fixed in the final.
- There's an exploit involving the Patra that was removed from the final: Destroying a mini-Patra and then exiting/re-entering the room will kill the main Patra.
- The sword and item in the HUD blink briefly at screen transitions. This was fixed in the final.
- There are some stairways that have bombable walls. Their appearance seems to be arbitrary, not intentional. They don't lead anywhere, and once the player exits and re-enters the room the cracks will disappear.
- There is a bug involving groups of Dodongos: If you feed one a bomb, then feed another one a bomb before the first one finishes its damage animation, the damage from one is transferred to the other, causing one to die instantly and the other to take no damage.
- Bomb graphics do not disappear while entering a cave. This can cause the screen to be briefly stuck in grayscale if the cave is entered during the bomb flash.
- After killing the Gohma in Level 6, its boss cry will continue until you leave the room.
Enemy Changes
 Armos Knights take much longer to come to life (128 frames, which was dropped to 60 in the final), and a cloud of smoke is visible when it is awakened.
- Moldorm has 1 HP per segment in the prototype, but 2 in the final. Likewise, the Blue Wizzrobe got its health buffed from 8 HP to 10 HP.
- Both Wizzrobes' beams do less damage in the prototype. The Blue Wizzrobe's beams went from 1 heart to 2 hearts of damage, and the Orange Wizzrobe from 2 hearts to 4(!) hearts.
- Lynels' sword beams do 1 heart of damage, while in the final they do 2 hearts.
- Ropes have different behavior: When they charge at Link, they may randomly change direction several times, and their charge speed is slower. They may also start charging randomly, even if they're not aligned with Link. In the final, they only charge when they are lined up with Link, and travel in a straight line until they hit a wall.
- Gleeok can fire two fireballs at a time in the prototype, but only one in the final.
- Moldorm and Lanmola don't flash while taking nonlethal damage in the prototype, but they do in the final.
- Blue Lanmolas take a lot more hits before they start losing segments.
Unimplemented Objects
- The hungry Goriya hasn't been coded yet, and its text is not in the ROM.
- The first Second Quest-exclusive Old Man ("IF YOU GO IN THE DIRECTION OF THE ARROW") has been coded but has no text. The other Old Man ("LEAVE YOUR LIFE OR MONEY") isn't present in any form.
- The Stalfos (sword shooter) and Ropes (flashing) of the Second Quest do not exist at this point.
Item Drops
A variable exists ($0050) that tracks how many monsters you've killed without getting damaged. When hit, this value is set to 0. Once the variable reaches a certain value and an enemy is killed, a Blue Rupee will drop and the variable is set to 0.
The final caps this at 10, but the prototype's variable stops at 6. This makes it easier to accumulate a lot of Rupees.
The final has an additional counter that causes a Fairy to be dropped by the 16th enemy killed without taking damage, but that doesn't happen in the prototype.
The different item groups were changed as well, except Group A. Differences are in bold.
Group B
| Drop Variable | Proto | Final |
|---|---|---|
| 0 | Bomb | Bomb |
| 1 | Blue Rupee | Rupee |
| 2 | Clock | Clock |
| 3 | Blue Rupee | Rupee |
| 4 | Heart | Heart |
| 5 | Bomb | Bomb |
| 6 | Blue Rupee | Rupee |
| 7 | Bomb | Bomb |
| 8 | Heart | Heart |
| 9 | Heart | Heart |
Group C
| Drop Variable | Proto | Final |
|---|---|---|
| 0 | Rupee | Rupee |
| 1 | Heart | Heart |
| 2 | Rupee | Rupee |
| 3 | Blue Rupee | Blue Rupee |
| 4 | Heart | Heart |
| 5 | Clock | Clock |
| 6 | Rupee | Rupee |
| 7 | Blue Rupee | Rupee |
| 8 | Rupee | Rupee |
| 9 | Blue Rupee | Blue Rupee |
Group D
| Drop Variable | Proto | Final |
|---|---|---|
| 0 | Heart | Heart |
| 1 | Fairy | Fairy |
| 2 | Blue Rupee | Rupee |
| 3 | Heart | Heart |
| 4 | Fairy | Fairy |
| 5 | Heart | Heart |
| 6 | Heart | Heart |
| 7 | Heart | Heart |
| 8 | Blue Rupee | Rupee |
| 9 | Heart | Heart |
Other
Killing a Dodongo when it is smoke-stunned will always make the Dodongo drop bombs in the final. This isn't coded in the prototype yet.
Shop Changes
Every shop type had its inventory tweaked for the final.
| Shop Type A | Item | Price | Item | Price | Item | Price |
|---|---|---|---|---|---|---|
| Proto | Shield | 160 | Bomb | 20 | Candle | 60 |
| Final | Shield | 160 | Key | 100 | Candle | 60 |
| Shop Type B | Item | Price | Item | Price | Item | Price |
|---|---|---|---|---|---|---|
| Proto | Shield | 130 | Bomb | 30 | Arrow | 80 |
| Final | Shield | 130 | Bomb | 20 | Arrow | 80 |
| Shop Type C | Item | Price | Item | Price | Item | Price |
|---|---|---|---|---|---|---|
| Proto | Shield | 90 | Bomb | 10 | Heart | 10 |
| Final | Shield | 90 | Meat | 100 | Heart | 10 |
| Shop Type D | Item | Price | Item | Price | Item | Price |
|---|---|---|---|---|---|---|
| Proto | Key | 80 | Blue Ring | 250 | Meat | 160 |
| Final | Key | 80 | Blue Ring | 250 | Meat | 60 |
Money-Making Game
The Money-Making Game is considerably nicer and less risky here. All values except the best one (+50) were lowered for the final.
| Proto | Final |
|---|---|
| -20 Rupees | -40 Rupees |
| +1 Rupee | -10 Rupees |
| +10 Rupees | -10 Rupees |
| +30 Rupees | +20 Rupees |
Sprite Differences
There are a few sprite changes in the prototype. Three of them are used in-game, while the other two are earlier designs left in the ROM.
Used
| Proto | Final |
|---|---|
Stalfos' raised foot was redrawn for the final version. Its head also has a couple of minor changes. The prototype sprite can be seen in the Japanese and American manuals.
| Proto | Final |
|---|---|
The Wall Master enemy is missing its spots.
| Proto | Final |
|---|---|
Pols Voice doesn't have whiskers in the prototype. The color used for its eyes was assigned to the whiskers in the final, turning the eyes from Link's tunic color to brown. This is also seen in the manual.
| Proto | Final |
|---|---|
 |
 |
Ganon's defeated palette is different.
Unused
| Proto | Final |
|---|---|
A simpler design for the boulders. Note that there's only one frame for this design, not two.
| Proto | Final |
|---|---|
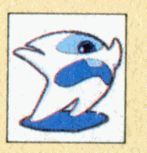
The Ghini looks angrier and has two spectral legs instead of a tail. This sprite can also be seen in the Japanese and American manuals.
Audio Differences
Music
| Proto | |
|---|---|
| Final |
The Game Over theme is simpler and shorter.
Other changes:
- The title, dungeon, and ending tracks are not yet present. It should be noted that Ravel's "Bolero" was intended to be the title theme, but copyright issues prevented this from happening. It is unknown whether this build is before or after these copyright issues were made, or if the Bolero track(s) were ever developed to a point where they would exist within the game code to begin with.
- All dungeons use the Level 9 music.
- Ganon's jingle does not play when you encounter/destroy him.
- The dungeon music cuts out when entering basement rooms.
Sounds
- All items use the same sound effect, namely the sound used for picking up hearts in the final. Normally rupees don't make this sound because the sound of your rupee count incrementing masks it, however if you pick up a rupee when you have 255 it will make the heart sound and the rupee sound at the same time.
- Moldorm and Patra don't use the standard boss sound effects (no sound ambiance or screaming when hit).
- An odd sound in addition to their screaming is heard from bosses when hit.
- The secret discovery chime is heard when you push the blocks that open the shutters inside the dungeons. This was removed in the final version, but reinstated in the cartridge versions.
- Opening a secret cave in the overworld or pushing a block to reveal a stairway in a dungeon causes the secret discovery chime to play. In the prototype, it plays to completion even if you enter the cave/stairs, but in the final, entering the cave/stairs causes it to cut off.
- Manhandla and Digdogger's boss cry is different in the prototype.
- Walking through a fake wall makes no sound in the prototype. In the final it makes the secret discovery jingle.
It's a Bribe to Everybody
| Proto | Final |
|---|---|
 |
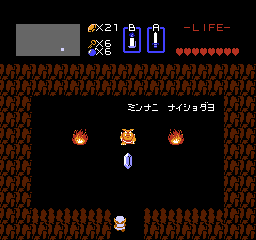 |
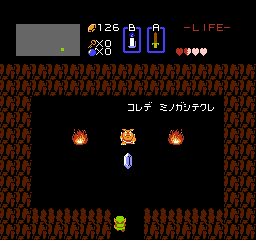
The "It's a Secret to Everybody" Moblin has different text, translating to "I'll give you this, so leave me alone!"
Unused Room Types
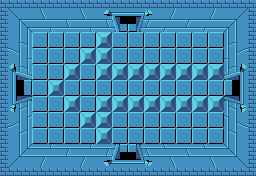
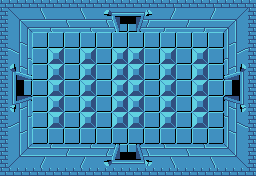
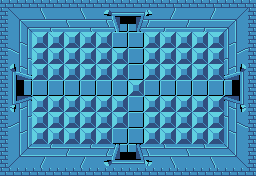
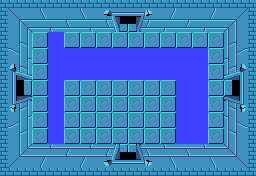
Dungeon room number 21 is unused. The blocks form a left-pointing arrow. This room does not exist in the final, and was replaced with the entrance room used in all dungeons. In the prototype, the ID for the dungeon entrance room is 2A.
| Proto | Final |
|---|---|
 |
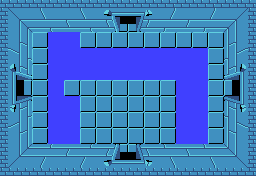 |
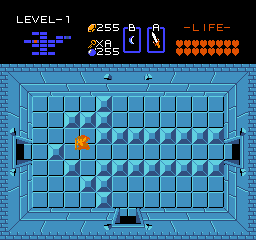
Room 0B is used in the final for the Second Quest, but it's unused at this point. However, there is a slight difference between the rooms in the prototype and the final: the gap between the South & West and North & East doors was widened from one to two spaces, making it impossible to cross with the Ladder.
These two rooms (10 and 20) are used only in the Second Quest.
Unused Push Blocks
Dungeon room number 61 is the same as 21 with the blocks forming a left-pointing arrow. However, it is possible to push one of the blocks to move from left to right and vice versa in the room.
Unused Enemies
Blue Bubble and Red Bubble
While several things from the Second Quest do not exist yet, the Blue Bubbles and Red Bubbles are present, complete with their effects on Link's sword. They're just not used anywhere.
Second Quest
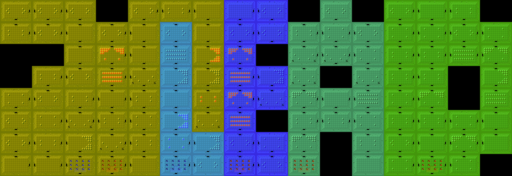
The Second Quest has barely been started in this build. The overworld is identical to the First Quest, including dungeon locations.
The dungeons, meanwhile...
Complete Maps
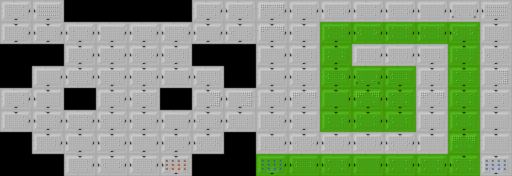
...are a random unplayable assortment of mish-mashed rooms, on top of still using the First Quest's palette schemes. The palettes for the L and E dungeons were swapped, as were those of the two spiral dungeons.
The associated HUD maps are pretty close to finished. Five of them (Z, E, D, A, and Level 7) are finalized, though the first four (as well as the L dungeon) moved to different Levels in the final.
Level 1
| Proto | Final |
|---|---|
 |
 |
Moved to Level 3 in the final, though the prototype is missing the two rooms on the left.
Level 2
| Proto | Final |
|---|---|
 |
 |
This design moved to Level 1 in the final.
Level 3
| Proto | Final |
|---|---|
 |
 |
Moved to Level 2 in the final.
Level 4
| Proto | Final |
|---|---|
 |
 |
Design moved to Level 5.
Level 5
| Proto | Final |
|---|---|
 |
 |
The last of the letter-shaped dungeons, this appears in Level 4 of the final.
Notably, despite the whole "ZELDA" letter thing, neither version actually has the dungeons go in that order (forwards or backwards).
Level 6
| Proto | Final |
|---|---|
 |
 |
Three rooms were cut from the final: one to the left of the starting point, two from the tail end of the dungeon.
Level 8
| Proto | Final |
|---|---|
 |
 |
The two innermost parts of the spiral were deleted from the final.
Level 9
| Proto | Final |
|---|---|
 |
 |
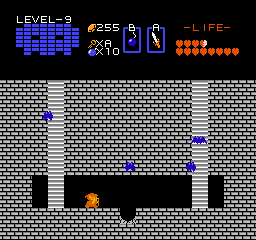
Two rooms on the left and right of the bottom section were taken out of the final's level design.
Ending
| Proto | Final |
|---|---|
 |
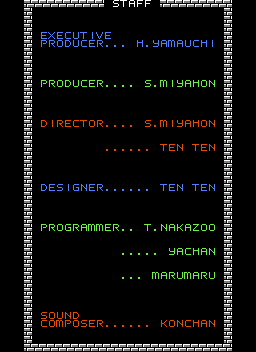 |
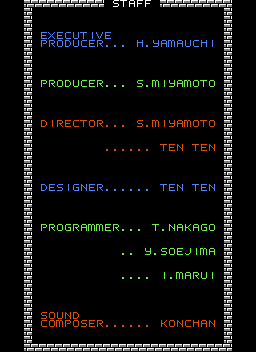
The staff list is different in the prototype. Shigeru Miyamoto, Toshihiko Nakago, and Yasunari Soejima all go by their real names here. They decided to use pseudonyms in the final game, which was common practice in the Japanese gaming industry at the time to reduce the risk of skilled developers being sought out by competing companies. Takashi Tezuka (Ten Ten) and Koji Kondo (Konchan) use pseudonyms in both versions. One pseudonym, "I. Marui" (a joke on まるい, "marui", meaning round or circle - 〇) changed to "Marumaru" (まるまる, which could either mean round/chubby or "〇〇", a placeholder symbol).
| Proto | Final |
|---|---|
 |
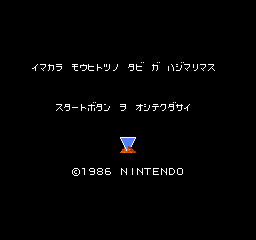 |
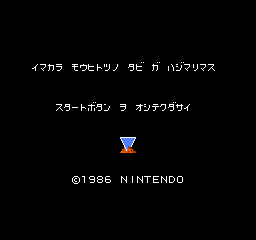
The copyright line is positioned lower in the prototype.
| Proto | Final |
|---|---|
 |
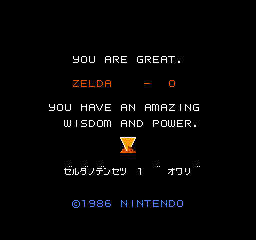 |
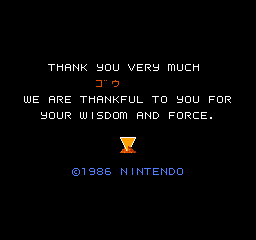
The Second Quest's ending text was rewritten for the final. The prototype doesn't display the player's death count, though there's space allocated for it. The prototype is also missing the "Legend of Zelda 1 'End'" text.
