Pikmin (GameCube)/Windows Executable
This is a sub-page of Pikmin (GameCube).
| This needs some investigation. Discuss ideas and findings on the talk page. Specifically: The Japanese version's files are slightly to largely different. Run the Japanese version and check for differences. Also, there's probably still a lot more to check. |
On the root of the Pikmin disc are a few files for a Windows executable, where you can run the game on a PC. It comes filled with a bunch of debugging features, and best of all, it's possible to have it run on any modern machine! For a guide on how to do so, see the Notes page.
Contents
Overview
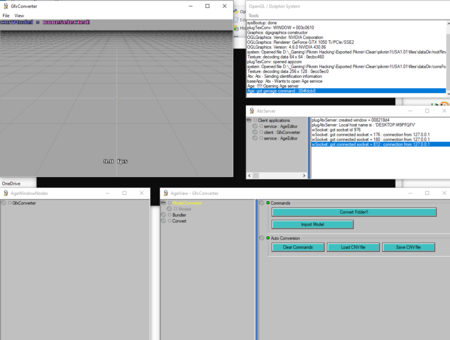
When you run the program, you get two windows: a main game window, just like what you'd see on an emulator, and a control window with a log, titled "OpenGL / Dolphin System". The messages that get added to this log also gets written to log.txt.
Some graphical effects are a bit wrong in the game. For instance, if you press Start on the title screen, the back of the screen becomes really dark except for the main menu.
By default, most things are invisible and behave a bit wrong. You have to access the in-game debug menu and enable "Game-Mode" in order to get stuff to show mostly right. Even still, only one Pikmin will really appear correctly, while the rest will just randomly flicker on the ground. You can see them if you hold the A key or enable Kando Debug from the Kando Options.
On the menus, you can navigate around just like in the actual game, but you can also pull out some extra debugging menus to access more options, with Tab. In-game, you have the regular game controls, except quite a few things are wonky (e.g. Olimar's health always appears as 0). You also get a lot of debugging features in-game by pressing the Z key. No audio plays at any point in the game.
Some objects, like Candypop Buds or Snagrets, have some spheres and boxes around them, which are always visible.
Some random things may make the game crash, like making the day time reach 0, or decreasing the value of debug menu options while in-game. This is due to the debug version of the game not being able to save.
Controls
The numpad keys require Num lock to be on. Keys in bold are shared between the regular controls and the debugging features, so be careful not to toggle a debugging function while trying to do a regular in-game action.
GameCube Controller
| GameCube button | Key |
|---|---|
| Control stick U/D/L/R | Numpad 8/2/4/6 |
| A | Space |
| B | B |
| C stick U/D/L/R | Arrow keys U/D/L/R |
| L | Numpad 7 |
| R | Numpad 9 |
| Z | Tab |
| X | V |
| Y | N |
| D-pad U/D/L/R | A/Z/S/D |
| Start | Enter |
Debugging
| Function | Key |
|---|---|
| In-game, hide the map's geometry | A |
| In-game, open debug menus | Z |
| On menus, open debug menus | Tab |
| In-game, dump current entity info | Tab |
| Toggle thing visibilities | V |
| Full screen toggle | F1 |
| Toggle performance charts of sorts | F2 |
| Exit | Esc |
| Pause game timers and entities | Space |
Menus
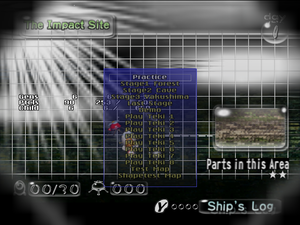
On the main menu, there are the same options as usual, but starting the game takes you instantly to the area selection screen, where only The Impact Site is unlocked, and it's in the Day 1 status. The sound volume settings on the options menu also don't work, and changing a language has no impact on the game.
While on the debugging menus, B (B key) closes the menu, A (Space Key) toggles or confirms an option, X (V key) increases a value, and Y (N key) decreases it.
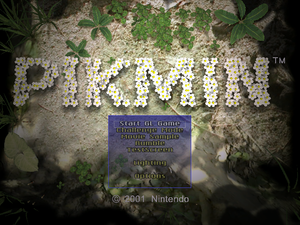
On the main menu, you have the following debug options, accessible by pressing Tab:
- Start GL Game: Same as starting the game normally.
- Challenge Mode: Same as starting Challenge Mode normally.
- Movie Sample: Opens a black screen, with the text "Movie Player : " followed by ever-increasing numbers. Only way out is to press Esc.
- Rumble: Opens the Debug Menu. You can also access it by pressing X (V key) on the main menu.
- Testscreen: Opens the 2D screen test. You can also access it by pressing Y (N key) on the main menu.
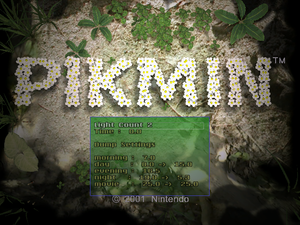
- Lighting: Opens a menu with lighting settings:
- Light count: Changes the number of OpenGL lights. Decreasing makes the game crash if you do it mid-game.
- Time: Changes the time of day. Decreasing it mid-game makes it crash.
- Dump Settings: Unknown.
- morning, day, evening, night, movie: Unknown. Cannot be changed.
- Options: Options menu.
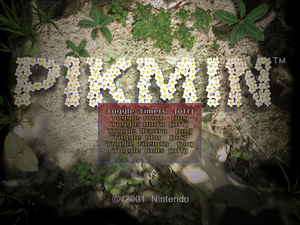
- Toggle timers: Toggle some charts, same as if you press F2. There are three settings: Off, On, and Full.
- Toggle print: Unknown.
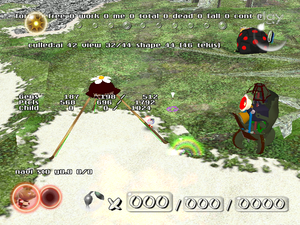
- Toggle DInfo: If enabled, coordinate arrows appear under objects, some strange circular shape appears on the left side of the screen, and some paths are drawn on the stage.
- Toggle DExtra: Toggles extra debugging information on the screen. (Culled AI, view, shape, number of enemies, generators, particles and Child).
- Toggle Blur: Supposedly toggles the blur effect, but it doesn't make a difference here as the blur is never present.
- Toggle FileInfo: Unknown.
- Toggle Colls: Toggles visibility of the collision triangles, and information about them (see MOD file documentation by Minty Meeo for more info on what these numbers mean).
Area Selection
On the area selection menu (and also on the Challenge Mode menu), you can press Tab to open a list of areas to enter. Pressing Y (N key) makes it open the Voyage Log, but close it right afterwards. The following areas are available on the debug menu for the main story mode, which you can "unlock" by choosing the "Open All Maps" option:
- Practice: The Impact Site.
- Stage1 Forest: The Forest of Hope.
- Stage2 Cave: The Forest Navel.
- Stage3 Yakushima: The Distant Spring.
- Last Stage: The Final Trial.
- Demo: Demo level.
- Play Teki 1 to Play Teki 8: The tuto2 maps.
- Test Map: testmap.
- Shapetest Map: shapetest.
The following areas are usable for Challenge Mode. These are just the same as the regular areas.
- Challenge 0: The Impact Site.
- Challenge 1: The Forest of Hope.
- Challenge 2: The Forest Navel.
- Challenge 3: The Distant Spring.
- Challenge 4: The Final Trial.
In-Game
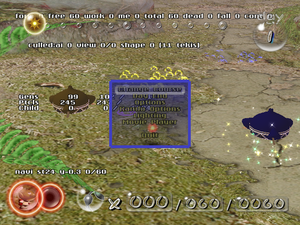
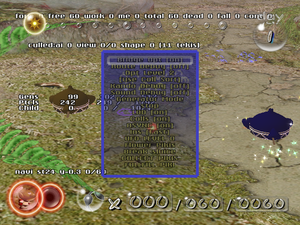
In-game, you can access a debugging menu with the Z key, with the following options:
- Change Course: Go back to the area selection screen or Challenge Mode screen.
- Day End: Ends the day, but makes the game crash.
- Options: Same as the main menu's options menu.
- Kando Options: More options.
- Bridge Opt: Unknown.
- Route Debug: Toggles the visibility of routes.
- Opt level: Unknown. Can be switched from 0 to 3 with X (V key) and decreasing it with Y (N key).
- Coll Sort: Unknown. A (Space key) toggles between "[Use Coll Sort]" and "[ignore Coll Sort]".
- Kando Debug: Toggles some on-stage debugging markers. Places two markers near the center of the Pikmin group, and places markers for each Pikmin spot on the group.
- Sound Debug: Toggles the visibility of sound handle IDs on-screen, as well as Olimar's coordinates.
- Mode: Toggles between "Generator Mode" and "Game-Mode".
- stop: Unknown. Toggles between "stop", "no stop" and "slip". "no stop" and "slip" appear to activate a moon jump.
- LOD: Unknown.
- Colls: Unknown.
- ASYNC: Unknown.
- Ins: Unknown. Toggles between "fast" and "slow".
- UFO Level: Changes the appearance and completeness of the Dolphin. On every change, the animation for the ship's upgrade takes place. Values beyond 16 don't do anything.
- Flower Pikis: Turns all Pikmin into flower Pikmin with Y (N key).
- Break Sluice: Appears to destroy breakable walls and completes bridges nearby by pressing Y (N key).
- COLLECT PIKIS: Moves all free Pikmin to the cursor with Y (N key).
- FULLFILL PIKI: Adds +100 Pikmin total number of living Pikmin on the map.
- Lighting: Same as the one on the main menu's debug menu.
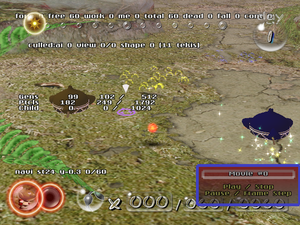
- Movie Player: Opens another menu. This supposedly allows the playing of cutscenes, but nothing ever happens.
- Movie #: Allows you to change the movie number. As usual, decreasing the number causes a crash.
- Play / Stop: Plays or stops the movie.
- Pause / Frame Step: Pauses the movie and advances a frame each time it's selected.
- Quit: Returns to the title screen.
HUD
At almost all times, there are three counters on the left of the screen, with three columns each, and a slash after the number on the second column:
- Gens: Number of generators in the current scene.
- Ptcls: Number of particles in the current scene.
- Child: Child Mode from Japanese version of Pikmin. It indicated if it's activated.
In-game, the number of Pikmin in certain states is written.
- form: Number of Pikmin following Olimar.
- free: Number of Pikmin idling on the field.
- work: Number of Pikmin moving objects or fighting enemies.
- me: Number of Pikmin planted in the ground on the map.
- total: Total number of living Pikmin on the map.
- dead: Total number of Pikmin that have died since the current map was loaded.
- fall: Number of Pikmin that have fallen off the map.
- cont: Number of Pikmin trapped in the mouth of an enemy before death (may be short for "contained").
Slightly below this information is a set of variables related to enemies.
- culled:ai # view #/# shape # (# tekis): The first numbers are related to how many enemies are on-screen. If the numbers are flickering, that means an enemy is close to being on-screen (if you use Free Camera on the actual game, you'll notice that enemies close to being on-screen are only rendered every other frame). The last number is the total number of enemies.
If you're hiding anything, by having pressed. X (V key), the type of thing you hid will appear under the previous line of text with the format "HIDE #", where "#" is the type. The following types exist, and are toggled in order:
- Nothing: If nothing is being hidden, no text appears.
- PIKI: Hides Pikmin, but their idle glows remain.
- TEKI: Hides enemies, but not bosses.
- ITEM: Hides Onions and the Dolphin.
- BOSS: Hides bosses... and Iridescent Flint Beetles, geysers, and Candypop Buds, since those are bosses internally, too.
- PELLET: Hides pellets.
- WORK: Hides task-related objects, like bridges.
- PLANTS: Hides plants.
- MAP: Hides most of the map's geometry. "Water" and some patches of ground remain. Pressing D-Pad Up (A key) hides everything, though.
- 2D: Hides the top two lines of debugging HUD text.
At the bottom, there is a line saying "navi st# y# #/#". Navi is the internal name for the captain. st# describes the state of the captain. y# is the y-coordinate of the captain. #/# is a simplified pikmin counter.
Finally, if you're playing a cutscene, such as landing on an area, you get a "frame = #" counter, and a "movieHeap free = #" counter. The frame counter increases one per frame as the cutscene takes place. The other number probably has something to do with the memory.
If you enable either the "on" or "full" "Timers" (press F2), you get 7 lines at the top, and a framerate counter at the bottom; below the framerate counter is the word "all", some sort of CPU usage bar and a number. The lines at the top are:
- # polys = # pps: The number of polygons being rendered, and likely, the number of polygons it's rendering per second.
- # anims: Number of animations taking place at once.
- # mats: Number of materials in the current viewport.
- # disps: Number of display lists in the current viewport.
- # mtxs: Number of matrices in the current viewport.
- # / # lighting skips / sets: Unknown.
- # light sets: Unknown.
Tools
| To do: Add controls. |
On the "OpenGL / Dolphin System" window, there is a "Tools" menu, with the following options:
- filterDvw
- filterJmp
- AtxServer
- PikiGame
- TexConv
- dmdImportFilter
The options with "filter" in their name don't do anything. PikiGame starts the main game, but if you choose it while it's already running, it crashes.
TexConv opens up a model viewer. This model viewer has a menu with two options, "File" and "View". View doesn't do anything, and as for File, you can either open a TGA texture with it or exit. The window itself has the framerate at the bottom, and "currModel = noneSelected!" at the top upon opening. Opening this also enables the "timers" chart on the game window, same as if you had pressed F2. Using AtxServers 'Node Preview' section, you can load models, create bundles and export models.
AtxServer is a server that allows connections from the other 'plugins' (plugTexConv and plugPiki). If you open AtxServer without creating a direct connection to your localhost using "+direct 127.0.0.1" in the command line parameters when opening sysBootup, it won't work properly. Once opening a plugin, it will connect to the server and, upon clicking the name of the plugin (or "client") will display all current 'Nodes'. This includes, for example, opening model files (dmd), editing them, exporting them, editing the current Pikmin 1 scene by their generation files, etc.
