The Legend of Zelda: The Wind Waker/Unused Rooms/Page Two
This is a sub-page of The Legend of Zelda: The Wind Waker/Unused Rooms/Page Two.
Page 2 of 4.
Contents
Unused Rooms
I_SubAN
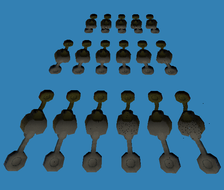
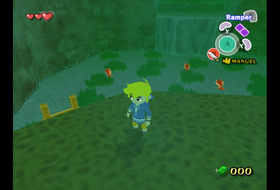
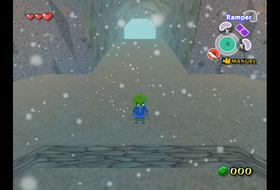
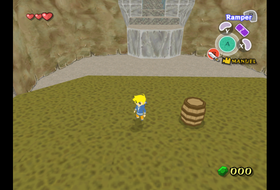
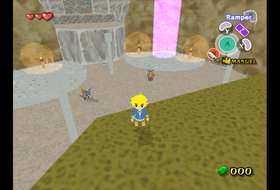
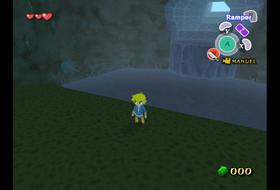
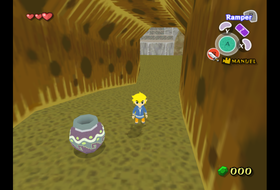
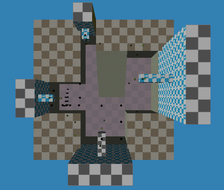
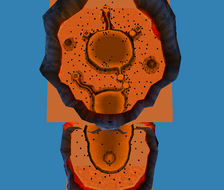
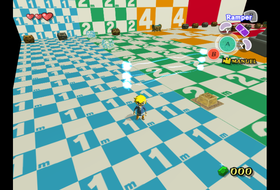
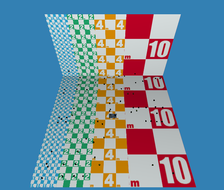
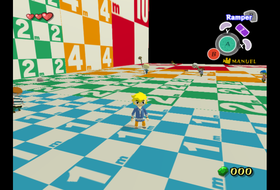
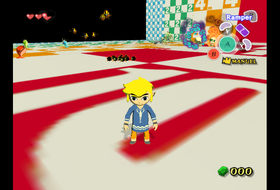
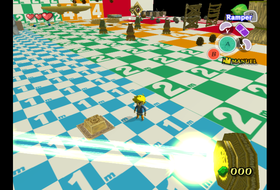
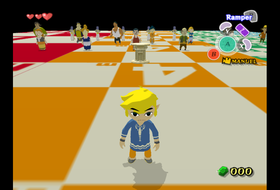
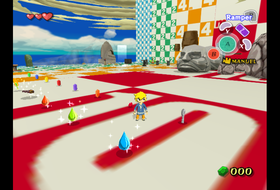
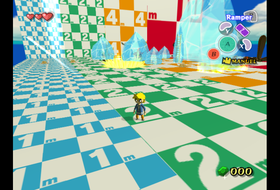
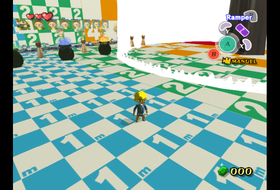
This group contains a total of seventeen unused rooms. They appear to be early versions of grottos, and most of the textures are unused in the final game. Some of these rooms are definitely more interesting than others. No matter what room number, all the rooms use the exact same model as shown above. There is the "starting room". After that you have the "first hallway" which leads into the "center room". After that you have the "second hallway" which leads into the "final room". This terminology will be used to describe the rooms.
Room0:
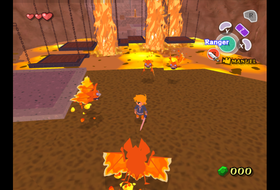
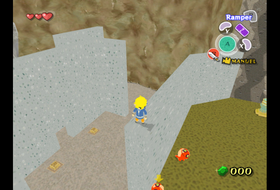
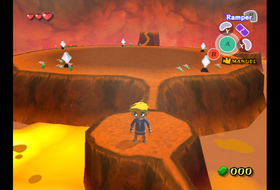
When the room first loads, Link is stuck in a camera sequence and can’t move until the sequence ends. The center room has a lava pit that Link must navigate across using platforms. An endless supply of Fire Keese will attack you every now and then. There is a treasure chest right after the lava pit and it contains the power bracelets. Using the warp near the entrance will bring Link out of Fire Mountain. We can conclude that this room is an early version of the mini dungeon inside of Fire Mountain. A video of this room can be seen below.
Room1:
This room is completely empty and has nothing interesting in it except a warp. Using the warp will take you out Ice Ring Isle.
Room2:
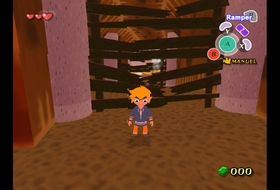
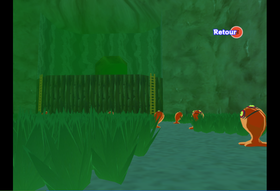
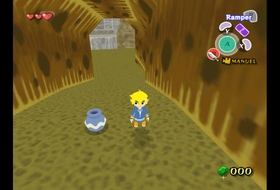
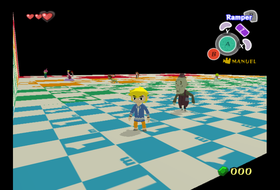
The first room and first hallway have a few small trees that can be cut down. This room’s center is filled with a ton of grass. There are also a bunch of Red ChuChus that will appear in the center of the map. Trying to use the warp to leave the room only crashes the game. Looking into the game's data, it appears that this warp is suppose to lead to a hole on Crescent Moon Isle, of which none exists. Something interesting to note is that a picture of this unused room exists in-game inside of Lenzo's house on the second floor as seen below. If you compare the image below to the second image above then you will see the resemblance.
Room3:
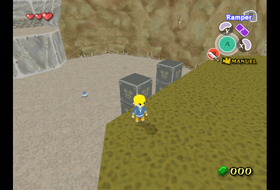
When walking into the first hallway, Link will encounter a Green and a Red Chuchu. In the center room there are two stacks of four movable blocks along with a single lonely pot. Breaking the pot will reveal a purple rupee. Exiting using the warp will take Link out of the hole of Diamond Steppe Island.
Room4:
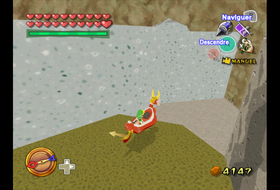
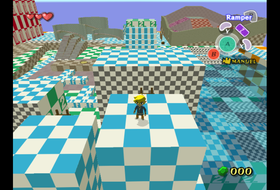
This is the only room out of the group that can have a difficult time loading. Strangely, Link’s starting point is in the first hallway and not near the warp point out of the room. This room contains a ton of test cube models scattered throughout. The room is filled with invisible water up to the second hallway so Link must swim or us his boat to navigate. Trying to leave this room will take Link out of the Islet of Steel so at least the environment inside is consistent with the outside. At the end room there is a treasure chest. What is strange is that this treasure chest seems to be an actor object which is highly unusual as regular chests found in the game aren't actors. This is probably the reason why the game crashes when the room is loaded.
Room5:
This room is almost completely empty except for the warp in the starting room. Using the warp will take you out of the hole on Bomb Island.
Room6:
When Link first enters the room, it will be snowing and it won’t stop until Link reaches the second hallway. In the first hallway there is a fierce gust of wind that prevents Link from traveling down it without the Iron Boots equipped. The wind only affects the first hallway so once Link reaches the center room he can take off the boots. Using the warp will take Link out of the west hole on Star Island.
Room7:
Like Room2, this room is almost completely empty except for a warp in the beginning room. Using the warp will take Link out of the hole on Cliff Plateau Isles where a Korok(Aldo) is growing a tree.
Room8:
There is only one item of interest in this room and it is a barrel. Breaking the Barrel will give Link an orange rupee. Exiting the room using the warp will take Link out of the hole on Rock Spire Isle.
Room9:
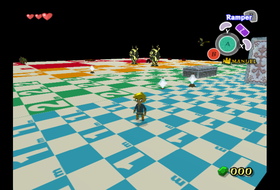
Compared to some of the previous rooms, there is actually something interesting in it. Link spawns in the center room but he is not alone. There are two Bokoblins in the room as well. When Link defeats them, three more Bokoblins will appear in the center of the room. When Link defeats those three, three Kargaroks will fly into the center from one of the hallways, one carrying a Moblin and drop him. When Link defeats those four remaining enemies, a treasure chest will appear containing a heart piece. For some reason, one of the hallways is blocked off by a huge block. Trying to use the warp in the room to exit will crash the game. The warp data says that Link should appear on Angular Isles. The game probably crashes because the spawn point it specifies no longer exists. A video of the room is can be seen below.
Room10:
This room is darker than the other rooms encountered. The only thing in the room worth mentioning is that there is a Wall Moblin in the center room. Using the warp will take you out of the hole on Stone Watcher Island.
Room11:
This is another interesting room. This room has some walls not present in some of the other rooms of this group which can be latched onto using the Hookshot. The walls make the room feel more maze like. The entrance has a Boko Baba and four torches with only one of them lit. Defeating the Boko Baba will give Link a stick which he can use to light the other three torches but nothing seems to happen from doing this. The first hallway contains a few pots, two of which hide Bokoblins that jump out when you get too close. In-between the first hallway and the center room there two Red ChuChus and a weight. In the center room there are six more Red ChuChus along with a second weight. There are also three button switches. Two of which can be pressed using the weights. The third button is guarded by a ring of fire which can be deactivated by shooting an eye. This will cause a ladder to drop down allowing Link to reach the second hallway. This hallway has a ton of cubes blocking the way making it impossible to get through without cheating. There is also a Moblin in this hallway and defeating him will, for some reason, cause a small camera sequence to happen that doesn’t do anything. Using the warp in the starting room will take Link out of the hole on Overlook Island. A video is shown below.
Room 12:
When walking down the first hallway there is a single small lone pot. Smashing it will release a fairy. This room is the only room in the group to have two warps in it. One of the warps will take Link out of the hole on Bird's Peak Rock while the other will take you out of the hole on Thorned Fairy Island.
Room13:
Similar to Room12, there is a single lone big pot in the first hallway and nothing else. Smashing the pot will give Link a fairy. The warp takes you out of the hole on Eastern Fairy Island.
Room14:
This room only contains a warp which will take you out of the hole on Western Fairy Island.
Room15:
This room only contains a warp that will take you out of the hole on Southern Fairy Island
Room16:
This room has a slightly different starting position for Link but like the two rooms before, it only has a warp. Using the warp will take Link out of the hole on Bird's Peak Rock.
I_TestM
A duplicate of Amos_T. Interestingly, I_TestM uses a BDL rather than a BMD; considering the fact that Amos_T uses a BMD, this could suggest that I_TestM was generated some time after Amos_T.
I_TestR
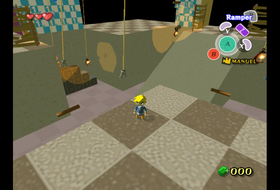
This area was used to test rope swinging physics. Oddly, some of the ropes are actually the Grappling Hook. There are also wooden posts from which Link can use his Grappling Hook on. Besides the ropes, there are lots of breakable wooden barriers in this level along with bomb flowers and some blocks that Link can push around. A video is shown below.
ITest61
Early versions of two rooms in the Bomb Island cave. Hitting the crystal switches with the Boomerang causes a chest to appear; however, it seems that the chest's contents were never finalized, as it contains a green rupee.
K_Test2
This map was primarily used to test treasure chests, but it also contains one of the knight statues from Hyrule Castle's basement and an electrical fence paired with a switch; stepping on the switch deactivates the fence.
K_Test3
K_Test4
K_Test4
K_Test5
K_Test5
Seems to have been used to test dungeon-specific puzzles. Among the objects loaded are the scales from the Tower of the Gods, Beamos, a laser gate, an eye switch, wooden grates, and Skull Hammer piles.
K_Test6
K_Test8
K_Test8
K_Test9
K_Test9
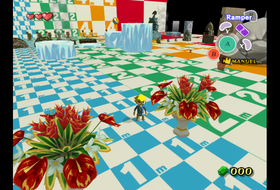
Interactive objects were tested in this map. The objects found here include the icebergs from Ice Ring Isle, the plants from the Auction House, the Headstone that requires the Power Bracelets to lift, and two statues that can be dissolved by a beam of light.
Another object testing area, which seems to focus more on switches. Eye switches mounted on platforms, Skull Hammer switches, the Wind Shrines from Dragon Roost Island, and the platforms from the teleportation room in the Tower of the Gods are among the things that can be found here.
K_Testb
K_Testb
Yet another character testing map. It seems to be geared more towards Windfall Island NPCs.
K_Testc
K_Testd
K_Testd
K_Teste
K_Teste
Contains the waterfall effects from the final boss and several pieces of the Forsaken Fortress, plus warp pots, the boss mural from the second room of Ganon's Tower, the wall puzzles from Link's Oasis, and the hatch that leads to the Nintendo Gallery. Entering the warp pots freezes the game, as does interacting with the wall puzzles.
