This is a sub-page of Proto:Sonic the Hedgehog 2 (Genesis)/Simon Wai Prototype.
General Differences
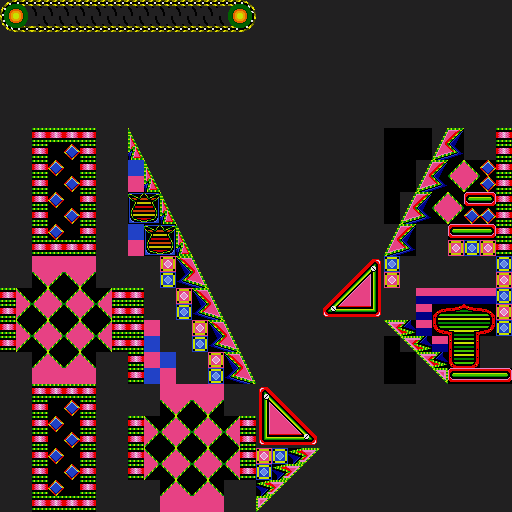
- There are no objects at all in the Simon Wai layout. This includes the objects that make the triangular bumpers, conveyor belts, and loops work.
- For some very odd reason, there are two different palettes defined and used for each act. However, they are identical between acts. Casino Night is the only zone to do this.
- The starting positions for Sonic and Tails are taken from Emerald Hill. This leads to the player(s) spawning slightly above the ground in Act 1 and way above the ground in Act 2. Other unused zones in both the prototype and the final use EHZ's start positions, indicating the stage had just barely been added.
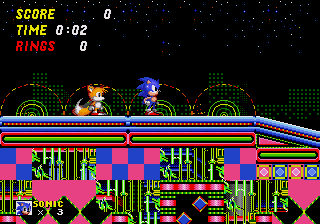
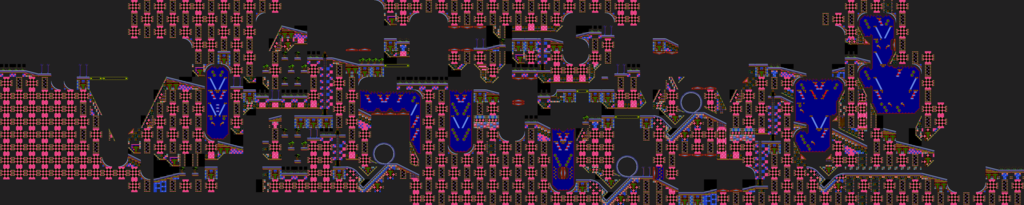
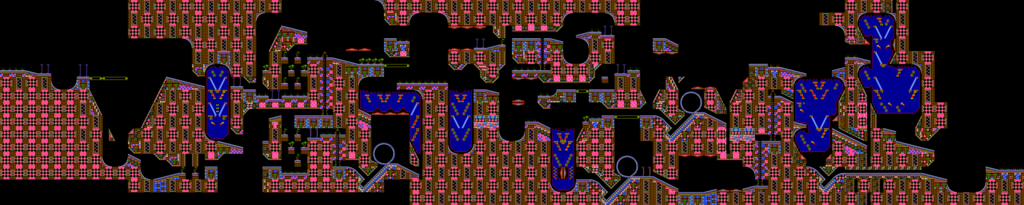
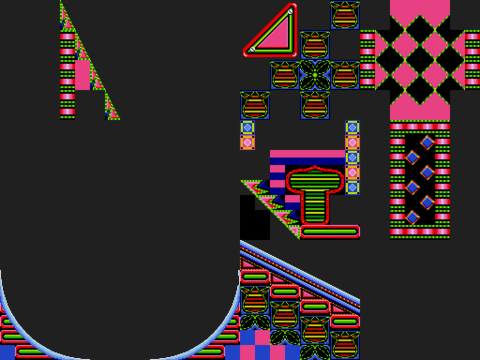
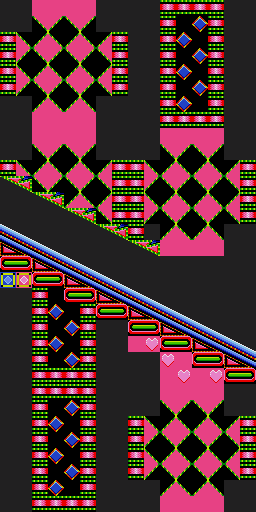
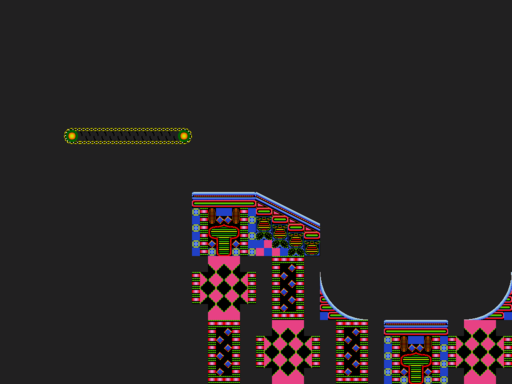
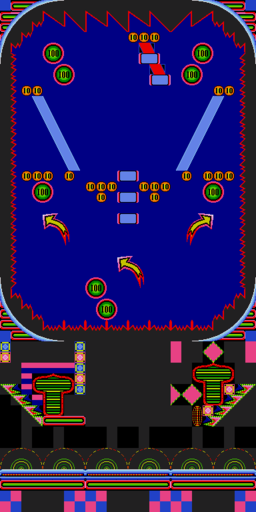
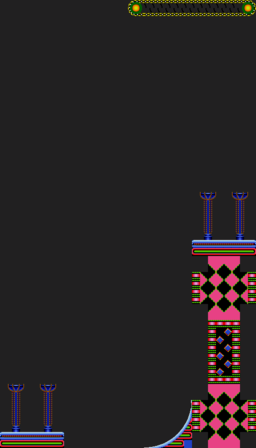
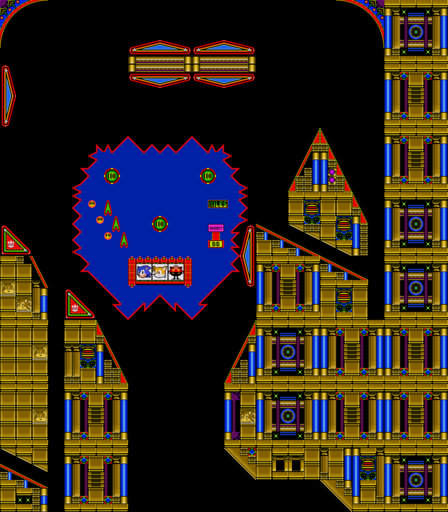
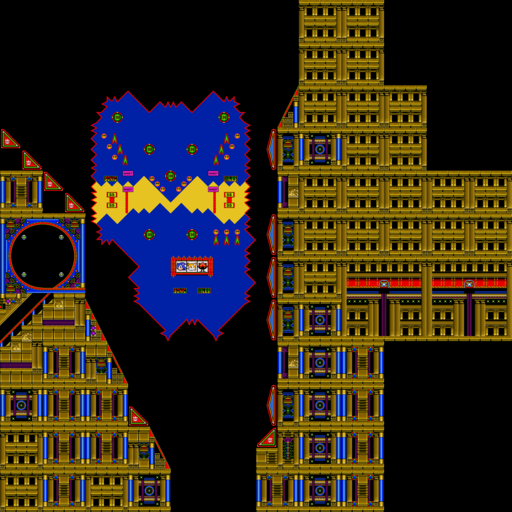
- There are certain 16×16 blocks that call for animated tiles in range 3E8-3F7 in the Simon Wai version, but no animated tiles are loaded to those slots. Those blocks will either be blank (if accessed from the Level Select before any demo plays) or use whatever tiles were loaded in VRAM from the previous Zone (as seen above, where the tiles come from Hill Top).
- The pink diamond blocks and would-be animated blocks aren't solid at the top. Since these are frequently used in floor chunks, this is a bit of a problem.
| Simon Wai - August 21st |
September 14th onward |
|---|
 |
 |
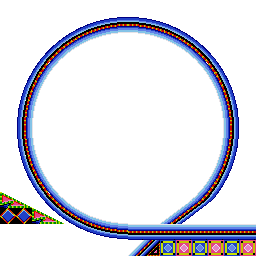
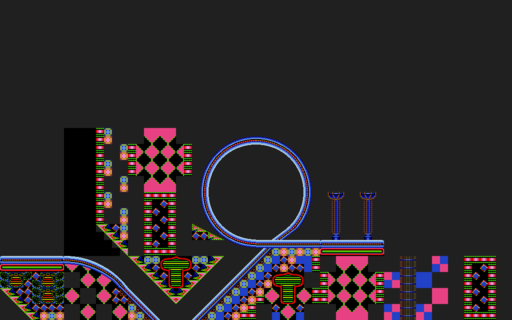
- In the Simon Wai version, the loops are very thin. The top of the loops have spotty collision in the prototype that doesn't match the actual art; the final version fixes this by adding a solid flat surface to the top of the loop. This also let the developers add objects like monitors and springs to the loop tops.
- There are odd black squares (Block 84) that are used in certain chunks. While most of these seem to be arbitrarily placed, the ones in chunk 15 mark where the pinball plungers should be.
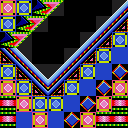
- There are a number of chunks in both Acts that are a few bits off from what they should be. For instance, blocks 0C and 0D should be placed next to each other to form a half-pipe. In Act 1, the first half-pipe is instead made of two 0C chunks.
| Simon Wai - August 21st |
September 14th onward |
|---|
 |
 |
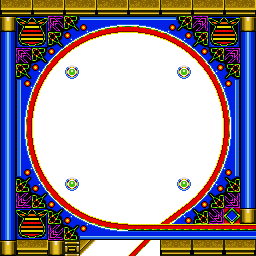
- Though there is a 128×128 chunk that would be used for a slot machine at 60, slot machines have yet to be placed in the Zone proper. The animated tiles are also defined differently:
- In the Simon Wai version all three icons use the same animated tiles, 2F4-2F7. So, if the machines were implemented, all three slots would display the same icons and scroll at the same speed.
- In later versions, icon 1 uses tiles 2EC-2EF, icon 2 uses tiles 2F0-2F3, and icon 3 uses tiles 2F4-2F7.
Graphical Differences
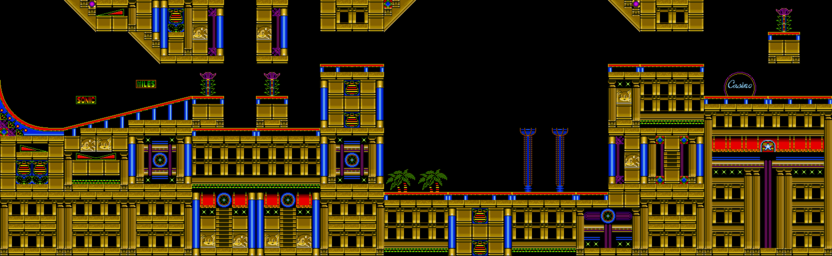
The Zone went through a radical makeover after the Simon Wai build; stage artist Yasuchi Yamaguchi (Judy Totoya) stated that he redesigned it after Rieko Kodama (Phenix Rie) finished working on it since Kodama was unfamiliar with how casinos looked, and felt the atmosphere was lacking.
It would be easier to just write "everything" here, but a few of the more notable differences are detailed below.
| Simon Wai proto
|
August 21st proto
|
September 14th onward
|
|
|

|
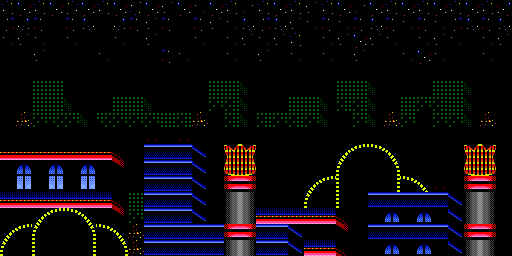
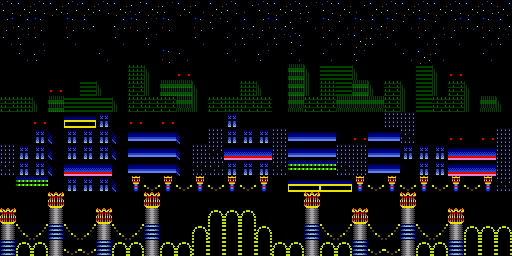
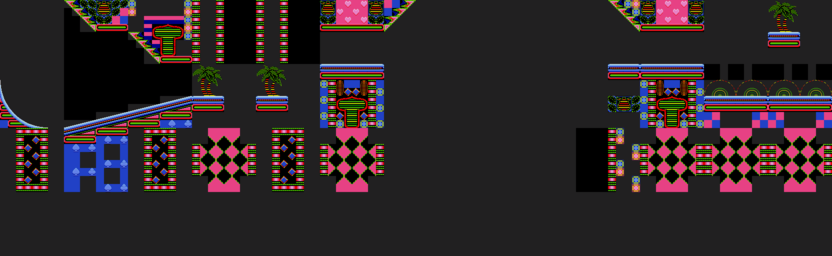
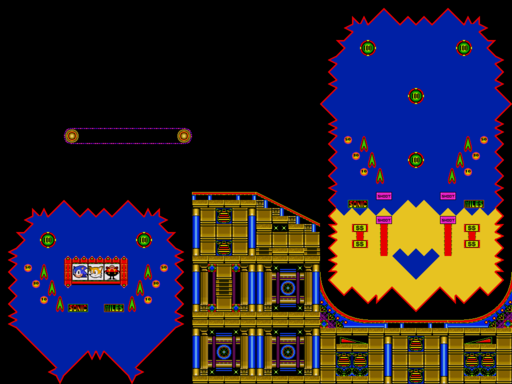
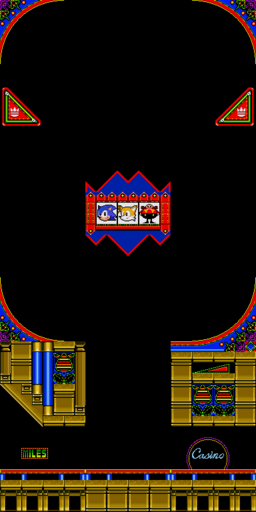
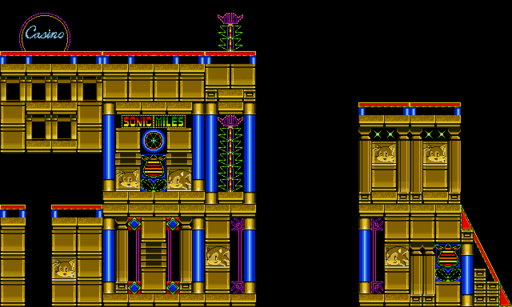
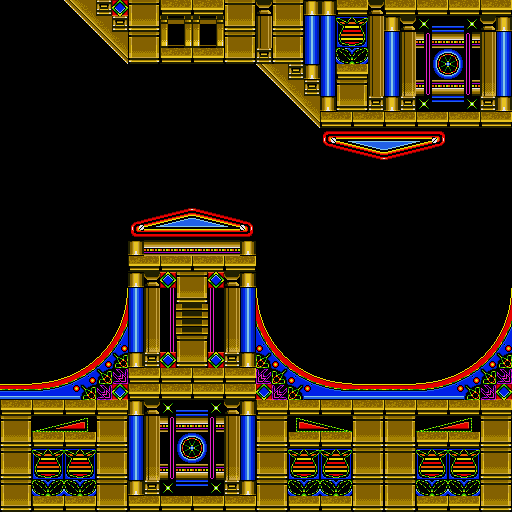
The background in Act 1 is completely different between versions.
| Act 2 (Old Chunk Set) |
Act 2 (Old Chunk Set with Corrected Stars) |
|---|
 |
 |
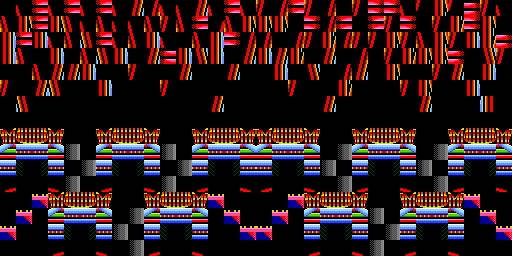
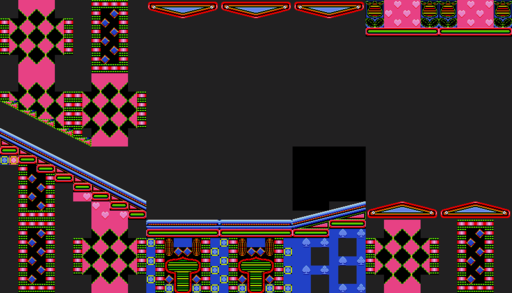
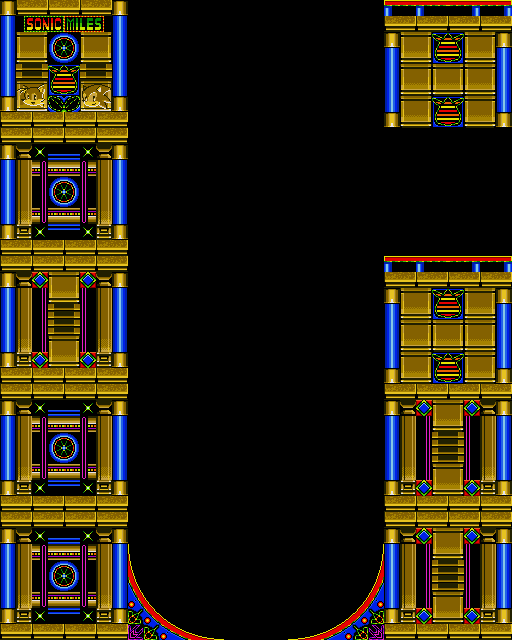
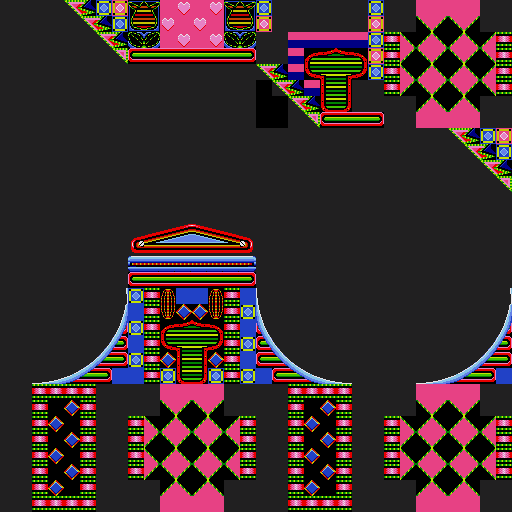
The background in Act 2 is incorrectly defined. It should be using chunks B1-B8, but it uses chunks 8B-92 instead. This appears to be a remnant from the older chunkset, as when restored the general outline of stars and a heart at the bottom are shown. The only tiles related to this version that survived are likely the stars which are currently used in Act 1's background.
| Simon Wai - August 21st
|
Fixed version
|
September 14th onward
|

|

|

|
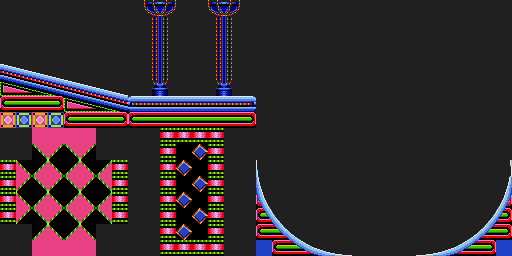
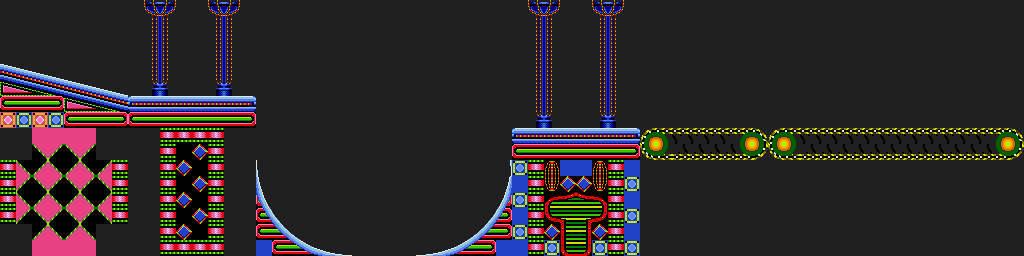
The conveyor belts are thicker in the Simon Wai version. There are strange black lines attached in the middle of the belt that were removed from the later versions.
| Simon Wai - August 21st |
September 14th onward |
|---|
 |
 |
The insides of the triangle bumpers are more detailed in the final design.
| Simon Wai - August 21st |
September 14th onward |
|---|
 |
 |
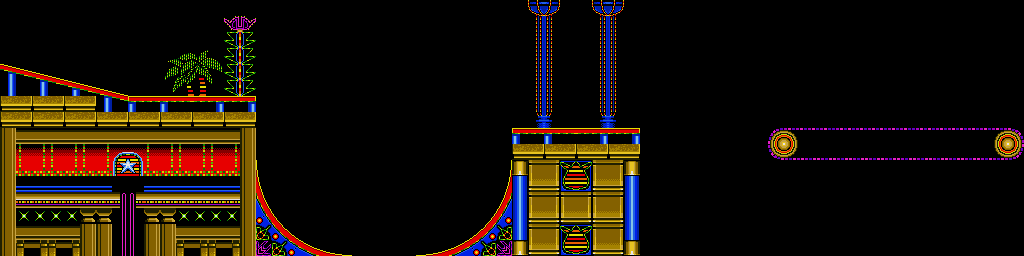
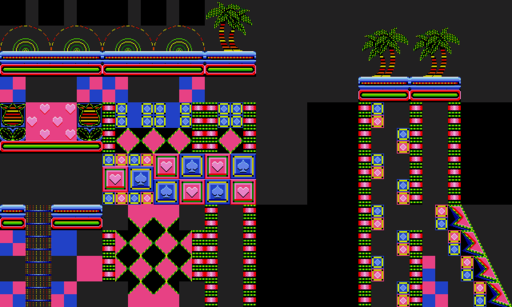
The neon palm trees are 16 pixels higher in the earlier prototype.
| Simon Wai - August 21st |
September 14th onward |
|---|
 |
 |
There are more lights at the top of the elevator tubes in the earlier design.
| Simon Wai - August 21st |
September 14th onward |
|---|
 |
 |
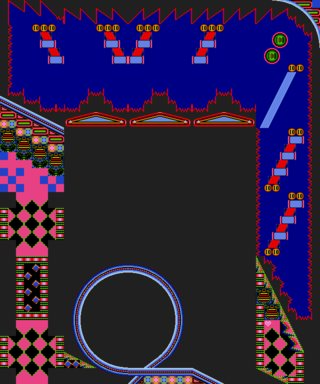
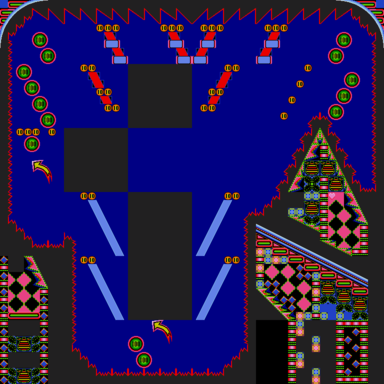
Arrows were added to the large 100 lights that all point to the center. The 100 graphic is centered differently in both versions.
Act 1
Full Maps
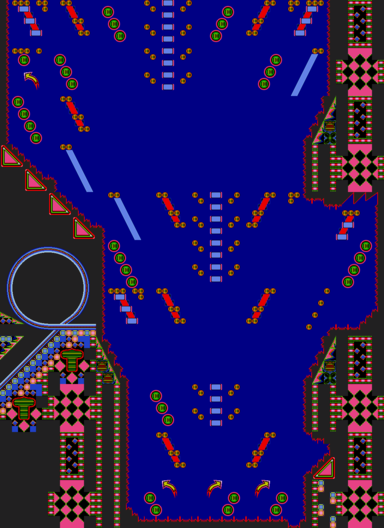
| Simon Wai proto |
|---|
 |
| August 21st proto |
 |
| Simon Wai proto (in-game) |
Simon Wai proto (fixed) |
|---|
 |
 |
- As mentioned previously, the right part of the half-pipe is incorrectly assigned chunk 0C instead of the correct chunk, 0D.
| Simon Wai proto |
|---|
 |
| Beta 4 |
 |
- Besides that error, the Simon Wai prototype has an additional, smaller conveyor belt to the left of the longer one.
| Simon Wai proto (in-game) |
Simon Wai proto (fixed) |
|---|
 |
 |
- The chunk in the upper-left corner is chunk 5A. It should be chunk 5C instead, an isosceles bumper that fits better with the layout and matches its position in the later versions.
| Simon Wai proto |
Beta 4 |
|---|
 |
 |
- A big slot table was put in this area in later layouts.
- The chunks that make up the triangular bumper and the ground below extend further to the left in the Simon Wai version.
- The slope underneath those chunks is steeper in the earlier prototype.
| Simon Wai proto |
|---|
 |
| Beta 4 |
 |
- The Simon Wai version is missing an important component: The floor. Floors are generally good additions to platform games.
| Simon Wai proto |
Beta 4 |
|---|
 |
 |
- There's an extra way to get to the upper path in the Simon Wai version. Most of that area was filled in afterwards.
- Three more isosceles bumpers were placed above the elevator tube.
| Simon Wai proto |
Beta 4 |
|---|
 |
 |
- More solid wall chunks were added above the loop. Walls can be used in conjunction with floors.
- The pinball background pieces were taken out of the later layouts.
- The slope in the upper-left was replaced by another isosceles bumper.
| Simon Wai proto (in-game) |
|---|
 |
| Simon Wai proto (fixed) |
 |
- One of the isosceles bumper chunks (4D) is using the incorrect ID (4C).
| Simon Wai proto |
Beta 4 |
|---|
 |
 |
- Neither of the slot tables are present in the Simon Wai version.
- Another triangular bumper was placed at the bottom-center.
| Simon Wai proto (in-game) |
Simon Wai proto (fixed) |
|---|
 |
 |
- The tube ceiling in this area should use chunk 9D, not chunk 9C.
| Simon Wai proto |
Beta 4 |
|---|
 |
 |
- The flat ground in this area was replaced by more isosceles bumpers.
- A triangular bumper was placed above the first isosceles bumpers.
| Simon Wai proto |
Beta 4 |
|---|
 |
 |
- In the Simon Wai version, there's one massive pinball table in this area. The later versions split them up into a small table at the top and a larger table at the bottom.
- Another isosceles bumper was added to the lower-right corner.
Act 2
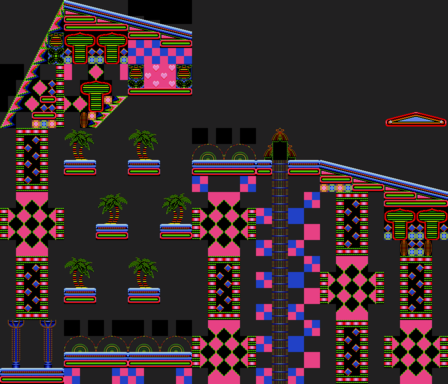
Full Maps
| Simon Wai proto |
|---|
 |
| August 21st proto |
 |
| Simon Wai proto |
Beta 4 |
|---|
 |
 |
- Later versions add a slot table on the left and a pinball table on the right.
| Simon Wai proto |
Beta 4 |
|---|
 |
 |
- The ground to the left of the loop is two chunks higher in later builds.
- A quarter-pipe was placed on the right edge of the area.
| Simon Wai proto |
Beta 4 |
|---|
 |
 |
- Two triangular bumpers were added to the top of this area.
- The big pinball table was changed to a tiny slot machine.
- The sloped ceiling in the bottom-right was flattened in later versions.
| Simon Wai proto |
Beta 4 |
|---|
 |
 |
- The first half of the conveyor belt at the top was changed to a standard solid floor. The second half was deleted entirely.
| Simon Wai proto |
Beta 4 |
|---|
 |
 |
- The floor on the right is at a higher elevation in the Simon Wai version.
| Simon Wai proto |
Beta 4 |
|---|
 |
 |
- The later layouts add a slot table here, and six isoceles bumpers above that table.
| Simon Wai proto |
Beta 4 |
|---|
 |
 |
- The ceiling chunks in the upper-right corner were removed from later versions.
| Simon Wai proto |
Beta 4 |
|---|
 |
 |
- The extra ceiling chunk in the exit on the right was deleted.
| Simon Wai proto (in-game) |
Simon Wai proto (fixed) |
|---|
 |
 |
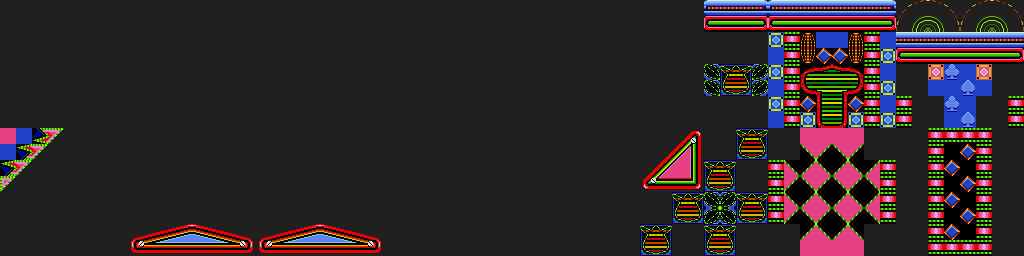
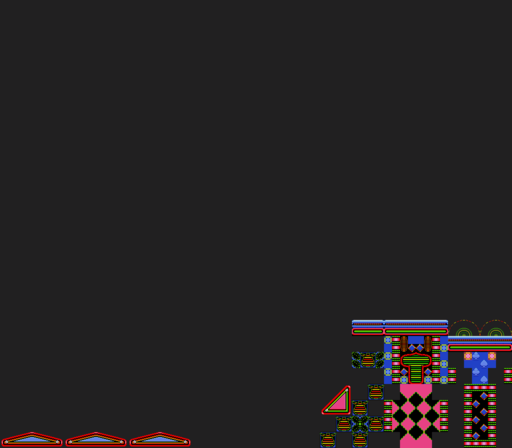
- The giant pinball tables later in Act 2 have a number of empty spaces in the Simon Wai version. This is not by design: The Simon Wai prototype is trying to use chunks D0 and D1, which aren't defined. It should be using chunks C0 and C1, which are properly defined and fit in those blank spaces perfectly.
| Simon Wai proto |
Beta 4 |
|---|
 |
 |
- Said pinball table was reduced in size and changed to a slot table after the Simon Wai prototype. More isosceles and triangle bumpers were placed to fill up the empty space.
- The slopes underneath the table are steeper in later versions.
| Simon Wai proto |
Beta 4 |
|---|
 |
 |
- There's an extra ceiling piece above the second half-pipe in this area. That piece makes actually exiting the half-pipe considerably more difficult. It was removed in later layouts, and an isosceles bumper was added above that half-pipe.
| Simon Wai proto (in-game) |
Simon Wai proto (fixed) |
|---|
 |
 |
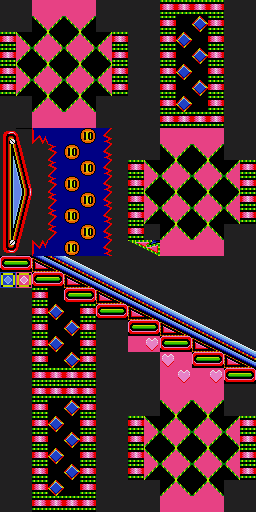
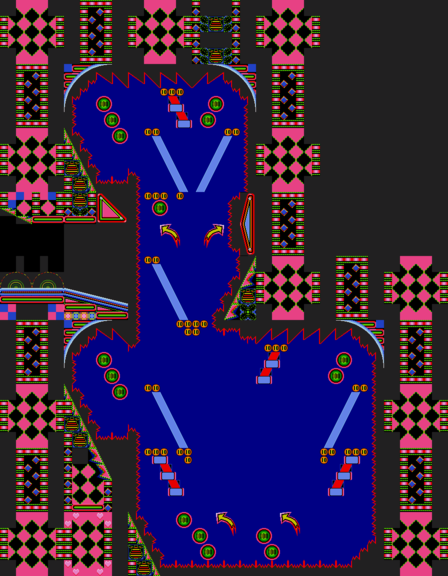
- This is the most noticeable of the misassigned chunks in the Simon Wai prototype: That version tries to use chunks D0-D9 here, when it should be using C0-C9. Changing those chunks leads to a much better-looking pinball table and adds triangle bumpers to the left side.
| Simon Wai proto |
Beta 4 |
|---|
 |
 |
- The gigantic pinball table was considerably reduced in size in later versions of the Act, and was changed to a slot table to boot.
- There's an extra path in the middle-right that was removed from later layouts.
- Five isosceles bumpers were placed on the right wall.
- The gently-sloping platforms at the bottom were replaced with steep slopes in later builds, making it more difficult for the player to get back to the top of the table.


