Proto:Pokémon Gold and Silver/Spaceworld 1997 Demo/Maps/Interiors
This is a sub-page of Proto:Pokémon Gold and Silver/Spaceworld 1997 Demo/Maps.
Contents
- 1 Global Maps
- 2 Silent Hill
- 3 Old
- 4 Route 3
- 5 West
- 6 High-Tech
- 7 Font
- 8 Birdon
- 9 New Type
- 10 Sugar
- 11 Blue Forest
- 12 Stand
- 13 Kanto
Global Maps
Pokémon Center
1F
| Generation I | SpaceWorld '97 | Early | Final |
|---|---|---|---|
|

|
|
|
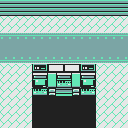
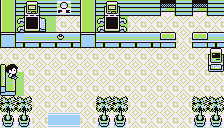
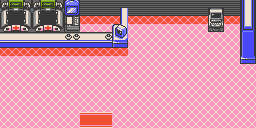
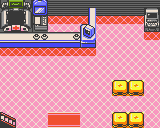
The Pokémon Center's lower floor is larger than even Generation I's, though its overall layout and aesthetics are quite similar to the release game's version. The demo's version features no chairs for NPCs to sit on, a second healing machine to the west of the first, and a small partition separating the PC from the rest of the room. The monitor connected to the healing machine has a slightly different design, sporting a squared-off top in the demo rather than the rounded top seen in the final. The demo's floor tile pattern is more complex, alternating between blank diamonds and diamonds containing a square; the final version simplifies this to just blank diamonds. The floors and counters lack shadows in the demo.
Notably, an unused early version of the Pokémon Center's map also exists in the final game. This version is almost identical to the demo's, lacking the staircase up to the Cable Club and the removal of the partition wall to the west of the PC.
2F - Cable Club
| SpaceWorld '97 | Final |
|---|---|
|
|
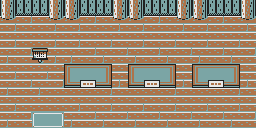
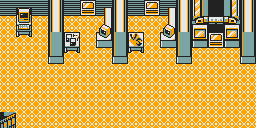
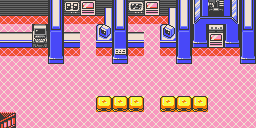
The Cable Club is much closer to the final product, though it reflects the same aesthetic differences as its lower floor. The PC to the left is standalone in the demo, but was integrated into a new section of the counter in the final version. The demo's Trade Center and Colosseum signs are free-standing and placed to the west of each room's attendant - in the final map, the signs have been redesigned and placed on a wall behind their respective counters, with a new short section of counter replacing their original positions. The pillar between the Trade Center and Colosseum counters is blank in the demo - in the final, an extra sign is positioned here. While the southern portion of the room is completely empty in the demo, the final version fills the space with two rows of seating.
Finally, the Time Capsule has a different design in the demo, featuring more glass and less visible machinery than the final game's design.
Trade Center
| Generation I | SpaceWorld '97 | Final |
|---|---|---|
|

|

|
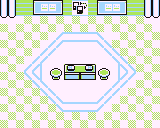
The overall design of the room closer resembles the Generation I games than the final version. The table has been redrawn but retains a near-identical design, and the accompanying chairs still use their Generation I graphics. The flooring has also been redrawn - the dark floor tiles are now a solid color rather than dithered, the dark and light tiles have swapped places, and the areas missing the checkerboard pattern above the terminal area have been cleaned up. The large pattern in the center of the floor more closely resembles the final game - unlike in Generation I, a hexagonal-shaped pattern identical to the Colosseum's is used, and a logo depicting two linked Game Boys has been added to the north of the table. The north wall in the demo resembles neither the earlier games nor the final, using a design which looks like a row of windows.
Colosseum
| Generation I | SpaceWorld '97 | Final |
|---|---|---|
|

|
|
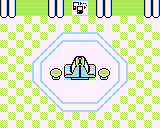
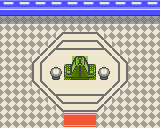
The Colosseum exhibits most of the same aesthetic differences as the Trade Center, though unlike the Trade Center's table the Colosseum's machines still use their Generation I design. The only additional difference of note is that unlike the Generation I games or the final version, the demo's version of the room displays a "VS." symbol to the north of the table in the same spot as the Trade Center's icon of two linked Game Boys. While this would have maintained consistency between the two rooms, the icon becomes difficult to read when viewed with the Super Game Boy palette assigned to this room. The final game opts to drop the icon entirely.
Time Capsule
| Generation I Pokémon Center | SpaceWorld '97 | Final (unused tiles, mockup) | Final |
|---|---|---|---|

|

|
|

|
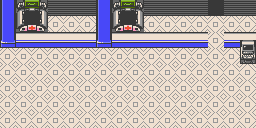
The demo boasts a unique interior for the Pokémon Center's Time Capsule, based on Generation I's Pokémon Center interior. Compared to the original, the map is larger but emptier, lacking the entrance mat, potted plants, and seating present in the original. The demo's healing machines use the updated designs seen in the demo and the final game, as opposed to the Gen I design. The floor pattern looks the same as the Gen I games, though the pattern's horizontal position is shifted by 8 pixels compared to the original.
In the final game, the Time Capsule interior reuses the normal Trade Center. However, the tiles used to construct the map still exist within the final game's Pokémon Center tileset, so it's possible to mock up how the room may have looked had it survived into the final version.
Poké Mart
| Generation I | SpaceWorld '97 (correct width) | SpaceWorld '97 (incorrect width) | Final |
|---|---|---|---|
|

|

|

|
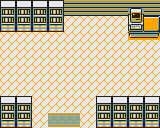
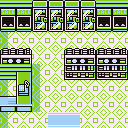
The Poké Mart looks quite different in this build, with elements such as the freezer cabinets and shelving resembling the Gen I games' design, though they almost all have been redrawn. The flooring pattern is unique to this prototype, with a checkerboard pattern. As with the Pokémon Center's lower floor, the demo's Poké Mart map is wider than either the Gen I games or the final version, though the overall layout resembles a larger-scale version of the layout seen in the final version.
Some of the Poké Mart maps in this build have too small a width defined, resulting in the map data displaying incorrectly, such as in Old and High-Tech, while others have the correct width defined and display properly, such as in Font and Birdon, which suggests the map may have been recently redesigned at the time this demo was built. The incorrect width matches the width of the final game's Poké Mart map.
Vertical Gate
| SpaceWorld '97 | Final (SGB) | Final (CGB) |
|---|---|---|
|

|

|
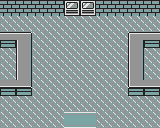
The layout is identical to the final, though the overall visuals differ. Only the Gate carpet remains the same.
Silent Hill
As with its exterior, some of the interiors in Silent Hill closely resemble those found in the final's New Bark Town.
Player's House
1F
| SpaceWorld '97 | Final |
|---|---|
|
|
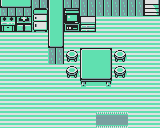
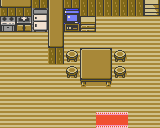
The ground floor of the player's house is identical to the version found in the final game's.
2F
| SpaceWorld '97 | Early | Final |
|---|---|---|
|

|

|
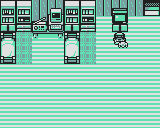
The upper floor of the player's house has many differences compared to the final version. The demo's map is larger, matching the size of the lower floor. There are multiple beds positioned to the north of the room - the single bed present in the final version is positioned in the southwest corner instead. Multiple bookshelves line the top wall, with a PC and radio between them and a TV to the east. All but one of the shelves have been removed in the final version, and the PC, Radio, and TV have been rearranged and grouped together. The Nintendo 64 in front of the TV is also removed in the final - this instead became an optional feature using the room decoration system present in the final game, and could also be swapped for a number of other Nintendo consoles. The final version also adds a Town Map and a table, neither of which are present in the demo - these added features also make use of the final game's decoration system, allowing players to place Pokémon dolls on the table and to swap the Town Map for a variety of Pokémon posters.
An unused early version of the map also exists in the final game, showing an interim state between the demo and final versions. Though the early version is largely similar to the final, like the demo's version it lacks the Town Map on the north wall. The bookshelves and radio also use tile arrangements more similar to those from the demo than the ones seen in the final. The table has been added, but it's positioned along the north wall rather than in the southeast corner of the room, meaning the shelves and other items to the north are positioned differently to accommodate it.
House
| SpaceWorld '97 | Final |
|---|---|
|
|
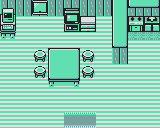
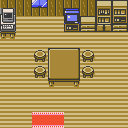
The rival's house in Silent Hill resembles Prof. Elm's house from the final New Bark Town. The demo's map is slightly larger, including a kitchen on the right side, mirroring the player's house. The final version removes the kitchen and the space it occupied, and replaces the now-redundant partition wall with a couple of bookshelves instead. The size and shape of the window on the north wall also changes between the two versions, with a large square window present in the demo and a small rectangular one present in the final. Finally, in the demo version the entrance mat is centered horizontally, while the final map moves it slightly off-center and to the west.
Silent Hill/New Bark Town Laboratory
| Generation I | SpaceWorld '97 | Final |
|---|---|---|
|
|
|
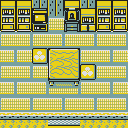
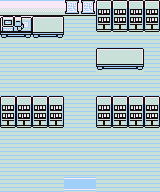
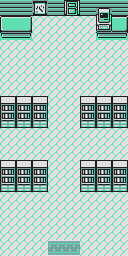
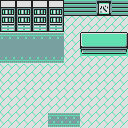
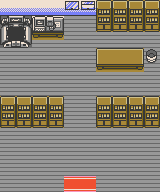
Silent Hill's laboratory is much larger than New Bark Town's laboratory, but similar in design to Generation I's Pallet Town Lab. The starter Pokémon selection area is split off into its own back room area, accessed through a door in the north wall of the map. The demo maps use a diagonal brick-patterned floor, as opposed to the floorboards seen in Generation I, and the bookshelves and tables are redrawn.
Interestingly, the final version's equivalent more closely resembles the Pallet Town laboratory from Generation I, featuring an almost identical layout and even reverting to the Generation I graphics for most elements. The only major differences between the two are the addition of a trash can to the right of the starter Pokémon table, the addition of a Generation II-styled healing machine in the northwest corner, and the two wall scrolls being swapped for a closed and an open window - the latter to aid the final game's narrative, as it allows the player's rival to steal a starter Pokémon without being seen by the Professor or one of his aides.
Unused Map 13
The 13th map of the Silent Hill map group is not used. There are an absurd number of 202 NPCs located here, the result of the game reading garbage data. Additionally, there are two garbled blocks that are unique to this area.
The map's filename in the leaked source files is "OOKIDO03", meaning it was related to Prof. Oak; but how is unknown.
Old
Gym/League Building
| Map LE_01.MAP |
NPC Events |
|---|---|
|

|
| To do: Info needed. Explain why the gyms are called leagues |
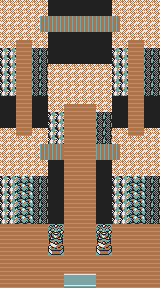
The first gym is located in Old City.
Five Story Pagoda
| 1F | 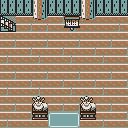
|
|---|---|
| 2F | 
|
| 3F | 
|
| 4F | 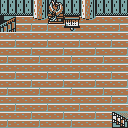
|
| 5F | 
|
While the final game has three Buddhist-style pagodas, only one can be found in the prototype region.
Treasure House
This map is used for the building near the pagoda. It appears to be a treasure house, a temple building used to store ancient relics.
Traditional House
| Spaceworld '97 | Final |
|---|---|
 |
 |
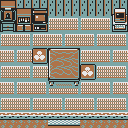
The traditional-styled houses, seen in Old and Sugar in the demo, and Violet and Ecruteak City in the final. The carpet's larger in the final game, the PC was replaced with another bookshelf, and the TV was swapped for a radio. This map's block data is internally known as OLD01.MAP.
Kurt's House
| Spaceworld '97 | Final |
|---|---|
 |
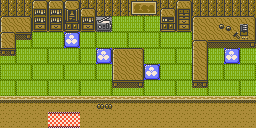 |
Fundamentally the same as the final, but with Kurt's workstation on the left side rather than the right.
Schoolhouse
| Spaceworld '97 | Final |
|---|---|
 |
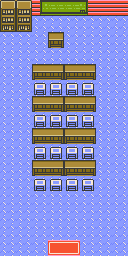 |
The school in Old lines up with Earl's Academy in Violet City. Lacks any chairs for the students to sit in.
Bill's House
A variation of the traditional house interior, with a different arrangement of blocks in the top row. It's occupied by Bill in-game. Notably, a Virtual Boy is present.
Route 3
Game Room
This interior is for the house found in the middle of Route 3. The map features two Nintendo 64 consoles, each hooked up to a TV. In-game, an aide is found here. The internal map name is GAME; this, combined with the presence of Nintendo 64s, indicates that this building might have been a game room.
West
Gym/League Building
| Map LE_02.MAP |
With NPCs |
|---|---|

|

|
| To do: Info needed |
The second gym is located in West City.
Radio Tower
| 1F | 
|
|---|---|
| 2F | 
|
| 3F | 
|
| 4F | 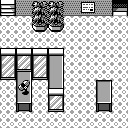
|
| 5F | 
|
High-Tech
Gym/League Building
| Map LE_03.MAP |
With NPCs |
|---|---|

|

|
| To do: Info needed |
The third gym is located in High-Tech.
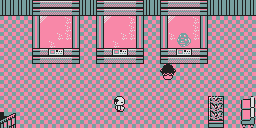
Aquarium
| Map | NPC Events | |
| 1F | 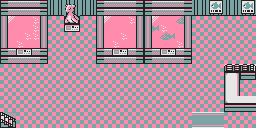
|

|
| 2F | 
|
|
| To do: Add description. |
Font
Research Center
A laboratory that can be found in Font.
Birdon
Gym/League Building
| Map LE_04.MAP |
NPC Events |
|---|---|
|

|
| To do: Info needed |
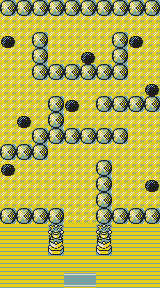
The fourth gym is located in Birdon.
Lottery Shop
This map's internal name, FUKUBIKI (lit. "lottery"), reveals that the Lucky Number Show was once a regular lottery shop. No NPCs are present here.
Fuji's House
Another variation of the traditional interior map with different arrangement in furniture. This house is occupied by none other than Mr. Fuji; we can infer that it's him because the map's internal name is FUJI. Since Team Rocket was seemingly still planned to invade Slowpoke Well at this stage of development, it's possible Fuji would've had a role similar to Kurt in the final game.
New Type
Gym/League Building
| Map LE_05.MAP |
NPC Events |
|---|---|

|

|
| To do: Info needed |
The fifth gym is located in New Type.
Fighting Dojo
| Map KAKUTOU.MAP |
NPC Events |
|---|---|

|

|
| To do: Info needed. |
Sugar
Glitched School
| In-game Map | Source Map TRAINE02.MAP |
|---|---|
|
|
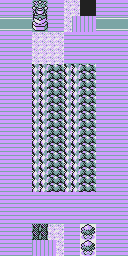
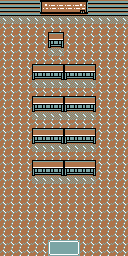
This map, located in Sugar, was intended to be another schoolhouse. However, in-game it appears glitched, due to it using the League blockset. It is also not compatable with the correct school blockset used in this demo, which is also used for the tower in Old. The reason for this is because the map is actually TRAINE02.MAP, which was created when the maps for league buildings and schools used the same blockset/tileset.
Blue Forest
Gym/League Building
| Map LE_06.MAP |
NPC Events |
|---|---|
|

|
| To do: Info needed |
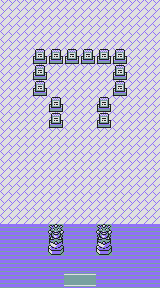
The sixth gym is located in Blue Forest. Notably, the fourth and sixth gyms seem to have had their types swapped during development, as Birdon's gym is full of rocks, while Blue Forest's has tombstones.
Stand
Gym/League Building
| Map LE_07.MAP |
NPC Events |
|---|---|

|

|
| To do: Info needed |
The seventh gym is located in Stand.
Daycare
| SpaceWorld '97 | Final (Unused) |
|---|---|
|
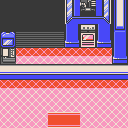
|
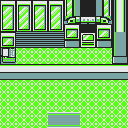
Some sort of laboratory using the Pokémon Center tileset, and occupied by a Nurse, can be found in Stand. This map can actually still be found in the final games, going unused, though this actually still brings some light as to its purpose. Indeed, leaked source code shows the map's filename is "KOSODATE", which literally translates to "raising children", suggesting that this building may have been the original iteration of what later became the Pokémon Day Care.
Safari Zone Office
What appears to be the office building for this town's Safari Zone. Its block data is internally named SAFARI.
Kanto
Red's House
As noted in the City Comparisons section, what appear to be the interiors for Red's house are linked to the eastmost building in Pallet Town, which is Blue's house in Generation I and the final game. Without the events and scripts for the area, there's no way of knowing if this was an error or an intentional change. For simplicity's sake, the tables below compare these maps with Red's house from Generation I and the final game.
1F
| Generation I | SpaceWorld '97 | Final |
|---|---|---|

|
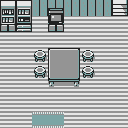
|

|
The ground floor of Red's house is largely the same as the final version, with even Red's mother in the same place as the final game's. Both the demo and final version use a wooden floor design, rather than the diagonal brick pattern seen in Generation I. Compared to the demo's map, the final version adds a window to the north wall, shifts the TV to the left, and adds an adjacent chest of drawers. Other than these minor changes, the two maps are identical.
2F
| Generation I | SpaceWorld '97 | Final |
|---|---|---|

|
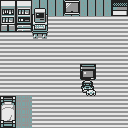
|

|
The upper floor exhibits a few more differences. The demo's version lacks the table present in Generation I, the bookshelves are placed in the northwest corner and the PC is shifted over to accommodate their presence. A window is present on the north wall, reminiscent of the shuttered windows present in the original Generation I map. Finally, the TV and Nintendo 64 are placed off-center to the east.
The final version makes some changes which bring the room a little closer to the Gen I version. The table missing from the demo's version is restored, albeit in a slightly different position to the original, and the TV and Nintendo 64 are shifted back over to the center of the room. The bookshelves from the demo's version are kept but moved to just left of the staircase, covering the area where the demo's window was located.
Blue's House
As with Red's house above, what appears to be the interior for Blue's house is also housed in the opposite building compared to Gen I and the final game. Again, for simplicity's sake the table below compares the map with Blue's house from Gen I and the final game.
1F
| Generation I | SpaceWorld '97 | Final |
|---|---|---|
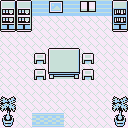
|

|

|
Blue's house in the demo is very different from both Generation I and the final game. As with Red's house, the demo's map uses a wooden floor rather than the diagonal brick pattern seen in Generation I – unlike Red's house, however, this was changed again to a carpeted floor for the final game. The demo map is sparser overall, lacking the potted plants, bookshelves and Town Map seen in the original, though it does add a TV positioned against the north wall. The final version keeps the TV, shifting its position slightly to the west, restores the missing plants, the map, and the two bookshelves in the northwest corner from the Generation I version, and also adds a radio in the northeast corner of the room.
The demo's map is also larger than either the Generation I map or the final version, sporting an entirely new kitchen on the west side of the room. This area largely matches the kitchen seen in the player's own house - albeit omitting the fridge-freezer seen in that version - and features some interesting tile placement, with a second TV connected to a Nintendo 64 seemingly placed in the middle of the kitchen floor! Interestingly, the Nintendo 64 uses different tiles to ones seen elsewhere, and appears to be sitting on some sort of small mat. The final version removes this extra area entirely, reverting the map back to the size of the Generation I version.
Pallet Town Laboratory
| Generation I | SpaceWorld '97 | Final |
|---|---|---|

|

|

|
The demo's Pallet Town laboratory differs greatly from both Generation I and the final game. While the map retains a roughly similar layout, it's compressed to fit within a much smaller map size, and the general aesthetic looks quite different with a brick-patterned floor instead of the original's wooden floorboards. The two rows of four bookshelves present in the original have been reduced to two rows of two bookshelves in the demo - even with the map's reduced width, this still leaves the gap between them much wider than in Generation I's map. The table and bookshelves in the northeast corner of Generation I's map are completely missing from the demo. The wall scrolls on the north wall remain, though are spaced further apart in the demo. Finally, the demo's map replaces the unique PC in the northwest corner with the standard model used elsewhere, and removes the second table east of the PC.
The final layout seems to scrap the demo's map entirely, reverting the layout and most of the graphics to match Generation I with a few minor changes. As with the final New Bark Town laboratory, a trash can has been added to the right of the table which housed the player's starter Pokémon in the Generation I map. The table to the right of the PC has been removed, and two closed windows have been added to the wall north of where it was located. The final version's bookshelves use a different design to the Generation I, though tiles for the Generation I-style shelves not only exist but are actually used in the aforementioned New Bark Town laboratory. Other than these minor differences, the rest of the map is identical to Generation I.
Celadon Game Corner
Main Building (1F)
| Generation I | SpaceWorld '97 | Final |
|---|---|---|

|
|

|
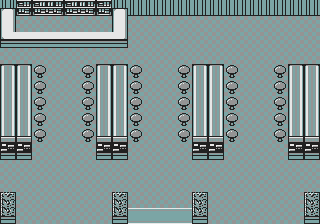
The demo's version of the Celadon Game Corner appears to have been built from scratch rather than using the original Generation I map as a base - while the layout is similar in concept, the scale and positioning of the various elements all differ. The demo's counter is closed off on both the eastern and western sides, though the latter is somewhat unecessary given that it connects directly to the western wall of the room. The demo's version also features less slot machines overall, with only five seats present per row of machines. The demo's entrance mat has been moved to be horizontally central, and is double the normal width. Finally, the decorative elements such as the bookshelves and poster are completely absent from the demo's map.
In contrast, the final version's layout has been completely reworked to ensure greater accuracy to the Generation I version, with the scale and position of elements matching exactly in most instances. Compared to the Generation I version, a cash register has been added to the counter, and the eastern side of the counter has been closed off in a manner similar to the demo's version. Four of the bookshelves have also been replaced with potted plants, adding some more visual variety, and a second poster has been added on the north wall to the east of the one present in the original.
Both the demo and the final version omit the secret staircase to Team Rocket's hideout - in the Generation I games, this was hidden until the player interacted with the poster on the north wall.
Main Building (2F)
This empty map, intended for Kanto, is unused, and seemingly has no purpose. However, the leaked source code gives context to this map's identity. First, the room is internally known as T11R1002, which means that it was the 2nd floor of the Game Corner (T11R1001). Next, the filename for this map's block data is CARD, which should spring the Poker and Memory games to mind. Finally, the Game Corner's block data was later updated, gaining a staircase that would have logically led to this room. With this information, it can be concluded that this area was intended for the card-related minigames, while the first floor would only have the slots. The final games, the slots and the Card Flip minigame are playable in the same map.
Prize Building
| Generation I | SpaceWorld '97 | Final |
|---|---|---|

|

|

|
As with the Game Corner, the demo's Prize Building also differs greatly from the original. Although the map's size matches the Generation I version, the demo's map features a manned counter in front of rows of well-stocked shelving as opposed to the original's nondescript holes in the wall.
The final version returns to the original concept but significantly scales down the map's size, leaving only two holes in the wall and removing the decorative bookshelves. However, FireRed and LeafGreen's Prize Building resembles the demo's Prize Building.
Unknown
This map is used for a house adjacent to the Prize Building. Its source filename is SLOT01.MAP, meaning it was definitely related to the Game Corner, but to what extant is unknown.
Celadon Department Store/West Department Store
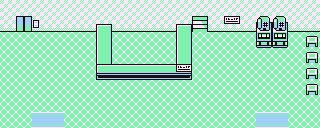
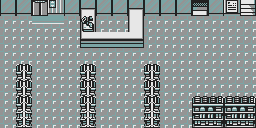
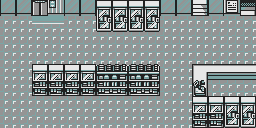
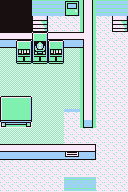
The tileset used for these maps has several differences, including a different floor pattern, different-styled shelving, and differently-shaded stairways. Even at this early stage, in spite of the aesthetic differences the layout of these maps are very close to their final form already - and as a result bear little resemblance to their Generation I equivalents. The Department Store in West shares these maps, just as the Goldenrod Department Store does in the final.
1F
| Generation I | SpaceWorld '97 | Final |
|---|---|---|
|

|

|
The demo's layout is largely the same as the final, though it at least attempts to echo the Generation I original a little closer. The entrance is placed roughly matching the position of the original east entrance, and the counter is placed slightly off-center to the west. The final version moves the entrance to the center and the counter to the far east of the map, and adds a cash register to the easternmost counter.
2F
| Generation I | SpaceWorld '97 | Final |
|---|---|---|

|

|

|
The demo's layout positions some shelving south of the counter and a cash register on top of the counter, both of which are removed in the final version. Other than that, their layouts are identical.
3F
| Generation I | SpaceWorld '97 | Final |
|---|---|---|

|
|

|
The demo's layout has a cash register positioned on the westernmost counter; in the final game, it's moved to the easternmost counter. Other than that, the layouts are identical.
4F
| Generation I | SpaceWorld '97 | Final |
|---|---|---|

|
|
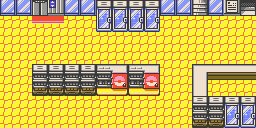
|
The demo's layout has a cash register positioned atop the counter; the final's layout removes this. Other than that, the layouts are identical.
5F
| Generation I | SpaceWorld '97 | Final |
|---|---|---|

|

|

|
This map's layout is identical to the final game's layout-wise, with only the aforementioned tileset differences distinguishing the two.
Celadon Condominiums
1F
| Generation I | SpaceWorld '97 | Final |
|---|---|---|
|

|

|
2F
| Generation I | SpaceWorld '97 | Final |
|---|---|---|

|

|

|
3F
| Generation I | SpaceWorld '97 | Final |
|---|---|---|

|

|

|
Rooftop
| Generation I | SpaceWorld '97 | Final |
|---|---|---|

|

|

|
Rooftop Condo
| Generation I | SpaceWorld '97 | Final |
|---|---|---|

|

|

|
The demo's rooftop condo differs greatly from both its Generation I equivalent and the final version. The demo's map retains the brick-patterned floor from Generation I, though tileset differences mean the design is mirrored. The table is slightly larger in size, and is shifted northwest from its original position. Most other decorations from the Generation I version have been omitted, including the book, potted plants, chair, window and blackboard - only the bookshelf in the northeast corner remains, though the demo adds three more bookshelves to accompany it. The entrance mat is placed horizontally central rather than slightly to the west as in the original.
The final map bears little resemblance to the demo's map, instead using the generic house interior map. This brings some elements - such as the potted plants, entrance mat, and table - back in line with their positions in the Generation I map, though the remainder of the room is entirely different.
Silph Co.
| Generation I | SpaceWorld '97 | Final |
|---|---|---|
|

|

|
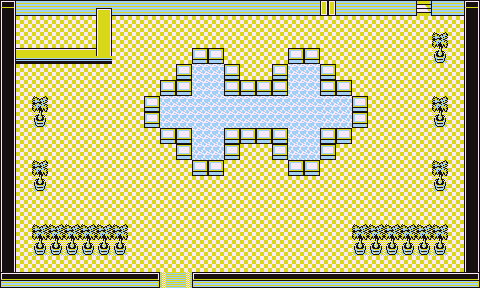
The interior of Silph Co. remains very similar to the building's ground floor from the Generation I games, retaining all of its major features unlike the version seen in the final game. The overall map size is slightly smaller than the original (likely to save space), but is still significantly larger than the final version. As in the final game, the upper floors cannot be accessed and there is no elevator present.
Gyms/League Buildings
| Northwest Gym/League Building | Southeast Gym/League Building |
|---|---|

|

|
| To do: More info needed |
Bizarrely, Kanto has not one, but two gyms, despite this build of the game only having eight gym leaders. Furthermore, both maps reuse the block data from Stand's gym.
