Proto:Kirby & the Amazing Mirror/Room Differences
This is a sub-page of Proto:Kirby & the Amazing Mirror.
All rooms in this Demo have at least one difference. Things that will not be documented in this page are differences caused due to tileset modifications (except in some special cases), as they lean more towards the graphical side of things, and because we'd be here forever. Also keep in mind that doors are not displayed here, but differences regarding them will be mentioned.
Contents
Room 321
| Prototype | Final |
|---|---|
 |
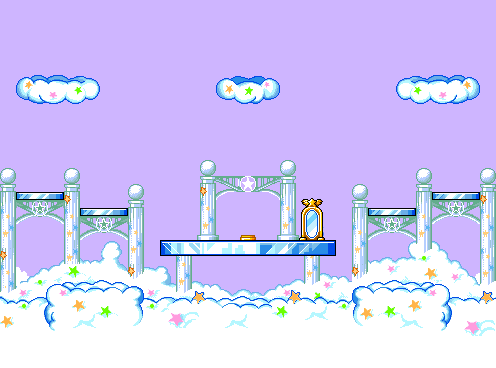 |
The Central Circle. Nearly identical to the final game. However, the middle-top platform was redesigned to be longer and more detailed. Additionally, while not shown here, the objects for the rest of the mirror doors are present where they all should be, but they have no warps nor coordinates defined.
Room 65
| Prototype | Final |
|---|---|
 |
 |
The room were your adventure truly begins. While it doesn't have any layout changes, the enemy placements have been changed a lot and/or removed in the final game.
Room 6A
| Prototype | Final |
|---|---|
 |
 |
The room before the split path. Also didn't receive any layout changes, but the enemies have been swapped around a lot. Most notably, a pair of Soarars appear in the Demo, while in the final game, a single Bronto Burt is in their place.
| Prototype | Final |
|---|---|
 |
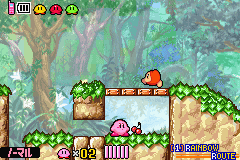 |
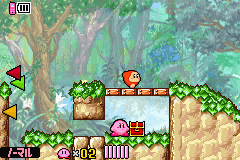
This chest with a cherry inside is replaced by a standalone cherry in the final build of the game. Probably removed since it would be much more convenient to just get the food rather than watch the chest animation.
Room 6B
| Prototype | Final |
|---|---|
 |
 |
The first split path. It's similar to the final version of the room, but the Boxins trapped inside the ground were instead a Sword Knight and a Sir Kibble. Additionally, the lower path contains a third Waddle Dee in its middle section. It has been removed in the final game.
Room 68
| Prototype | Final |
|---|---|
 |
 |
The room that the upper path of the split path leads to. The Demo version contained Laser Balls at the beginning and end of the room, which were both replaced by Sword Knights in the final game. There was also a Pengi in the second gap of the stone blocks, which was removed in the final game so the second Chip could take its place instead. Lastly, there was a Bronto Burt atop the first tree in the Demo, sadly removed from the final game.
Room 6C
| Prototype | Final |
|---|---|
 |
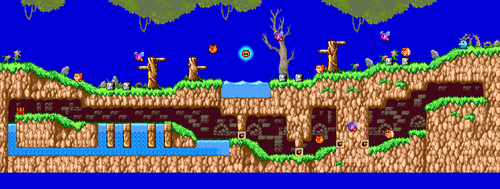 |
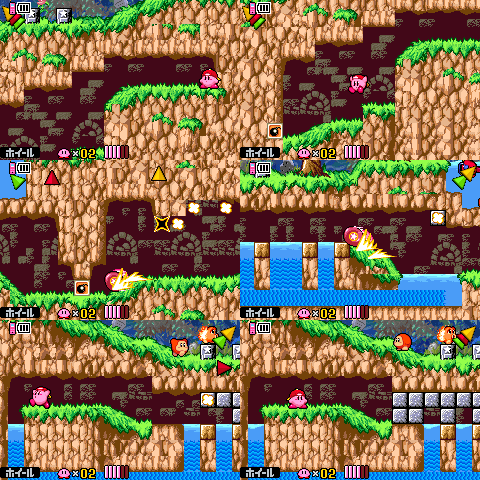
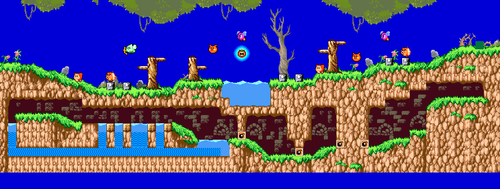
The room that the bottom path of the split path leads to. Many enemies have been moved and changed. Notably, there was a Cupie present in the Demo, but it was replaced with a Bronto Burt in the final game. It also contains our first real layout difference! In the Demo, the pond containing the Maxim Tomato was deeper. It was made one tile more shallow in the final game. Additionally, the Demo doesn't contain any warp, door, or object data in the bottom path, but the Bomb Block events are still functional. They work a little different compared to the final game, as the first trigger doesn't open a path to the upper section of the room.
Room 67
| Prototype | Final |
|---|---|
 |
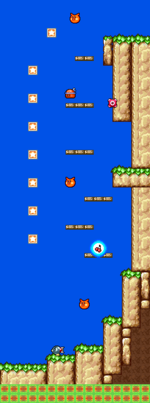 |
The penultimate room of Rainbow Route is completely different in the Demo; a long horizontal room instead of a vertical room with vastly different enemies as well. The early room was focused on protecting Kirby from falling Foleys with the Parasol Copy Ability, while the final room is focused on using Missile to rise to the top. They both share the same ID in the Demo and the final game.
Room 8E
| Prototype | Final |
|---|---|
 |
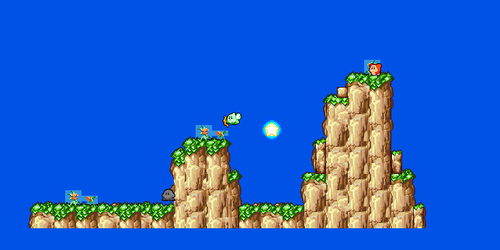 |
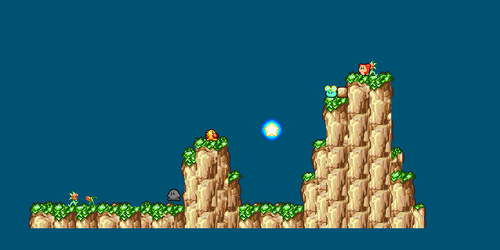
The room with Shadow Kirby. The first hill was made one tile wider in the final game. Additionally, a Boxin was present in the Demo, while in the final game, this enemy is replaced by a Cupie. Lastly, the second hill has a Sparky enemy in the Demo, nowhere to be seen in the final build.
| Prototype | Final |
|---|---|
 |
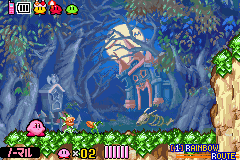 |
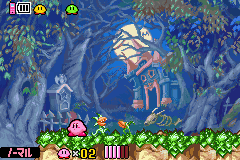
Curiously, the object in this room that locks the camera when facing Shadow Kirby is programmed to move the camera further to the left in the Demo version, allowing the player to walk into the close pit. If walked into, Kirby won't descend nor be defeated as long as Shadow Kirby hasn't been KOd.
Room C3
| Prototype | Final |
|---|---|
 |
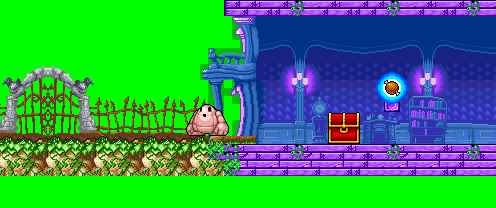 |
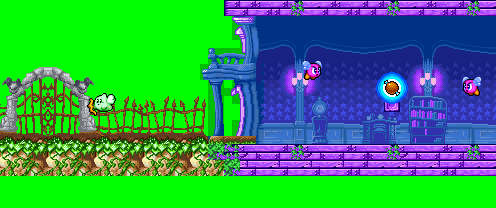
The room after the Warp Star ride. The layout and appearance of the room is identical to the final game. However, many enemy and object changes can be appreciated. For starters, the Golem present in the final game was originally a Cupie, located closer to the beginning of the room. At the end of the room, the large chest containing the map to Moonlight Mansion is absent, and the meat on top of the floating block triggers an enemy spawner object in the Demo, represented by the two Bronto Burts spawned when consuming the meat in the map above.
Room 2C4
| Prototype | Final |
|---|---|
 |
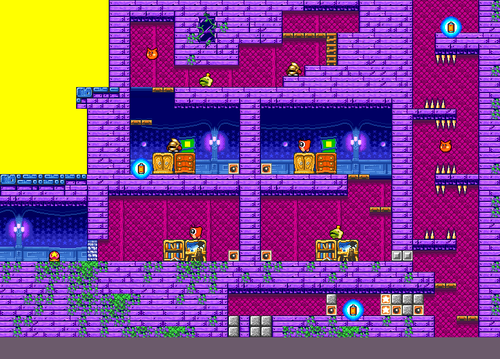 |
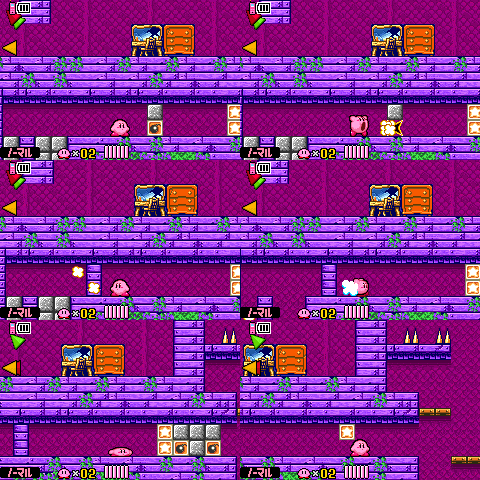
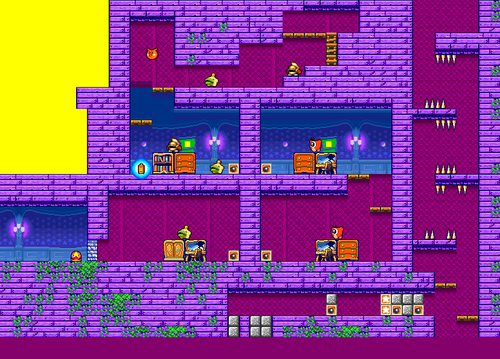
The first large room of Moonlight Mansion. The first two enemies, Snooter and Waddle Doo, got swapped in the final game. Additionally, the right part of the room doesn't have the destroyable steel blocks, most likely to prevent the player from wandering into places that aren't programmed for the Demo. It also has no doors, warp, or object data, but similar to room 6C, the Bomb Block events are functional and work pretty much like their final incarnations.
Room 2E4
| Prototype | Final |
|---|---|
 |
 |
Mr. Flosty Frosty's room. The upper right wall inside Frosty's area was made one tile wider in the final game, and the last Batty was moved downwards a little. Other than that, the layout is nearly identical between both versions.
Room 316
| Prototype | Final |
|---|---|
 |
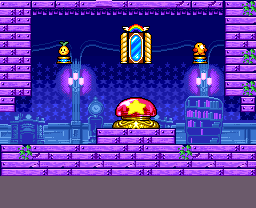 |
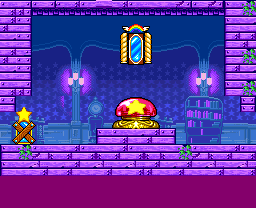
Moonlight Mansion's switch room. This room is pretty different between versions. The left door is actually an object that prevents the player from going back. There are also no Copy Esences in the room, as opposed to the final game.
| Prototype | Final |
|---|---|
 |
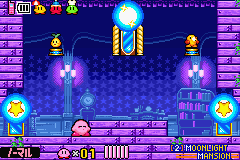 |
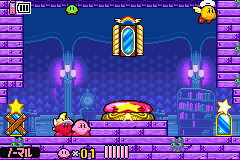
The switch remains after being pressed in the Demo; it disappears after being pressed in the final build.
Room 2C2
| Prototype | Final |
|---|---|
 |
 |
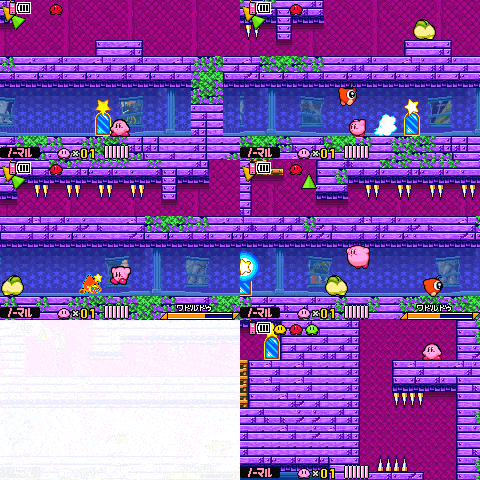
Room after the switch. The layout and enemy placements are actually identical between versions, but there are still some key differences. For starters, the thin passageway near the beginning of the room has spikes at the top, and the bottom path actually has defined objects, doors, and warps despite not being able to be accessed in the Demo. Interestingly, the warp of the second door is set to send Kirby just outside from it was originally entered, while the first door actually takes Kirby to the room it is supposed to take him in the final version.
Room 2C3
| Prototype | Final |
|---|---|
 |
 |
The room right after room 2C2. The object and enemy placements are nearly identical between versions. The only differences that can be seen is that the Sword Knight enemy in the Demo was replaced by a Snooter in the final build, and that the Battery item was misplaced, causing it to fall through the platform it was supposed to stand on. This was fixed in the final version. The layout is also nearly identical as well, but the ceiling after the second Bomb Block was moved one tile upwards in the final game, and the upper path at the end of the room didn't contain a door, platforms, or metal blocks, most likely to prevent the player from wandering into a room not available in this Demo.
Room 2C5
| Prototype | Final |
|---|---|
 |
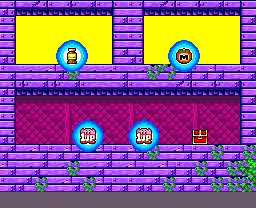 |
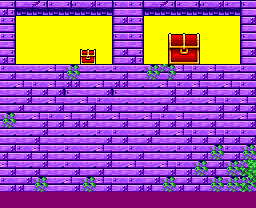
A room that can be accessed from rooms 2C3 and 2C0. The Demo's version of the room contained to chests: one small and one large. The small one contained a One Up, while the large one contained a Vitality heart. Additionally the bottom path was covered up by some generic tiles. The final version of the room hosts a completely different assortment of objects altogether, and includes the bottom path.
As previously mentioned, the Demo has the bottom path inaccessible and covered up, but the final game's collision is there, meaning it was covered up specifically for the Demo to avoid getting the player's interest.
Room 2C0
| Prototype | Final |
|---|---|
 |
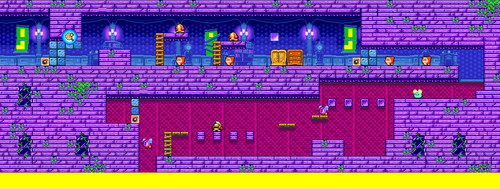 |
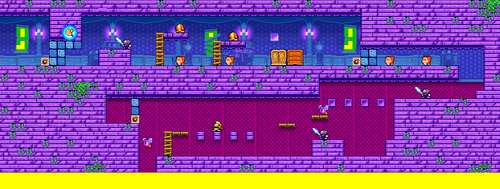
The room with the Invincible Candy. The layout and enemy placements are nearly identical to the final game. The Demo version, however, contained three Sword Knights that were removed in the final game. The second one was replaced with a Sparky.
Room 2C7
| Prototype | Final |
|---|---|
 |
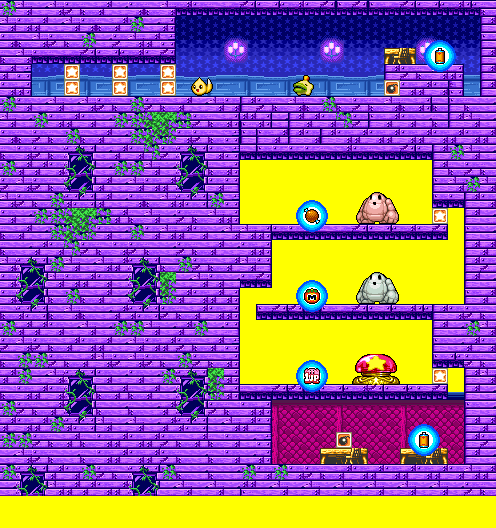 |
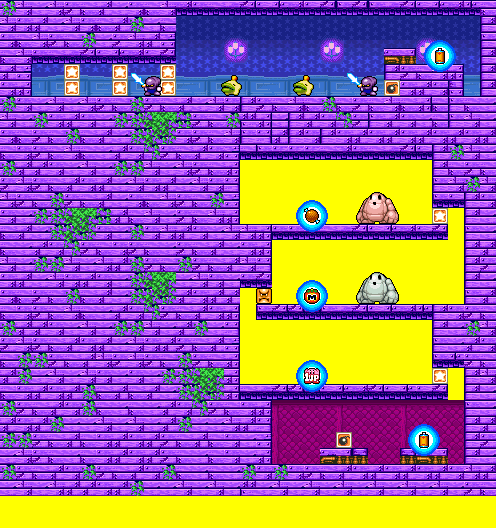
The room before King Golem. The layout is identical between versions. The Demo had 2 Sword Knights that were removed in the final game. It also had an extra Snooter that was replaced by a Chip. The Demo also had a Blockin in the path with the white Golem, and the switch to Rainbow Route wasn't present, most likely to prevent the player from going back to the Central Circle and explore areas that aren't programmed into this Demo (though, at this point, there is no real way to go back to the Central Circle).
| Prototype | Final |
|---|---|
 |
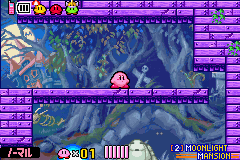 |
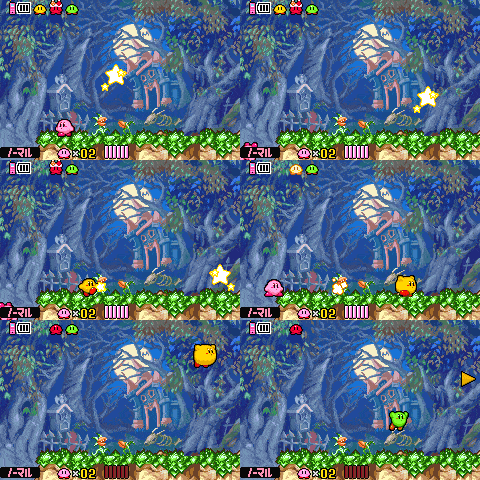
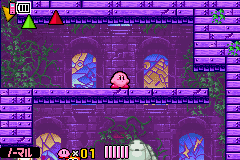
The background used in this room is surprisingly more fitting in the Demo. It may have been changed so that the bosses in the background could only be seen in the hallway before the boss itself, which was not present yet.
| Prototype | Final |
|---|---|
 |
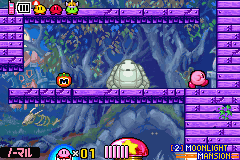 |
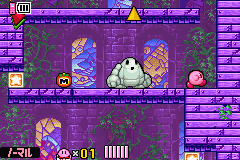
Also, this Golem activates when approached from the right in the Demo; it activates from the left in the final build.
Room 2C6
| Prototype | Final |
|---|---|
 |
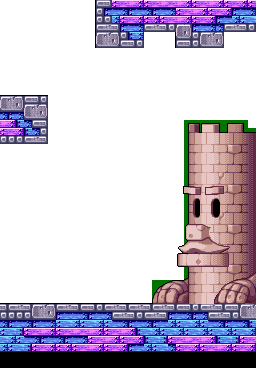 |
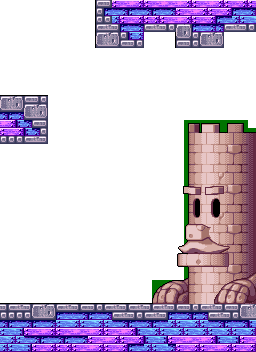
King Golem's room. The final version of the room adds some garbage tiles at the bottom of the room so the camera looks like it's adjusted to a lower angle. In the Demo, the lack of these tiles resulted in looking as if the ground was lower.
| Prototype | Final |
|---|---|
 |
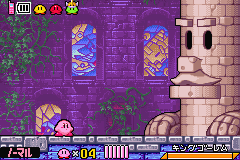 |
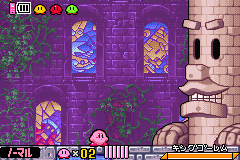
King Golem also looks like he's located a few pixels further to the right in the Demo due to changes to the camera's positioning.
