Proto:Duke Nukem 3D (PC)/LameDuke/Episode 2
This is a sub-page of Proto:Duke Nukem 3D (PC)/LameDuke.
Mission Cockroach is the second episode in Lameduke. It contains a variety of city levels, but these appear to be from an earlier take on how the team wanted to handle cities instead of the final-like city areas seen in the second half of Episode 1. Compared to the E1 city levels, these have lighter textures and much more primitive geometry. The first half of the episode contains a lot of Mandroids and Femanoids, but the second has them replaced with Troopers and Captains. The Bat enemy makes a few rare appearances in this episode, while the Octabrain appears once.
Of note is that the second half of Episode 2, M5-M7, were last modified on December 1st 1994 (M5) and the beginning of 1995 (M6 and M7). The first half, M1-M4, had M1 last edited on November 1st, 1994, a month before M5 was last modified.
Contents
Intermission Screen
Just like the previous mission, there's a picture (possibly of a between-levels "map") that shows up when debug mode is disabled. It's worth noting that the left side of this image blends in with the right side of the previous mission's image, so the developers may have intended to pan between the two.
M1.MAP
M1.MAP is the first level in episode 2. The player starts in what looks like a teleport pod, then enters a waterway underneath a highway that is filled with enemies and items. The middle of the waterway contains a secret area that can be accessed by jumping on a trash can, then hitting the use key. At the end of the waterway is a door that cannot be opened. To do it, the player will have to go through the subway portion of the level in order to bypass the door.
Near the start of the waterway, there is a path that leads to what appears to be a subway system. however, the subways cars themselves aren't functioning. A station at the opposite end of the system leads to a concrete area past the door that could not be opened earlier (which can now be opened via a switch). At the end of the concrete area is an underground area that uses brown brick textures. The area starts with one of the few instances of the bat enemy, then has the player go underground proper, where they appear to be in a sewer-like area with Mandroids standing around. One end of the sewer is a dead-end, while the other leads to the exit.
M2.MAP
M2.MAP takes place in a sewer area similar to the one M1 ended in. This level also contains one of the few instances of the Bat enemies.
The player starts in an elevator similar to the one that was M1's exit. After exiting it, the player will be in another sewer area, but this one is filled with Drone 1s. After a walk, the player will end up in a four way, with two paths on the lower part of it, and two on the upper parts that are accessible via elevators. Since the player is entering the four way from an upper path, there's technically only one "new" upper path for the player to explore.
The other upper path leads to a dead end with a Plasma Gun in it, but the lower paths are a bit more interesting. One lower path leads to an elevator that takes the player to an area that leads to a computer room with windows in it that let the player see the four way from another angle. The other lower path splits into two pathsː upper and lower. The upper path leads to a dead end with another window that can be seen through, but the lower path leads to what looks like a generator room that has square-shaped water "pipes" running through it.
Inside the generator room is a pillar in the center of it. On each corner of the generator room are pillars of water surrounded by water the player can dive in. The water contains nothing of note, though. On two sides are small waterfalls that aren't animated. From the opposite end of where the player enters the generator room is a door with a unique symbol on it. Past it is the exit.
M3.MAP
M3.MAP takes place in what appears to be a power plant. The map is divided into roughly two portions: the square room and the generator room. Of note is that a large parking lot surrounds the area and can be seen through various windows in the level.
After getting out the starting room, the player will end up in the square room, named because its paths are shaped like a square. The start of the square room has the player take either left, right, or center. The left path leads to a computer room with some enemies and propane tanks in it. The center path has a pillar in the center of it that can be accessed with. The right path contains the way to the exit and allows the player to access the exit at any time.
No matter what path the player uses, they will all converge on the back of the square room, which leads to the generator room. Flanking the generator room's entrances are two rooms that can be seen by glass. The right one has a switch that seems to do nothing. After going a bit into the generator room, the player will be forced to take either left or right. They both lead to the generator itself, but each one has a unique path that leads to one of the two rooms seen at the start of the generator room.
Inside of the generator is the titular generator near the front of it. Destroying the generator does nothing. The back of the generator room has some enemies, a secret door that leads to an empty room at the very back, and an elevator. The elevator leads to a room that overlooks the generator itself, but has nothing in it.
To exit, the player needs to head all the way back to the right path at the start of the square room (left if entering the square room from the generator room). Inside it is a door that leads to a long hallway and some enemies. At the end of the hallway is a door that has to be opened with a nearby switch. Opening the door will let the player reach the exit.
M4.MAP
M4.MAP takes place in a fictional part of Los Angeles. The level has the player follow a linear street, but contains several side areas.
The player starts in front of what seems to be the etrance to the power plant seen in the previous level. Following the street will have an optional apartment on the player's left side. Inside it is a room that leads to a sewer entrance that ends in a broken exit (Jetpack is required to get back into the apartment), an elevator that leads to a second floor, and an empty room in the second floor that lets the player see the next apartment complex that can be entered.
After exiting the apartment complex and following the street again, the player will reach a fork in the road. Going left will lead the player to another optional apartment complex, with this one having a staircase in its back. The staircase leads to a dead end, while the apartment block on the right side of the complex will lead to a room with a window that lets the player see the street from another angle.
Taking a right at the fork sends the player to a street that contains an industrial-looking building on the right. At the end of the street is another turn and a unique-looking door that cannot be opened. To access the industrial area, the player must hop into a nearby sewer hole, then navigate the small sewer, and use the Jetpack to fly into the industrial building's interior. The industrial building itself is fairly empty, containing two elevators. The first one leads to a large room with a switch that does nothing, while the second one leads to a patio that overlooks the streets near it.
On the other side of the industrial building and on the street that branches from the industrial area's street is a gas station (or nuclear fuel station, as a nearby texture calls it). The station is bugged; it is meant to look normal, but have destroyable gas pumps that would make the roof above the pumps collapse. However, when the level is started, it is already in its post collapse state. Oddly, shooting an RPG rocket or blowing up a Pipebomb near where the pumps would be partially reverses the sequence by removing the collapsed part of the roof, mostly reverting it back to how it should be. However, the roof itself is gone. The station itself is barebones, but uses a unique glass texture showing "Cola-Cola" and lotto tickets. On the right on the station is a switch that does nothing.
Following the street that branches from the industrial area's street leads the player to an odd wall made out of a photosourced car texture, a door in it, and a Mandroid with what appears to be a crude-looking sandbag emplacement in front of it. Going past the door will lead the player to a long street that ends in a four way. Two sides lead to barriers made out of the car texture mentioned earlier, while the other one leads to the level's exit. This area has three notable things in it: the first one is that a crude version of the Capitol Records building in Los Angeles can be seen at the start of the path that leads to the exit, a prototype version of the Hollywood star texture on the sidewalks, and an earthquake effect that breaks the four-way into chunks once the player approaches it. However, the earthquake itself is broken in a default install and must be fixed in a level editor.
Past the Capitol Records building is an odd, somewhat futuristic-looking building with some enemies in it. Opening the door in the back of it will lead to another room. In the back of that room is the exit.
M5.MAP
M5 takes place in another power plant, but this one is much different from M3.
The player starts in an elevator. After getting out of it, they will enter a Trooper-filled area that has a very long corridor at the end of it. Past the corridor is another small, but Trooper-filled room. In the back of it is an elevator, but a switch in the center of the second small room must be activated in order to disable a laser barrier that surrounds the elevator.
After taking the elevator up, the player will end up in a hallway with two spiral staircases on their left and right. The spiral staircases lead to a set of hallways that overlook what look like turbines in water. One of the overlooks has a random propane tank in it.
After heading back to the previous hallway and going forward instead of taking the staircases, the player will end up in front of a laser barrier that has a door to its right, along with a path on the left and one on the right. The left and right paths are essentially copies of each other. In the middle of each path is a door that leads to the turbines seen earlier. Here, the player can get a better look at them and take a dive into the water, revealing windows underwater.
At the corner of the left and right paths are switches. These must be used to deactivate the laser barriers blocking the elevators at the end of the paths.
Taking the elevators down will place the player in a set of hallways. These hallways are the same ones seen while diving in the turbines' water. Both sides use the same design.
To exit the level, the player can go to the laser barrier with the door on its right, enter the room blocked by the door, press a switch to deactivate the lasers, then run through the areas blocked by the lasers before to reach a door that leads to the exit. This can be done at any time, making most of the level skippable.
M6.MAP
M6.MAP takes place around a hotel, but is completely different from the final game's Hotel Hell (E3L8). It has a unique feature: the player has two ways to access the hotel itself.
The player starts off in what looks like a crude parking lot with a Plasma Gun and some ammo for it near the spawn point. On the other side of the parking lot is an elevator that leads to a street. However, if the player approaches the Plasma Gun and ammo near the player's spawn point, an earthquake will happen, blocking off access to the elevator. But, this opens up an alternate sewer entrance.
The sewer entrance is very straightfoward. In the middle of it, the player will meet the only Octabrain in the entire episode. At the end, the player will find an RPG, some ammo for it, an open manhole they can use to fly up to the street via the Jetpack, and a path down. On one side of the path is a simple dead end. The other side of the lower path has some Captains, several small waterfalls that connect to the street via storm drains, and another dead end. The intention seems to be to use the Jetpack to fly up the storm drains or sewer entrance where the RPG is if the earthquake has happened.
If the player doesn't trigger the earthquake, they can enter the street by taking the elevator at the other end of the parking lot up.
No matter how the street is entered, the player will find an fairly empty street with storm drains, an open sewer entrance near the parking lot elevator, and an entrance to a hotel on the other end of the street.
The player first sees the reception desk, but there's nothing special in it. Past the desk is a lobby that has a non-functioning waterfall meant to look like it's dripping water into a pool in the center of the lobby. The left and right sides contain staircases that lead to dead ends. In the back of the lobby are two elevators that lead to another area.
The other area consists of a barebones set of six rooms, with three on each side of the center of the area. The center of the area contains a pseudo-vent made out of sprites the player can hop into in order to explore the area above the ceiling. However, there is nothing there.
Unlike previous levels, this one does not have an exit the player can reach.
M7.MAP
M7 starts off in a posh, seaside home, but contains a secret passage that reveals a hidden base underneath it.
The player starts by falling into a pool. After getting out of the pool, they'll see that they're at what looks like an expensive home on a cliff by the sea. The player can jump down onto the beach below, but can only get back up by using the Jetpack. There are three ways into the house itself, but they all lead to the same area.
Inside the house, the player will find a living room in the center of the area, with elevators to an upper floor surrounding it. On the right side of the living room is a propane canister that can be destroyed to blow up a part of the living room's (and the walkway above it) right side. The upper part of the living room area has two paths, one for the left side, and one for the right side, that converge on a bedroom with a bed and a TV with a stereo setup inside it.
In the back of the living room is a fireplace. After entering it, an elevator prompt will appear. Going down will make the player enter a secret brick room with a switch across from the elevator. By pressing the switch, the brick walls will go up, revealing some Captains near the switch and a secret entrance to a hidden base on the opposite side of where the switch is!
The entrance leads to a room that has a switch in the center and a laser barrier on the left and right side. using the switch will deactivate the lasers. The left path eventually splits into two smaller paths that quickly converge in a room with large cylinders and a switch in the center of it. Pressing the switch will make hidden doors next to the switch at the end of the secret entrance open. The right side leads to a large, multistory room with a generator in the center of it and switch at the bottom. Destroying the generator and/or using the switch does nothing.
Going past the hidden doors that were opened by the switch on the left side will have the player end up in a hallway that has Troopers in red-lit rooms on both sides of the hallway. The red rooms are covered behind glass, but once the Troopers are awakened, they will likely shoot the glass in order to hit the player, inadvertently releasing them from their "cages".
Past the red room hallway is a bridge connecting one side of an underground area filled with water to another. The bridge has two Captains on it, and there are paths at the start and end of each side of the room that let the player enter the water. However, there's nothing except maybe a stray enemy or two in them, and the only way to get back up is to use the Jetpack.
After going through the bridge room, the player will end up in another hallway, but this one has computer rooms filled with Troopers in them. At the end of the hallway is a large double door, but the door is bugged and will not open all the way. The player has to open it and run through it once it's large enough for the player to squeeze through it.
The double-doors lead to a large, round area. Behind the double doors the player just exited are two doors that lead to the computer rooms seen in the previous hallways, letting the player clean them up and get the battery ammo in them.
The large, round room has a red area that contains a switch in the end of it. The switch can be hard to activate, but getting on top of it, then using it, seems to work better. Once the swtich is used, two parts of the circular area will come down, revealing a lot of Drone 1s. The right chunk that was lowered contains nothing, but the left one has some RPG ammo and a switch. Use the switch like the one before, and a chunk near the back of the room will also lower, revealing more Drone 1s and a switch that goes much higher than the other ones. Use the switch (the Jetpack is essential for getting it), and a wall in the back of the room will go down, revealing a gaggle of Drone 1s and Troopers. Going past the wall that was lowered will reveal what looks like a teleporter, which is the level's exit. using the teleporter will crash the game because the level it's looking for doesn't exist.
M8.MAP
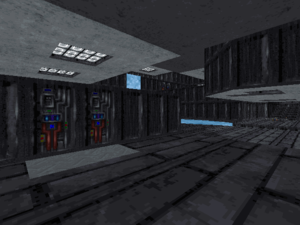
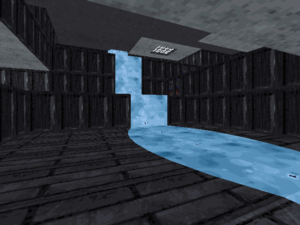
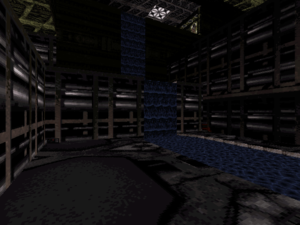
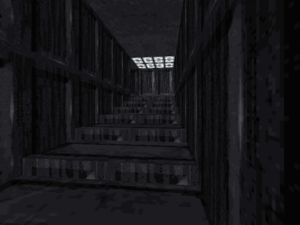
M8 uses the version 4 level format, which the prototype cannot play. To fix this, download the "convmap" package from Ken Silverman's website, then drag "M8.MAP" onto "convmap5.exe". This will convert the level to the level format the prototype expects, allowing it to be played.
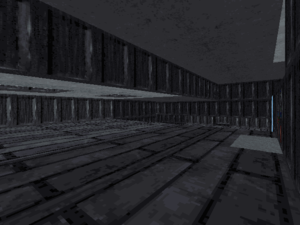
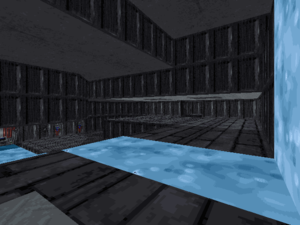
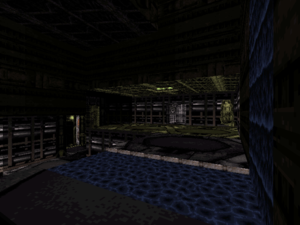
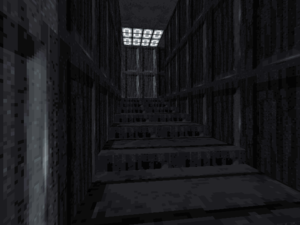
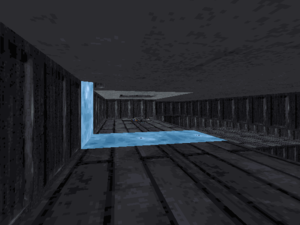
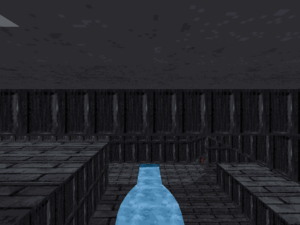
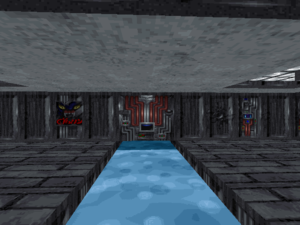
After starting it up, this level can be quickly seen as a prototype version of the waterfall area in the final game's "Overlord" (E2L9) level, making it one of the oldest parts of the game. However, M8 has several differences, such as a smaller scale, stairs instead of slopes connecting the different parts together, less detail, completely different textures, and elevators that help connect the floors that were removed in the final game.
The player starts on the right side of the bottom floor. The final game has the player enter it from the left side instead. The level lacks an exit as well.
It's also notable that M8 was last modified on July 2nd, 1994, giving it the oldest "last modified" date in the prototype.
| M8 | Final E2L9 |
|---|---|
 |
 |
| M8 | Final E2L9 |
|---|---|
 |
 |
| M8 | Final E2L9 |
|---|---|
 |
 |
| M8 | Final E2L9 |
|---|---|
 |
 |
| M8 | Final E2L9 |
|---|---|
 |
 |
| M8 | Final E2L9 |
|---|---|
 |
 |
| M8 | Final E2L9 |
|---|---|
 |
 |
| M8 | Final E2L9 |
|---|---|
 |
 |
| M8 | Final E2L9 |
|---|---|
 |
 |
