Proto:Donkey Kong 64/Level Differences
This is a sub-page of Proto:Donkey Kong 64.
| This article is a work in progress. ...Well, all the articles here are, in a way. But this one moreso, and the article may contain incomplete information and editor's notes. Notes: Also see here for some changes belonging to maps that don't have a subpage yet. |
While the background models for all non-demo areas appear to have been stripped from the ROM, their foreground setups and textures are still in place. The former can be accessed with GameShark codes, which can be found on the Notes page.
A note on texture encoding: N64 games use many different texture formats, but the two relevant to this page are CI4 and RGBA16.
- Color-indexed (CI) textures use a "paint-by-number"-like system, where each pixel is represented by the index number of its color, which is stored in a separate palette file. CI4 textures use a 16-color palette (4 bits per pixel), while CI8 textures use 64 colors (8 bits per pixel). CI textures generally look more compressed, as they can only use so many colors at once.
- RGBA textures store the color data in the pixels themselves, with an extra bit (RGBA16) or byte (RGBA32) for alpha transparency. This gives them higher color fidelity, but they also take up more space.
Major Areas
The first three levels are mostly complete, and have all their pickups present (including Banana Medals and Extra Life Balloons). Most of the changes are to their color or placement, or minor layout adjustments.
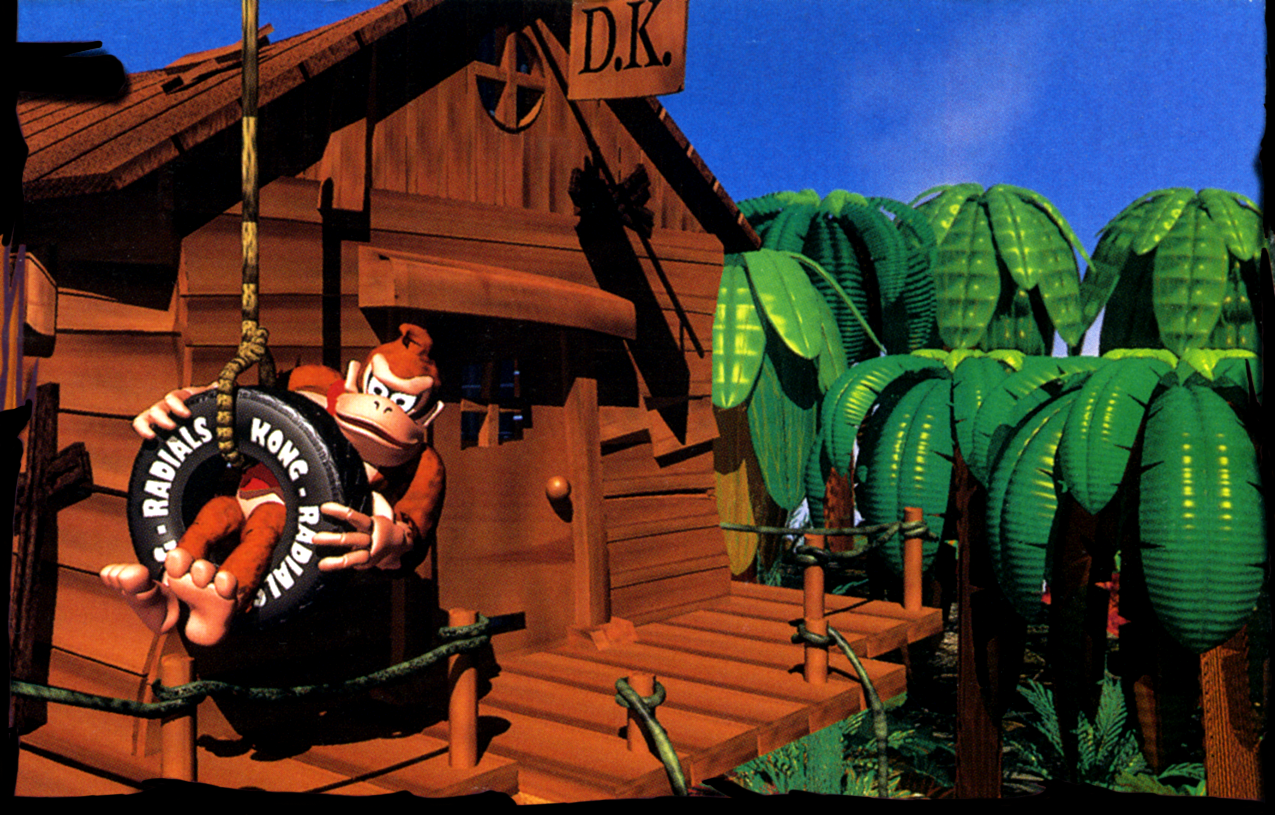
 | Jungle Japes Swingin' through the jungle, I have sailed the seven seas... |
 | Angry Aztec Now with 100% less burning sand and 50% more crashes! |
 | Frantic Factory How does this place produce anything if it has no machinery? |
The rest have no pickups other than Golden Bananas (and occasionally Blueprints, via Kasplats). IDs in square brackets may not even have anything to document, and are just here for posterity.
 | Gloomy Galleon Yar-har 'n all that. |
 | Fungi Forest Or: what happens when you throw Click Clock Wood, Tree Top Town, and Mushroom Kingdom into a blender. |
 | Crystal Caves Don't confuse it with this Crystal Caves. Or this one. Or this one. |
| Creepy Castle Maps 57, 58, 69, 6A, 6C, 70-72, 97, A3, and A4. |
Hideout Helm and DK Isles (Maps 98 & 99)
| This needs some investigation. Discuss ideas and findings on the talk page. Specifically: Crocodile Isle (obj 026E) is present in map 99 but only visible for a split second. Anything else of note? |
- In the final game, these maps are duplicates used only for the Intro Story cinema, and have no music of their own defined. Here, however, they are configured to use their standard level themes (with 99 also doing dynamic track switching like the final DK Isles), indicating they were originally the playable versions of those areas.
- The texture for the unused ledge vine can be found among map 99's textures, indicating it was once used somewhere on DK Island. If so, the most likely spot for it would have been the tall ledge underneath the Crystal Caves lobby.
Common Differences

- Several maps have a small red cube in various spots. The reason for this is unknown.
- All Bonus Barrels lead to either map 41 (Gloomy Galleon's Stealthy Snoop) or 4E (Angry Aztec's Busy Barrel Barrage). Despite this, all the rest of the minigames have been implemented (see below).
- Blast Barrels move faster than in the final version, making the timing a little stricter.
- The Jungle, Aztec, and Factory blast courses all have a palm tree sitting in the middle of the area, which can also be seen in pre-release footage.
- If you lose a (non-Bonus Barrel) challenge, there is no "try again" option; you are simply kicked out.
- The dialogue used when approaching a captured Kong's cage can be retriggered again and again. In the final game, it only appears once.
- Said line will often repeat several times before terminating (see right).
Kong Exit Doors
| This page or section needs more images. There's a whole lotta words here, but not enough pictures. Please fix this. Specifically: Comparison rips (early Exit Doors vs. final Wrinkly Doors and/or TnS portal). |
Instead of portals, the exits to Troff 'n' Scoff's room are wooden doors with the Kongs' faces on them. These behave slightly differently in that they work only for a specific Kong, like many other objects in the game. In practice, this doesn't accomplish much beyond making the player do a lot of extra travelling. Putting a Tag Barrel inside Troff 'n' Scoff's room (as can be seen in the final game, but not this version) makes the whole setup redundant, which may have been why it was cut.
Not much was actually lost, however: Many Exit Doors simply became Troff 'n' Scoff portals in the final game, either in the same position or somewhere nearby. The door objects themselves were refashioned into the Wrinkly Doors, which still retain their old internal name of "exit".
Miscellaneous Maps
| To do: K. Lumsy (61). |
- 00: Unlike in the final game, the test map appears to have nothing in it.
Funky's Store (Map 01)
This area would have retained its E3 appearance, judging by the textures present.
| Proto | Final |
|---|---|
The "Workshop" sign is wider and uses a slimmer font. The original texture was split into three pieces, while the final's is smushed into one.
| Proto | Final |
|---|---|
 |
 |
These two textures were originally RGBA16, but were downgraded to CI4. The difference is more noticeable in the "FUNKY1" texture.
| Proto | Final |
|---|---|
This metal texture is ever-so-slightly darker in the kiosk version.
The following textures were removed from the final ROM. Some of them can be seen in E3 footage:

More distinct designs for the wooden crates.
![]()
Metal textures that would have been used for the stove.
![]()
Early-looking wall textures.

A hinged door and barricade.
![]()
A 2D bullet.
Cranky's Lab (Map 05)
| Early | Proto/Final |
|---|---|
 |
 |
An earlier version of the "Monkey Book of Science" can be found among the textures for this area. It uses a smaller font, with the title aligned at the top.

Next to it in the ROM is this, er... alternate cover.
| Proto | Final |
|---|---|
 |
The brick platform was extensively textured in the kiosk version... or so one can only assume, given the large number of textures with minute differences. The final cuts this down to just one, probably to conserve memory and/or cartridge space.
![]()
Extra textures for the machinery were removed, likely also to save space.
| Prototype | Final |
|---|---|
 |
 |
This one, on the other hand, was converted from CI4 to RGBA16, giving it a slightly grayer tinge.
And strangely, the green glow around the beaker on the burner table is not present in this version.
Snide's H.Q. (Map 0F)
- Snide only has a standing animation in this version, leading to him "sliding" on-screen rather than walking.
| Prototype | Final |
|---|---|
 |
 |
- The portrait is a render of DK Island as it appeared in Donkey Kong Country. It is also a foreground object with some implied functionality that was left out of the final game.
- Additionally, a few cameras line the ceiling that aren't there in the final version.
- By entering from map 0B, you can see (part of) the Golden Banana sequence, which has no audio.
- There is no blueprint/exit menu; unlike in the other shops, you are able to wander around freely after Snide finishes talking to you.
| Early | Prototype/Final |
|---|---|
 |
An early wood texture, presumably for the ceiling. The final ceiling texture is in the ROM as well.
| Prototype | Final |
|---|---|
The metal cable texture is slightly brighter in the kiosk version.
| Prototype |
|---|
 |
| Final |
 |
A few wall textures had their (barely-visible) top and bottom seams fixed.
Candy's Music Shop (Map 19)
| Pre-release | Prototype | Final |
|---|---|---|

|

|

|
Among this area's textures are some for a green vending machine seen only in pre-release footage. In the final game, several instruments sit in its place.
| Prototype | Final |
|---|---|
Early metal textures, likely for the trombone and sax. In the final game, they both use a smaller version of the Golden Banana texture.
| Prototype | Final |
|---|---|
The wood floor/ceiling texture is slightly lighter in this version.
Troff 'n' Scoff (Map 2A)
Almost everything here is the same as it is in pre-release footage. The video to the right showcases this starting at 3:57.
- The layout is the opposite of how it is in the final game, with two wooden doors at the sides and one large set of stairs in the middle. As explained by Troff in his early dialogue, the Level Door (to the right) takes you back to the level, as the final portal does. The Exit Door (to the left) presumably would have allowed you to exit to DK Isles without going through the pause menu; here, however, it takes you to map 32, the E3 lobby.
- There is no Tag Barrel here, in order to facilitate use of the Kong Exit Doors (and probably played a factor in why they were cut, as noted above). Without it, you would have been forced to exit, switch Kongs, and find the other character's door in order to continue feeding.
- The counter is on the tally pad instead of the door, and counts up rather than down (which gives you no way of knowing how many bananas the door needs). The door always has Chunky's face on it.
- The feeding pad has one yellow banana instead of a multicolored bunch.
- The feeding sequence starts with a dramatic camera pan across the room.
- The feeding pad animation hasn't been implemented yet-- your Kong just stands there while bananas magically fly out.
- Notably, the sequence plays out even if you have no bananas.
- Unlike in the final game, Scoff will not stop eating if you have more than required, leading to a potential crash if you have too many(?).
- The pad only works once; to feed again, you must exit and re-enter the area. This makes sense, as you're not going to find any more bananas until you leave, but in the final game it is possible to feed Scoff more than once per visit. This was probably changed because it interfered with Kong switching after the Tag Barrel was added.
- Since Chunky's face is always on the door, it opens up right away instead of cycling through the Kongs first. Amusingly, this means the door-opening fanfare gets abruptly cut off just as it reaches its crescendo (which, oddly, doesn't happen in the pre-release video).
- The loading zone for the boss door is far behind it. Walking underneath the door will play the entry cutscene as usual, but since your Kong cannot reach the exit, the camera lingers at the door (which never closes) for a while until the cutscene ends and returns control to you.
- This means the cutscene itself does not warp you to the boss as in the final game; the boss warp is a regular loading zone with a DK transition.
Lastly, textures:
| Prototype | Final |
|---|---|
The steps are more rounded at the top.

Some unique stone textures for the back walls, which can just barely be seen in the pre-release video. The final game uses Gloomy Galleon's rock textures instead. Note that the assembled image is approximate, as this appears to be the only way the pieces match up seamlessly. It's possible that there were two extra parts that are missing from this version.
| To do: Make sure I didn't just overlook them. |
Boss Rooms and Banana Totals
| This needs some investigation. Discuss ideas and findings on the talk page. Specifically: Is there a way to make this map actually behave as intended? (e.g. enter from Jungle and get the Jungle TnS, enter from Aztec and get the Aztec TnS, etc.) |
The map's level-specific functionality does not work in this version. No matter which level you enter from, the boss door requires 34 bananas to open and always takes you to map 48, exit 4 (Crystal Caves, coming out of Chunky's section of the igloo). The reason for this is somewhat complicated.
At RAM address 806F1DD8 (ROM offset 162DD8) is a list of map IDs connecting boss rooms and (what are presumably) their door counts to their respective levels:
| Level | Level ID | Boss Door Total | Boss Room ID | Boss |
|---|---|---|---|---|
| Jungle Japes | 0007 | 001E (30) | 0008 | Army Dillo |
| Angry Aztec | 0026 | 001E (30) | 0011 | Map 11 (Snake) |
| Frantic Factory | 001A | 001E (30) | 0008 | Army Dillo |
| Gloomy Galleon | 001E | 001E (30) | 0022 | Map 22 (Puftoss) |
| Fungi Forest | 0030 | 001E (30) | 0022 | Map 22 (Puftoss) |
| Crystal Caves | 0048 | 001E (30) | 0053 | Dogadon |
The bugged behavior happens because the door count and boss room values are being pulled from the wrong sections of memory: the door count is read from the boss room list (34 = 22 in hex = map 22), while the boss room warp is read from the level list (48 = Crystal Caves). The GameShark code 806F1D3A 00XX can be used to make the game read both values correctly, and thus load Troff 'n' Scoff data for a specific level (XX = 00-06 for Jungle Japes to Crystal Caves); however, it still affects every Troff 'n' Scoff instance (and has the side effect of making your bananas for the level suddenly not apply there-- presumably because the game's now reading that number from the wrong spot), so it shouldn't be considered a real fix.
On a related note, the list itself appears to be very early, as it contains a few duplicate entries and doesn't reflect some of the changes already implemented in this version.
- All boss door totals are 30 bananas-- a placeholder value. Interestingly, this differs from the pre-release video, in which the total shown is 20 bananas.
- Angry Aztec's boss room is given as map 11, which lines up with pre-release footage. The Aztec Dogadon fight did not yet exist at this point.
- Frantic Factory's boss is listed as Army Dillo, instead of either 1C (the early jack-in-the-box arena) or 9A (the final Mad Jack map).
- Despite the final fight existing at map 6F, Gloomy Galleon's boss warp is map 22 (which makes sense, as it does contain Puftoss).
- Fungi Forest is also given map 22, with the Dogadon fight assigned to Crystal Caves. Whether this was intentional or not is unknown.
See also the Notes page for a more technically-accurate map of these values, as well as a comparison against the final game's data.
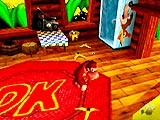
Inside DK's Treehouse (Map AB)
While this map doesn't have any setup data to speak of, a few textures can be found at the tail end of the texture bank.

![]()
- An earlier version of the guardrails flanking the entrance, similar to how the treehouse looked in Donkey Kong Country. The final railings are polygonal and connected by rope instead of vines.
- Notably, no trace of the infamous Banjo-Kazooie fridge/locker can be found in this ROM. The screenshot depicting it dates to around October of 1999 (a month after the kiosk version came out), so it may not have even been implemented yet.
Bonus Stages
Many of the Bonus Barrel minigames are more difficult in this version, and were toned down for the final game. While most of them load, few are properly playable since they weren't designed to function with the demo maps.
- The gallery games (Teetering Turtle Trouble, Krazy Kong Klamour, and Peril Path Panic) will only load if map 06 is used as the background model.
- Kremling Kosh always freezes after the intro.
- One difference shared between all of them: The jingle that plays upon losing is the slower one usually reserved for non-minigame challenges (such as the rabbit in Crystal Caves). The final game uses a different failure jingle for minigames and races.
- Stash Snatch, Splish-Splash Salvage, Beaver Bother, and Speedy Swing Sortie all use Mad Maze Maul's theme music (52).
- Busy Barrel Barrage is configured to play music track 31 (Frantic Factory production machine interior) for some reason.
| Map ID | Proto Hit | Proto Time | Final Hit | Final Time | Final Game Location |
|---|---|---|---|---|---|
| 0A | 22 | 60 | 18 | 60 | Angry Aztec |
| 73 | 25 | 60 | 22 | 60 | Gloomy Galleon |
| 74 | 28 | 60 | 25 | 60 | Creepy Castle |
| 75 | 30 | 60 | 28 | 60 | DK Isles/Snide's H.Q. |
All four Kosh maps have higher hit counts.
| Map ID | Proto Time | Final Time | Final Game Location |
|---|---|---|---|
| 41 | 60 | 70 | Gloomy Galleon |
The final game adds ten extra seconds.
| Map ID | Proto Hit | Proto Time | Final Hit | Final Time | Final Game Location |
|---|---|---|---|---|---|
| 42 | 13 | 130 | 11 | 120 | N/A |
This Mad Maze Maul was made slightly easier...and then went unused anyway.
| Map ID | Proto Get | Proto Time | Final Get | Final Time | Final Game Location |
|---|---|---|---|---|---|
| 4A | 6 | 50 | 6 | 60 | Frantic Factory |
| 4B | 4 | 100 | 4 | 120 | N/A |
More time was added in the final version.
| Map ID | Proto Get | Proto Time | Final Get | Final Time | Final Game Location |
|---|---|---|---|---|---|
| 60 | 12 | 60 | 10 | 60 | Jungle Japes |
Two coins were taken out.
| Map ID | Proto Get | Proto Time | Final Get | Final Time | Final Game Location |
|---|---|---|---|---|---|
| 63 | 14 | 50 | 9 | 40 | Jungle Japes |
| 87 | 5 | 80 | 6 | 60 | N/A |
Both of these maps have a radically different setup in the kiosk version. Instead of a linear pathway, the vines are arranged in a grid-like formation that must be navigated like a maze in order to grab the coins. This is actually rather difficult due to the way the vines behave, and was likely changed to be less confusing for players.
| Map ID | Proto Hit | Proto Time | Final Hit | Final Time | Final Game Location |
|---|---|---|---|---|---|
| 66 | 10 | 60 | 4 | 60 | Angry Aztec |
| 94 | 10 | 60 | 6 | 60 | Gloomy Galleon |
| 95 | 10 | 60 | 8 | 60 | DK Isles |
- The number of flies was reduced.
- Instead of laying flat, the swatter sits at an angle. The animation for it is longer and more exaggerated, which makes it look like it's swatting backwards and doesn't match up with the hitbox or sound effect.
| Map ID | Proto Hit | Proto Time | Final Hit | Final Time | Final Game Location |
|---|---|---|---|---|---|
| 67 | 10 | 60 | 4 | 60 | Gloomy Galleon |
| 8A | 10 | 60 | 6 | 60 | Snide's H.Q. |
| 8B | 10 | 60 | 8 | 60 | Crystal Caves |
- Same for the number of Klaptraps.
- The melon is fired from the top of the screen rather than the bottom, and is accompanied by a whistling sound effect that isn't in the final.
| Map ID | Proto Time | Final Time | Final Game Location |
|---|---|---|---|
| 76 | 60 | 45 | Fungi Forest |
| 77 | 75 | 60 | Creepy Castle |
| 78 | 90 | 60 | Snide's H.Q. |
- The timers are longer, which would have made the minigame harder.
- The kiosk version displays "Bad Luck!" upon losing, whereas the final game shows nothing.
- The turtle model is far less detailed and lacks textures.
| This page or section needs more images. There's a whole lotta words here, but not enough pictures. Please fix this. Specifically: Comparison rips. |
| Map ID | Proto Get | Proto Time | Final Get | Final Time | Final Game Location |
|---|---|---|---|---|---|
| 7A | 3 | 45 | 3 | 40 | DK Isles |
| 7B | 3 | 45 | 3 | 35 | Snide's H.Q. |
- These two were actually made slightly harder in the final version, an exception to the general trend here.
- This minigame strangely has no music defined beyond the intro, leading the track to simply start over when gameplay begins.
- There are no messages of encouragement for stopping all the reels.
- The original background texture (or part of it) can also be found in the ROM:
| Prerelease | Proto | Final |
|---|---|---|

|

|

|
| Map ID | Proto Hit | Proto Time | Final Hit | Final Time | Final Game Location |
|---|---|---|---|---|---|
| 8D | 10 | 60 | 15 | 60 | Gloomy Galleon |
| 8E | 10 | 60 | 5 | 60 | Fungi Forest/Crystal Caves |
Every bonus from map 88 onward has the same general configuration in the kiosk version, with a 60-second time limit and some multiple of 5 as the count. It’s possible these were just default/placeholder values. In this minigame's case, one map has more bananas to hit, while the other has less.
| Map ID | Proto Save | Proto Time | Final Save | Final Time | Final Game Location |
|---|---|---|---|---|---|
| 90 | 5 | 60 | 6 | 60 | Frantic Factory |
| 91 | 5 | 60 | 8 | 60 | Fungi Forest |
| 92 | 5 | 60 | 10 | 60 | DK Isles/Snide's H.Q. |
| 93 | 5 | 60 | 12 | 60 | N/A |
- More fairies were added in the final game.
- The kiosk version uses red Klaptraps instead of green ones.
Battle Arenas
Battle Arenas are similarly harder, as most of them expect you to fight for longer. Only Kamikaze Kremlings (9F) remained unchanged.
| Map ID | Final Name | Proto Time | Proto Enemies | Final Time | Final Enemies | Notes |
|---|---|---|---|---|---|---|
| 35 | Beaver Brawl | 60 | Kritter x3 | 30 | Gnawty x3 | This obviously wouldn’t have been named “Beaver Brawl” in the kiosk version. |
| 49 | Kritter Karnage | 80 | Kritter x2 Skeleton Kritter x1 |
30 | Kritter x3 | In E3 footage, the second Battle Arena was named "Kremling Karnage", but its setup doesn't match either one here. The name string still exists in the kiosk ROM. |
| 9B | Arena Ambush | 60 | Kritter x1 Kasplat x1 Skeleton Kritter x1 |
45 | Kritter x2 Kasplat x1 |
The skeleton Kritter became a regular one. |
| 9C | More Kritter Karnage | 60 | Kritter x2 Skeleton Kritter x2 |
45 | Kritter x4 | Both skeleton Kritters were brought back to life, so to speak. |
| 9D | Forest Fracas | 60 | Kritter x2 Kasplat x1 Skeleton Kritter x1 |
60 | Kritter x1 Skeleton Kritter x2 Kasplat x1 |
One Kritter joined the ranks of the undead. |
| 9E | Bish Bash Brawl | 90 | Kritter x1 Kasplat x1 Skeleton Kritter x1 |
60 | Kritter x1 Kasplat x1 Skeleton Kritter x1 |
All of these originally had longer timers. |
| A0 | Plinth Panic | 90 | Kasplat x2 Kritter x1 |
70 | Kasplat x2 Kritter x1 | |
| A1 | Pinnacle Palaver | 120 | Kasplat x2 Skeleton Kritter x1 |
80 | Kasplat x2 Skeleton Kritter x1 | |
| A2 | Shockwave Showdown | 150 | Kasplat x2 Kritter x1 |
90 | Kasplat x2 Kritter x1 |