Prerelease:The Fantastic Adventures of Dizzy
This page details prerelease information and/or media for The Fantastic Adventures of Dizzy.
World Map
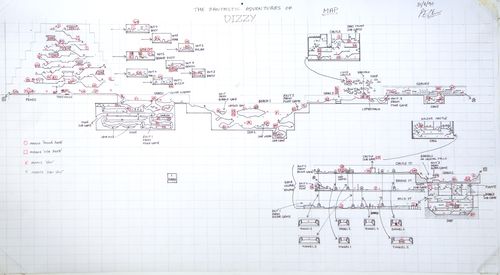
This hand-drawn world map, signed by Philip Edward Oliver himself, dates back to 31st August 1990 - quite a few months before the game's release. The layout is largely identical to the first ("Blue logo") NES version with only a couple of significant differences. The map legend differentiates between "stars" and "new stars", with "new stars" approximately corresponding to where additional stars were placed in the second ("Red logo") version, suggesting that at least the expanded star count was decided upon before this map was done with.
One curiosity is the circled "CW" located on the left side of the graveyard map. There is no item to pick up there in any released version of the game, but this abbreviation would seem to refer to the pygmy cow, as a squared "CW" is one of the possible items to give the shopkeeper along with a squared "CN" (the coin from the sea cave). In all released versions, Dylan gives the cow in exchange for the caged Pogie, but this map instead places a circled "EB" over Dylan's hut interior. A squared "EB" appears over a circled "FB" on the surface of Carber Bay, and a squared "FB" is present where the fireplace is in Zaks' castle. From this it's easy to deduce that "EB" and "FB" mean "Empty Bucket" and "Full Bucket", as every version of the game from the second on requires Dizzy to put out the fireplace by filling a bucket with water. Yet the bucket does not exist in the first NES version, and all other versions place it in the graveyard cave, but it appears that the designers once considered having Dylan provide the bucket instead. The map does not yet contain the wall in Zaks' castle that would force the player to put out the fire instead of simply walking over from a rope swing, however.
Another oddity is found just to the left of Dozy's hut. The map shows a jump to the left for an X (a star), then a jump to the right for a circled X. The other five circled Xs correspond to the locations of extra life puzzles in the playable game, and there is indeed a platform hidden completely behind a tree accessible by jumping to where the circled X was in all NES versions as well as the Sega Master System and Game Gear ports, but there is nothing to collect there in any of them. Since the map is missing the extra life puzzle at the left end of the grasslands ("GRASS3") and there are no unused item values near the six indices used for extra life puzzles in memory, it's reasonable to think that this puzzle was moved or planned to be moved. (Incidentally, the extra life puzzle on the grasslands' left edge is also missing in the Genesis, Amiga, and PC ports, but they don't appear to contain one at the top of the treehouse village, either.)
Prerelease Screenshots
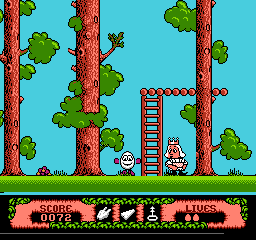
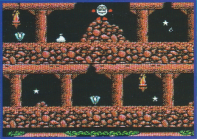
The manual included with the Aladdin version contains a few screenshots, and some of them spot several differences compared to the actual game. These screenshots are also present on the back of the box on some releases.
| Manual (Aladdin) | In-game (Blue) | In-game (Red) |
|---|---|---|
|
|
|
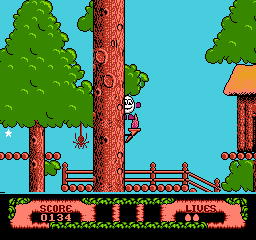
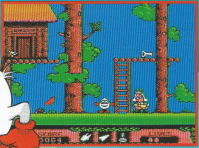
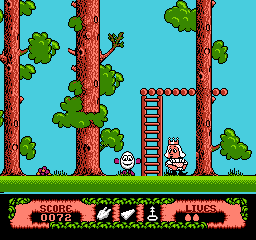
- There's a house near Prince Clumsy. In the final game, there are no houses that low at all.
- The umbrella near the house can be found in a different spot in the final. It should be noted that the manual screenshot might not show the item's initial position; it might have been moved by Dizzy beforehand. In any case, in the final game the umbrella is unobtainable without using either the cooked chicken or wooden plank, both of which are present in Dizzy's inventory.
- There's a door key on the ledge above Prince's head. It'd have been completely inaccessible in the final versions; the ladder is purely decorative, and there's no way to drop onto the platform from above. It's not really clear how one would obtain it in the version shown in the manual either; the gap seems too large for Dizzy to jump across.
- Some leaves were added to the tree closest to the Prince in the Red (including Aladdin) versions of the game; they aren't present there in the manual and the Blue version.
- A watermelon can be seen in the manual, but not in the final.
- Dizzy appears to stand in front of the grass, not behind it.
| Manual (Aladdin) | In-game (Blue) | In-game (Red) |
|---|---|---|
|
|
|
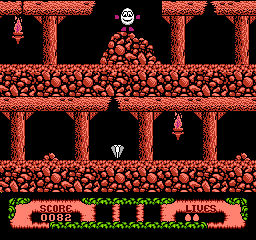
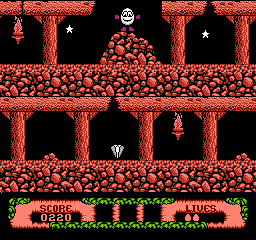
On this screenshot, only one of the diamonds and star locations matches with the retail versions of the game. The bag of gold is located in different spot in either revision. Interestingly, the first (Blue) version doesn't have stars on this screen at all - that suggests the manual screenshot might have been taken when the later Red revision was being made.
| Box (Blue) | Box (Aladdin/Europe) | In-game |
|---|---|---|
|
|
|
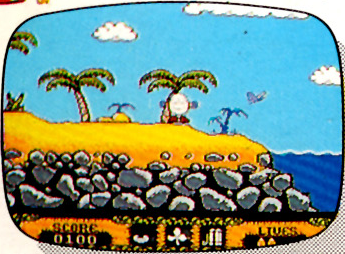
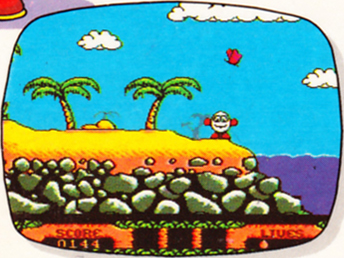
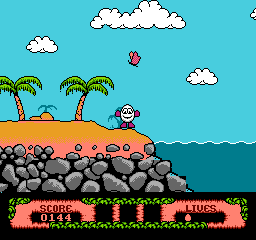
A subtle difference on the Golden Palm Beach / Carber Bay screenshot from the rear of later Aladdin and European version boxes: Dizzy is not centered, suggesting that he's near the screen boundary. In the final release, this area extends far to the right, including two islands and the right shore of the bay. Also, the palm tree far in the distance (partially obscured by Dizzy) is in a slightly different location.
Surprisingly, on the earliest (Blue) release's box there's a screenshot taken at the same location, but it does match final.
