Mario & Luigi: Partners in Time/Unused Rooms
This is a sub-page of Mario & Luigi: Partners in Time.
| This page or section needs more images. There's a whole lotta words here, but not enough pictures. Please fix this. |
These rooms can be warped to by using this Action Replay code (with the xxxx's replaced by the room ID) and holding the L button while walking through a door. The code is the following:
94000130 FDFF0000
12207FA8 0000xxxx
12320238 0000xxxx
1232026C 0000xxxx
12320768 0000xxxx
1232079C 0000xxxx
D2000000 00000000
Contents
Room 0x00
| Map | Basis |
|---|---|
|
|
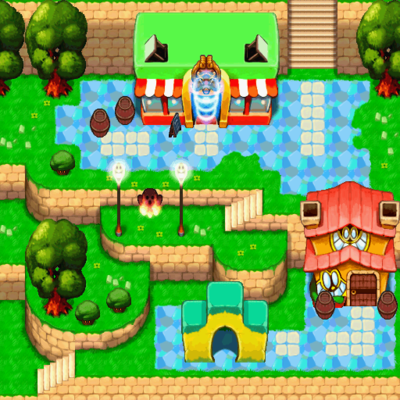
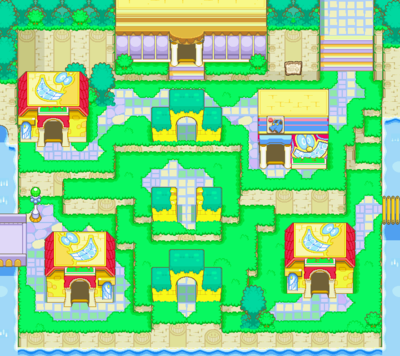
This map, which appears to be based on the western side of Beanbean Castle Town, seems to have been used for debug purposes. When entered, the Toadwood Forest theme plays, and Mario's HP drops to 0 while the player's coin count jumps to 262136. You are unable to move around or interact with any of the objects in the environment (two item blocks, a used block, a purple event block, Toadsworth, a Boo Guy object, and a Toad NPC with graphics taken from Mario & Luigi: Superstar Saga).
It is worth noting that Toadsworth is always placed in a certain spot relative to where the player is. The flaming Hoohooligan statue, whirlwind/whirlwind statue, and the many barrels can't be interacted with.
Room 0x01
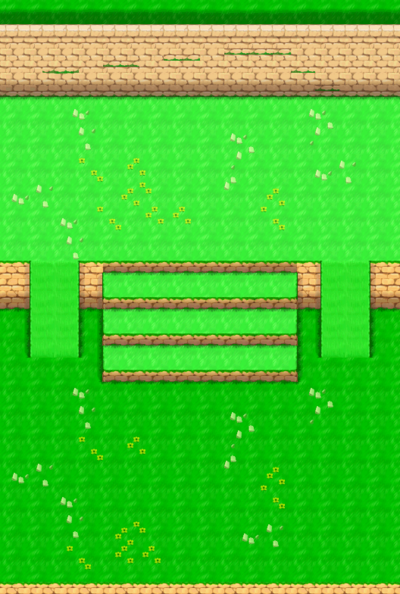
An empty grassy field area with stairs. May have been used as a simple physics/collision test room.
Room 0x02
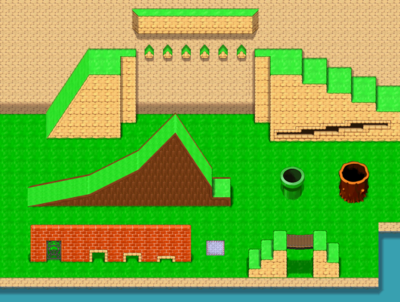
A debug room meant to test the Bros' capabilities (like the Bros Ball, tunneling underground, etc.) as well as several blocks. Two of the blocks can be activated by the adult Bros, and contain a fairly large supply of coins and Mushrooms. Four blocks can only be activated by the babies (they're too close to the ground for the adults), and three of the blocks require both baby and adult in order to be hit, each at slightly different heights. The player starts at the upper-left corner of the room, and the collision only activates once you jump or go near something that turns it on. The lower-right corner of the room contains a warp point which crashes the game.
It's also interesting to note that the pipe seen here is blue in the final game (this particular green design is only used when using a Warp Block), while the stump sprite is really rough, looking even more primitive than anything seen in promotional material.
Room 0x03
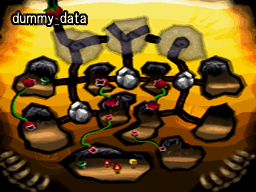
A weird “room” which looks more like a minimap than anything. This room appears to be an earlier version of the underground area of Gritzy Desert. Judging from the map, the player may at one point have had to use Piranha Plants as a way to traverse rooms (i.e., being swallowed by one, only to be spat back out on the other end of the stem). Other notable elements include paths blocked by boulders, a room with a green pipe, and a room with a green pipe, two torches, and a block. The player is unable to spawn in this room.
Room 0x04
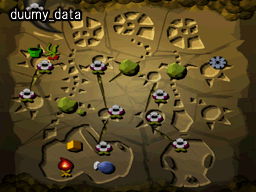
What appears to be an earlier/alternate version of room 0x03, but with more fossils and less defined rooms and paths. The Piranha Plants are also just regular flowers here, aside from the two unique ones on the leftmost and rightmost rooms. Another difference from 0x03 is a missing torch in the bottom room, and an unknown object being added in its place (an early puzzle, perhaps?). The player can spawn in this room, alongside the babies.
Room 0x05
A duplicate of room 0x03, except that the player can spawn here alongside the babies.
Room 0x06
This "room" is merely a simple black void, though the player can still spawn in and move around.
Room 0x07
In this debug room are two Superstar Saga-style Toads (one inaccessible and the other crashing the game when interacted with), a heart bubble, pipe block, a non-functional red elevator platform, a 4-player platform, a baby trampoline, and a Boom Guy object. The terrain is identical to that of room 0x001, and there is no music. Interacting with the Boom Guy starts a battle against two Shrooblets, using a battle background from the outskirts of Hollijolli Village. Touching the 4-player platform loads room 0x08 on the top screen with the babies as playable characters. Hitting the Pipe Block will make the babies come over to the bros. Jumping with the babies on the 2-player trampoline will crash the game. Pressing X/Y and then A/B will take you back to the save spot.
Room 0x08
This room is loaded in 0x07 when interacting with the 4-player platform. The Superstar Saga-style Toad crashes the game when spoken to, and two wall buttons have already been activated. There is no music, and the terrain is the same as room 0x01.
Room 0x09
Much like 0x00, movement and actions are disabled, and two red elevator platforms can be seen side by side. The terrain is also the same as room 0x01, and there is no music.
Room 0x0A
This room seems to be a messed-up version of the Thwomp Volcano Time Hole room. The Time Hole is functional, and entering shows the usual time travelling sequence... but with an additional Superstar Saga-style Toad spinning alongside you. The Time Hole in this room should take you to Hollijolli Village, but it instead takes you to a completely white room. There is no music and no other warp data, but collision data is present. When entering this room from 0x0B's Time Hole, the map on the top screen is replaced with one of the early Gritzy Caves maps (0x03 / x005).
This room, according to RAM, appears to be room 0x00; the difference is that the only other object in here this time is a Superstar Saga-style Toad, presumably the one who was in the time travelling sequence. However, talking to him does nothing. There is also a Time Hole that supposedly takes you to the past, playing the same sequence as the one in 0x0A and taking you to the same room (the one that you are already in). There is no music, but collision data is present.
Room 0x0B
This room is very similar to 0x0A; however, its Time Hole takes you to room 0x0A instead of 0x00, and uses a rather long "returning to the present" sequence instead of going to the past. Unlike room 0x0A's Time Hole, Mario & Luigi "return to the present" without either the babies or the Superstar Saga-style Toad.
TestMAP Test 1 (Fujioka Value 5)
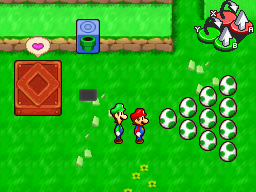
A hammer sound is played, and you're warped to a variant of room 0x07 as Mario & Luigi. You're standing between two Toads from Mario & Luigi: Superstar Saga.
If you talk to the upper Toad, the screen will scroll and an arrow made out of Yoshi Eggs will spawn on the right. The Yoshi egg graphics are used, but the behavior is not: if you touch them, they will make a little hop and a hammer sound. The eggs seem to make use of some sort of primitive physics engine; they will bounce endlessly on top of characters' heads, and will move ever-so-slightly after being disturbed. The latter will result in the hammer sound looping infinitely. If the player continues to disturb the eggs, the game will lag and eventually sprites on-screen will flicker or disappear. The second Toad does nothing. The 4-bro platform is gone, as is the trampoline. Room 0x09 is displayed on the top screen.
Shop, Menu Test (Fujioka Value 10)
You appear in the debug room as Mario & Luigi next to a Boom Guy and a Toad. Talking to the Toad reveals a menu. (Note that in the localized versions, everything is a "_" due to missing Japanese characters.)
On the first screen the menu options are:
- Full Party
- Mario only
- Adults only
- Babies only
- Quit
Selecting any of the options besides Quit reveals a second screen:
- Suitcase (brings you to the suitcase screen with the party you selected on the first screen)
- Item Shop
- Badge Shop
- Back
Selecting either shop brings you to the Shop Select screen:
- Peach Castle Shop
- Monty Mole Shop
- Toad Town Shop
- Back
Selecting anything besides Back brings you to another screen:
- Select items you want to buy screen
- Standard items buy/Badges buy screen
- Back
Early Test Maps
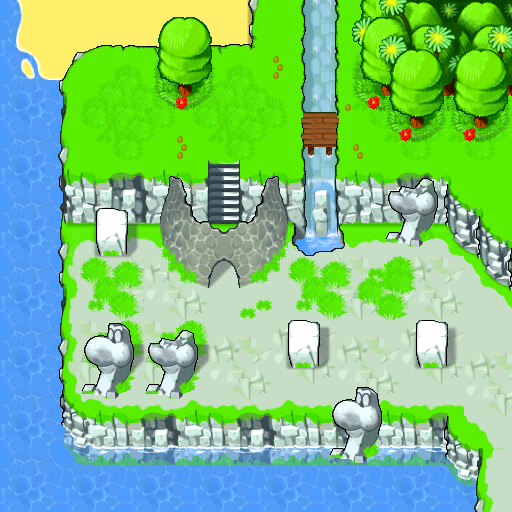
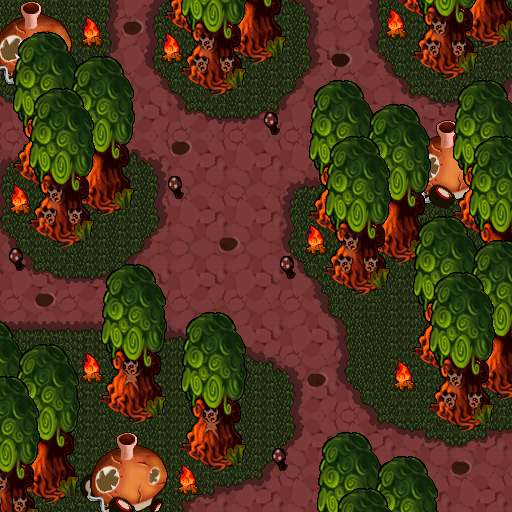
The file \Etc\Sasaki\TestMapData.dat contains graphics for 2 unused maps: one of an early version of Yoshi's Island and another of an earlier iteration of Toadwood Forest. These maps contain no collision data and cannot be loaded into the game. The Yoshi's Island map looks very different from its appearance in the final game, but one noticeable detail present in both is the Yoshi head statue, having both the normal and destroyed versions. The Toadswood Forest map looks much closer to its final appearance, albeit having much scarier-looking depictions of the Vim-sapped Toads, as well as numerous campfires and multiple instances of the mysterious, destroyed mushroom vehicle that still appears in the final game.
