GoldenEye 007 (Nintendo 64)/Nenaudojami dalykai pagal lygius
This is a sub-page of GoldenEye 007 (Nintendo 64)/Unused stuff by level.
| This page sucks. If you could make it suck less, that would be awesome. Specifically: Needs a rewrite and more screenshots. |
Dam
Unused Areas
The Island
| To do: Another shot or two of the tower, show its interior at least. |
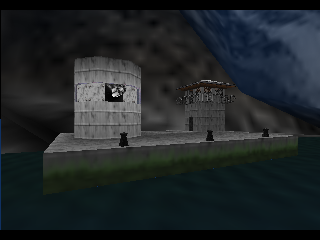
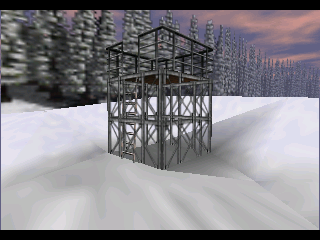
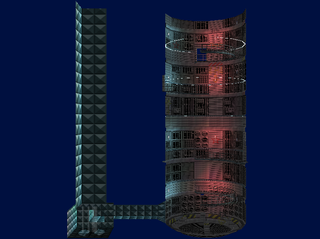
There is a small outpost at the base of the mountains on the opposite side of the dam's reservoir. This is commonly called "the island" by the game's fanbase. It can be seen from anywhere on the dam, but the easiest way to take a peek at it is to zoom in with the sniper rifle at the end of a dock. The island is home to a guard tower, which uses a unique style not used for the other towers in the level, and an inactive drone gun. This drone gun is actually modeled as part of the level background—it's not a prop, so it can't fire.
The only things confirmed to have been placed on the island are a lone patrolling guard and body armor – a reward for exploring. There is a pad on the wall inside the lower section of the guard tower—it (2759) is found between the pads used for the mission's alarm objects. There are also pads (0103–010C) that would've been used as nodes for one or two patrol routes around the bottom of the tower and its walkway, but there is no defined path for these anymore.
Only a few areas of the island have collision in the final game—interestingly, there are three pads (004F–0051) placed on a section of ground which still has collision near the mooring posts.
Level Ending
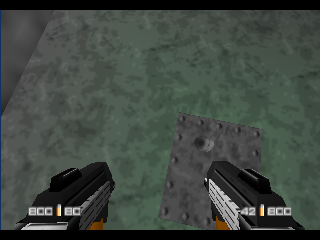
There is a platform near the bottom of the dam, which can only be briefly glimpsed since the outro starts before Bond arrives at it. There is a metal plate in the center of the platform, modeled as a part of the background, but interestingly, there is also a small section of duct modeled beneath it. In the movie, Bond uses the laser on his piton gun to cut this plate open, gaining access to the facility's ventilation system. The developers may have originally planned something similar for the game, although it must have been scrapped before the plate could be converted into a prop.
Unused Props
Sat Box
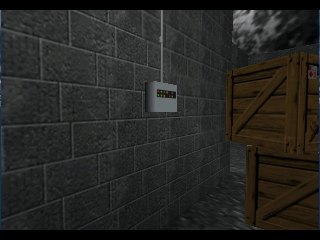
This light gray box with colored lights was what Bond had to attach the covert modem to originally. It can be seen in this promotional trailer for the game.
Speedboat
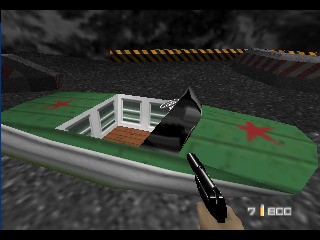
To get to the island, Bond was intended to use this speedboat. This never got beyond the planning stages. There is a pad (006F) over the water at the dock behind the center guard tower on the dam, which was likely the boat's intended starting position.
Unused Items
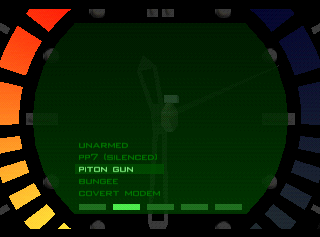
As for getting down the dam, use the bungee rope. At the bottom of the jump, use the piton gun. Simple.
Q's briefing specifically mentions a bungee rope and piton gun. This may be simple fluff to better explain the mission's ending to players who hadn't seen the movie, but both of these items actually exist. Neither is modeled, but the piton gun has preliminary stats and its own ammo type.
Interestingly, the bungee and piton gun are not mentioned in the earlier briefing text found in Perfect Dark.
Unused Objects
Weapons
- 08, 09, 1D–23, 2D, 2E: KF7 Soviet—attached to unused character IDs.
Tags
- 0D, 0E: Both of these tags reference 03 Standard Object #00—one of the oil drums at the bottom of the stack near the pillbox.
- 13: References 2A Glass Object #10—the angled glass pane near the mainframes.
Unused Pads
| To do: Lots more |
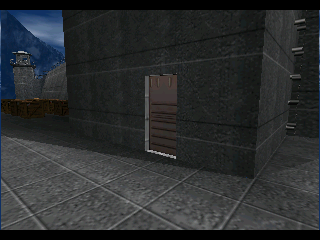
There are pads (2752, 2755) for doors at the base of the two guard towers which are open to the docks.
Unused Text
Picked up a covert modem.
This pick up string for the covert modem can never be seen, since Bond starts with it.
Debuginiai komentarai
0408
važiuojam...
Šis bloką naudojama sargybinis, stovintis už metalinių dėžių krūvos išėjus iš tunelio. Šis komentaras naudojamas tada, kai jis žirguliuoja atgal į savo postą...
namo
...ir šitas tada, kai jis atvažiuoja.
040A
brrm brrm
Šis blokas nustato šarvuočio kelią ir judėjimo greitį.
0412
whee
Šis blokas atsakingas už kamerų keitimą ir Bondo animacijų grojimą outro katscenoje.
Keistenybės
Veiksmo blokai
040B nustato orlaivio propelerių arba sraigtų greitį. Jis nieko nedaro, nes misijoje nėra orlaivio, su kuriuo galima susieti bloką. Filme yra orlaivis, skrendantis per užtvanką, tai gali būti taip, kad kažkas panašaus irgi buvo planuota žaidimui.
040E yra begalinis kartojimas.
Military Truck
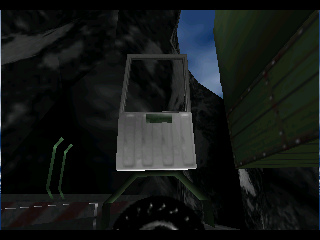
The inside of the truck's doors are actually modeled. They can be seen by enabling the Tiny Bond cheat, crouching in front of the truck, and standing up when the cab is over Bond. The rest of the cab's interior is not modeled.
It's possible that these are a leftover from when Bond was able to drive the truck.
Facility
Original Wall Texture
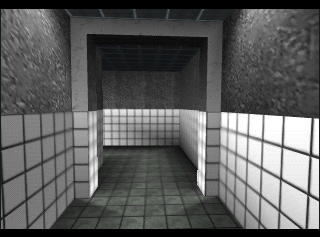
Early screenshots of Facility show it using a white texture with gray blotches above the tiles on the walls in the bathroom and the area with the security room surrounded by halls. It was replaced with a much nicer looking gray stone texture later in development, however the old texture can still be found on some of the wall supports. With the exception of one location, the old texture is always found on the darkened ceilings or back sides of the supports relative to the way you progress through the level, which explains how it was overlooked, or at least why no one thought it was important enough to fix them.
Unused Props
Swinging Doors
Three swinging door models go unused in Facility.
- Pgas_plant_sw_do1Z is similar to the gray swinging doors found throughout the level, but is a lighter shade of gray, has blue and black stripes across the middle, and a kick plate at the bottom.
- Pgas_plant_sw3_do1Z is nearly indistinguishable from Pgas_plant_sw2_do1Z, which is the gray door actually used in the level. It's ever so slightly brighter, as seen on the right side in the screenshot above.
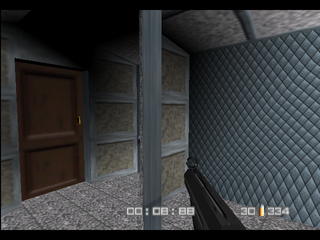
- Pgas_plant_sw4_do1Z is the most interesting: It uses a beige texture similar to that found on the walls in the first half of the map. In fact, this door uses texture index 2D0, while the walls use 2D1. This hints that secret passages, like those found in Archives, may have been planned for Facility. As can be seen in the screenshot above, one side of the door has bright shading, while the other has dark.
Test Tube
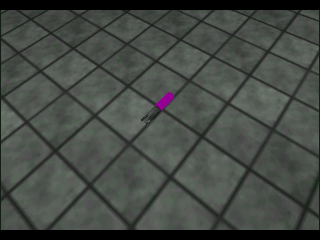
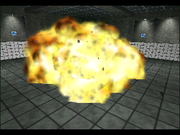
This pink-capped test tube looks harmless...at least until it's shot and fire fills a good chunk of the room! While there's nothing directly tying it to Facility, this is the only mission where laboratory equipment is encountered, so it makes the most sense here.
chr in its filename hints that it was intended to be collectible, and indeed its model archetype is that of collectible objects, but there's no corresponding item or G model for it to use in the watch menu.
Unused Text
Ourumov: One...

Ourumov: 1
These two lines from Ourumov are not used in the final game. He ends his countdown with the line "One... Kill him!" instead. The numbers are always spelled out, too, which hints that the "1" line is from earlier in development, despite coming later in the text file.
Mission Photo
There doesn't seem to be any opaque/bulletproof glass in the windows to the labs at the top of the walkway.
Runway
Motorbike
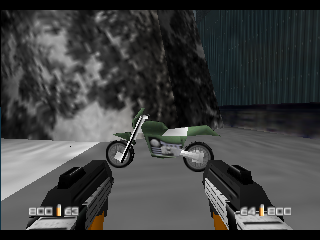
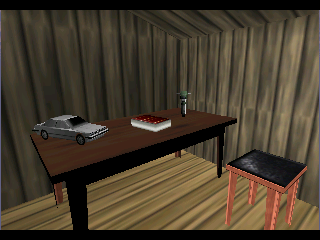
A motorbike, like those seen in the movie, was modeled for Runway. While there were originally plans to let Bond ride this, the developers tested the tank in Runway and chose to utilize that instead. The motorbike model, shrunk down and placed on a desk, can be seen in Surface.
Perfect Dark would eventually allow the player to ride a (hover)bike, though it's unknown how much was inspired from the Runway bike.
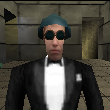
There's also the biker head, which you can play in multiplayer with the well-known Extra Characters button code. The biker's helmet is modeled as a part of the head itself, not an attachment like those worn by many of the guards, as are his goggles. The biker head doesn't have a specific body, but can work on any of the guard bodies.
Mission Photo
The Missile Battery does not appear to be placed.
Surface 1
Guard Towers
There are small guard towers found throughout the map. Despite having guards armed with sniper rifles, none of them are placed on these towers. The reason why the towers aren't utilized has to do with how game handles guards' line of sight and gunfire. Guards can only see you if they have a clear line of sight to you across collision tiles. Since the towers' collision tiles only connect to the ground's tiles at their ladders, the only place guards can actually see you is when you're standing in front of the ladder. This goes both ways, and guards on the ground cannot see you when you're in a tower, although they will come up the ladder if they're already pursuing you. Even if sight is faked, as the game does elsewhere, non-player bullets work in the same way as line-of-sight and will not cross the edges of collision tiles without connections. Any bullets that are fired will appear to hit an invisible wall. Both of these limitations combined would have rendered any snipers on the towers completely ineffective.
Sendoff
Surface 1 seems to have been the developers' dumping ground for unique props which are never used in any other mission. Probably the most notable of them is Runway's motorbike, but the unused BMW is also on this table. The wooden stool in front of the table is also unique, as are the red books. There's even a crate packed full of books, which spills them out when destroying it.
Unused Pads
Huts
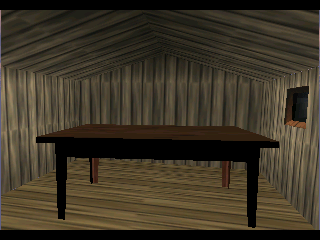
There's a pad for a table in nearly every hut. The exceptions are the one with the safe and the two at the dead end.
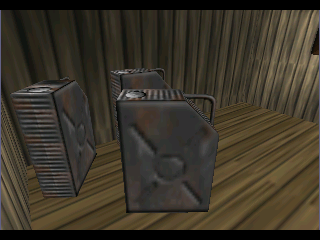
Speaking of the dead end huts, there's a pad for a third jerrycan sitting with the other two.
Additionally, it seems several of the huts were supposed to have other objects on their tables, and possibly even additional guards, but there's no way of determining what was intended to be placed on the pads.
Observatory
While the observatory serves no real purpose in this mission, it's worth noting that there is a pad for a door between its outer and inner walls at the same height as the exterior walkway, suggesting that its interior originally had a second floor.
Bunker
The pads for the Bunker's glass door are present inside its entrance corridor. These are fairly pointless since it's not even possible to open the entrance door in this mission.
Bunker 1
Empty Bunker
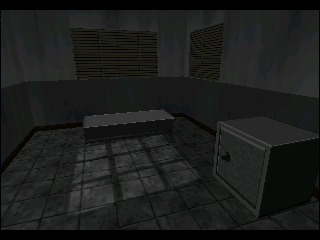
Bunker 1 is the default level in the game. If you use a level modifier GameShark code and set it to an invalid value, you end up in Bunker 1 without any objects at all. The pause screen will list "E R R O R" as the mission's location and if you try to view the briefing, you'll get the message "There is no briefing for this mission". Additionally, Bond wears his default blue suit.
Main Screen
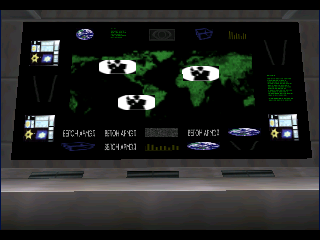
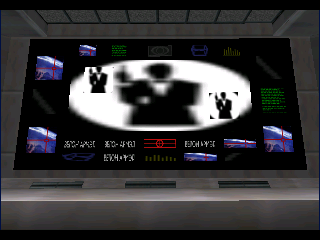
The prop used for the world map on the main screen is not a standard wall monitor, but instead a unique one which supports three picture-in-picture displays. These displays are never utilized, but their existence makes it clear that the developers originally wanted to overlay something on the world map. The GoldenEye satellites and their targets, like in the movie, are a good bet, but since the world map is animated in the final version they can't be placed over any specific location.
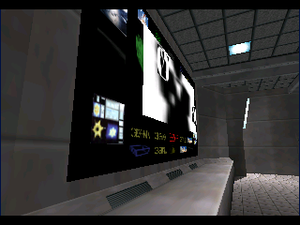
There are also pads for three more monitors placed in front of the world map. The first is another large screen, positioned slightly in front of the world map. The other two are smaller screens which are placed in front of the upper left and bottom right of this large screen. The pad values, 273D, 273E, and 273F come directly after those used for the other screens, so it's doubtful they're from earlier in development.
Unused Props
Severnaya Door
A gray door with a fake window and caution stripes at the top and bottom. The window is done in a style from earlier in development, when windows were not environment mapped and used a diagonal striped texture instead. Unlike examples of these windows found in the final backgrounds, the one on this prop cannot be shot through but it plays a glass sound effect when shot. This door was intended to slide or swing open, since its bottom isn't modeled.
Severnaya Door 3, Window
This is an earlier version of the windowed door, with a fake window like the one mentioned above and incorrect texture indices. The textures are interesting since they change as you move, similar to environment mapped textures.
Unused Text
hello
This could be a debug string, as it appears right before the text used by Boris and Bond. "hello" is also used as a debug comment in the action block which spawns endless guards when the alarm is triggered.
Programmer: Don't shoot! It's this way.
This line is set up in the action block used by the rest of Boris's dialogue, but is never displayed, instead Bond's "Take me to the mainframe terminal!" line is always used. The section of the block which displays that line masks Boris' guard type value with 04. Prior to displaying that line, there is a check that this value is not already set, and if it is it's supposed to display this "Don't shoot!" line instead. However, when Boris runs away, the block unmasks the type value, so only Bond's dialogue is shown.
Programmer: Just through here.

Programmer: Let me see.
These two lines for Boris, however, aren't set up. Given the wording, they were probably intended to be shown when entering the doors to the room with the mainframes and before he mentions the root password being changed.
Present day
This would have been shown in the intro. Apparently, Bunker 1 was meant to mark the transition from the past to the present. This makes no sense though, since it says in Surface 1 that the mission plays out four years before the main storyline.
Silo
| To do: Concept art (including the start point being in the ventilation shaft) |
Ventilation Shaft
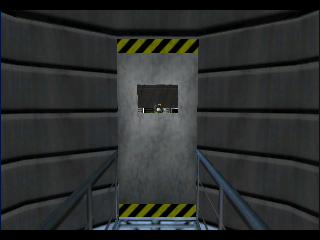
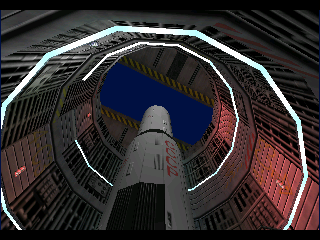
There is a ventilation shaft connected to launch silo 4-H4 – the one Bond starts in. A grating with a blue duct behind it can be seen from the starting walkway, however this makes a 90 degree turn farther in, so nothing of the shaft can be seen. The ventilation shaft itself is as tall as one of the launch silos and uses a fan texture that can also be seen in Archives at its bottom, along with a lighting and shadow effect.
Pad 00E6 is below the shaft, implying it was intended to be accessible, however the duct has no collision. This pad may have even been intended as a start point at one time - there is a ladder connecting the bottom of the launch silo to the area Bond currently starts the mission. In the final version, the duct and ladder simply serve as a detail pieces explaining how Bond got onto an empty walkway at the bottom of the silo.
The following GameShark codes can be used to start below the ventilation shaft:
8106D380 C48B
8106D382 7ED9
8106D384 C500
8106D386 A060
8106D388 452F
8106D38A A39A
8106D38C 801B
8106D38E 365C
8106D390 446E
8106D392 A3DA
810B3BCC C58C
810B3BD0 C530
810B3BD4 C530
As mentioned, there is no collision in the duct, so moving away from the starting area will just result in Bond entering a blue void.
These codes can be used to start at the bottom of the launch silo:
8106D380 C185
8106D382 5FAC
8106D384 C502
8106D386 87BD
8106D388 4512
8106D38A CCBD
8106D38C 801B
8106D38E 1B1C
8106D390 4180
8106D392 7F00
Unlike the duct, the bottom of the silo does have collision. The ladder does not, however, and tiles are in place seemingly to prevent the duct from being accessible, even though it wouldn't be regardless due to the aforementioned lack of collision.
Ourumov's Equipment
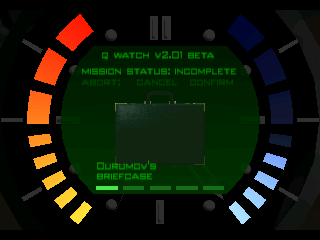
Dealing enough damage to General Ourumov before he runs away will cause him to drop his briefcase. Collecting this was originally intended to be an objective. In one draft of the story, it contained the blueprints for the Pirate helicopter. In another, it had vital information for stopping the GoldenEye satellites from firing later in the game.
Additionally, while it is not normally possible without cheats, if you kill Ourumov he will also drop a keycard flagged to open any locked door in the mission. The key has not been given a name, so it will appear in the menu as a hyphen.
Missile Launch Doors
| To do: Find where the developers mention making these into normal doors because they considered having the missiles launch like the shuttle in Aztec, work it into the article. |
The launch doors at the top of the second silo encountered can actually be opened. This is handled via action block 1003. If you switch to unarmed at any point during the mission, the doors will open. Drawing the silenced PP7 will close the doors again.
Inaccessible Walkways
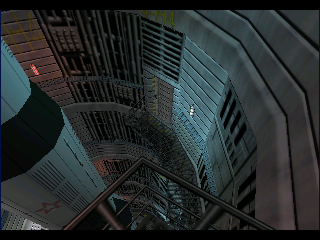
There are two walkways which cannot be accessed in any way. One of these is in the silo Bond starts in. It can be seen from the starting area at the bottom of the silo, but is most visible from the walkway at the top of it, which is accessible by going right at the T junction where Ourumov is encountered. There is actually a screenshot of Bond firing down at a guard on this walkway - it can be seen on the back of the GoldenEye box, and below in the elevator section. No guard is on this walkway in the final version. The door simply opens into the void.
The following GameShark codes will allow Bond to start on the first walkway:
8106D380 C26F
8106D382 F845
8106D384 42FE
8106D386 3733
8106D388 4515
8106D38A 7543
8106D38C 801B
8106D38E 0D8C
8106D390 4380
8106D392 7F00
The other one is in the second missile silo and is most easily seen by taking a left after the second fuel room. There is actually a soldier on this walkway who will never normally react to Bond's presence in the launch silo. Even if he did, due to the limitations of characters' line of sight detailed in the Surface section, he would not be able to do anything to Bond. However, if you use the following code to start on the walkway, the soldier will happily blast Bond as soon as the mission starts.
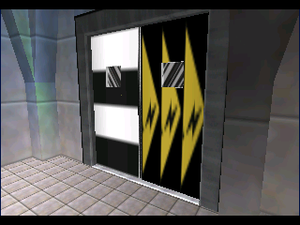
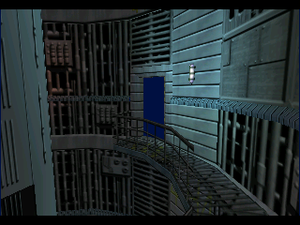
Unlike the door on the first walkway, there's something behind this one: Another door, modeled as a part of the map itself. It's a blue variation of the doors used in this mission, resembling an elevator door. This door can also be seen in early screenshots. The silver door's filename is silo_lift_door, so the blue door is probably just an early look for the final door.
These codes allow Bond to start on the second walkway:
8106D380 4527
8106D382 0CC9
8106D384 C3A2
8106D386 DF50
8106D388 453F
8106D38A E74D
8106D38C 801B
8106D38E 21FC
8106D390 40EC
8106D392 B000
Elevator
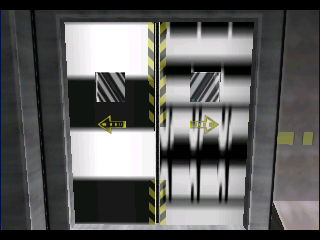
Early screenshots show an elevator scaffold running up the wall of the silo Bond starts in. A prerelease video even shows Bond riding this elevator to the top walkway of the silo. The only evidence of the elevator in the final map is that the handrails are missing from the ends of two walkways – the one at the top of the silo, and the bottom one you start on. This means the elevator was likely entered from the bottom walkway.
Unused Pads
There are three pads behind the walls of two of the launch silos which were intended for doors. The first one, surprisingly enough, is found directly behind Bond's starting position. This may have simply been a detail piece, another explanation for how Bond got into the missile silo in the first place.
The second and third are in the third launch silo Bond enters. One is directly across from the door leading to the silo's upper walkway, the other is above that, on a level which does not even have a walkway in the final map.
Unused Textures
A round light fixture can be seen attached to the ceilings in some prerelease screenshots; they emitted a triangular beam of light. These lights weren't props; they were actually map geometry and were entirely flat, similar to lights still used in the Frigate and Depot maps. The texture for these lamps is still in the image bank.
Frigate
Inaccessible areas
There are two locked doors on each side of the bridge - these doors lead out onto two small grated walkways, which are easily visible from outside the Frigate. The doors can be opened if you can get a guard to stand by the door, which is easiest to accomplish with the Invisible cheat on.
Radio Room Map
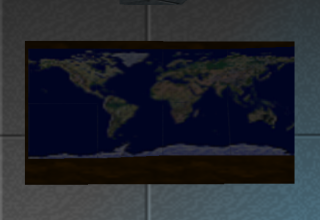
The radio room has two bulletin boards behind the desks with radios. The one farthest from the bridge has a number of maps and satellite photos attached to it, but the other is completely bare...or is it? There is actually a full world map, composed of 8 unique 32×32 8-bit textures, placed on this board. It doesn't show in-game since the board's triangles were accidentally given priority over those used by the map.
Unused Character
After completing the Cradle mission, you can play as the helicopter pilot in multiplayer. In the movie, Xenia kills two helicopter pilots on the Frigate, and she and her accomplice take their place to steal the helicopter. There's no evidence of any of this ever taking place in the game, although Moneypenny's briefing does mention Xenia. The character must have been modeled for this mission, but really has no place with how it plays out.
Unused Props
Torpedo Rack
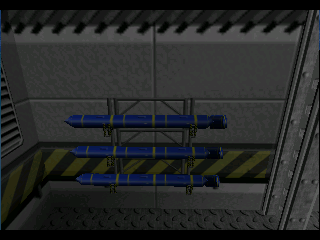
A wall-mounted rack holding three blue torpedos. It was likely modeled for this mission, as it wouldn't really fit in any other level, but there are no pads that seem intended for it.
Harpoon
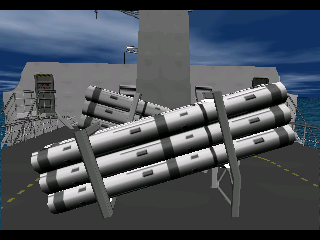
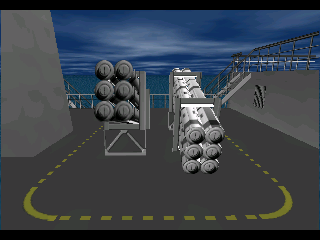
The harpoon missile launcher is the only gun modeled for this level that isn't used. As noted below, they were placed in this location at one point during development.
Door 2
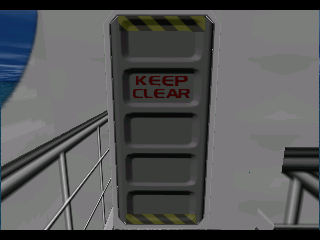
An alternate door model with "KEEP CLEAR" printed on it. In addition to the text, the dark and light sides of these doors are reversed compared to the doors that are used, but otherwise the two are identical.
Unused Pads
Pads $00AC and $00AD were intended for the unused harpoon missile launcher. They're found among the pads used for the rest of the Frigate's guns and are placed side-by-side facing opposite sides of the ship, which is a typical configuration for these launchers. And if there was any remaining doubt they were intended to go here, they're visible in an early side view of the ship.
Mission Photo
The Mission Photo lacks the speedboat and walkway leading to it. In Prerelease material it is noted that Bond's original starting point was at the fore end of the ship.
Bunker 2
Unused Props
The old-style windowed doors mentioned under Bunker 1 were probably also used in this level at some point.
Unused Text
Twinned Safe Key 1
Twinned Safe Key 2
These strings are assigned to the two safe keys, but they replace the weapon of choice string shown after completing the mission, which can never actually be seen since only weapons will appear there. They're interesting since they note the safe keys are twinned – you need both of them to open the safe, something unique to this mission.
Statue
Unused text
 null
 null
These two lines appear between the Valentin and the Janus text. They were likely placeholders in case the developers needed some more lines.
 Trevelyan: Closing time, James
               - last call.
This line is used in the movie as a command to Trevelyan's goon to shoot Bond with a tranq dart, however it's not used at all in the game.
Truck
A truck may have been intended to pick up Bond and Natalya in the ending cutscene, as hinted by Mishkin (Mishkin: There's a truck waiting outside.) A script for this level contains the debug comment "brrm brrm", always used for moving vehicles, but then goes into an infinite loop.
Archives
Mission Photo
| Prerelease | Final |
|---|---|
 |
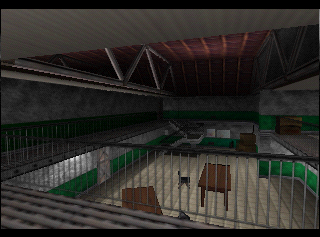 |
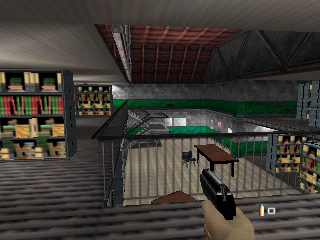
The photo used for this mission is taken from earlier in development. Several walls and doors which are present in the final mission are missing. These walls were likely inserted to give a frame rate boost in this area, since without them it's wide open and a large number of props can be seen at once.
Unused Props
Desk Blotter
This desk blotter can be seen sitting on tables in a prerelease overview of the office section of Archives. Use the GameShark code 801D1919 0009 to replace the PP7 on the table at the start of the mission with it in the North American version, or Pro Action Replay code 801B8CA9 0009 in the PAL version. It looks pretty strange when the table it was sitting on has been destroyed, which might explain why it was cut.
Unused Textures
This green lamp can be seen hanging from the ceiling in several prerelease screenshots and videos. Like the ones in Silo and Bunker, they were completely flat, but unlike those they did not emit a visible beam of light.
Streets
Inaccessible areas
There are two inaccessible areas in the first area of the level. The first one is behind a rusty wall at the start. The other area is located near the building with Valentin.
Chasing Ourumov
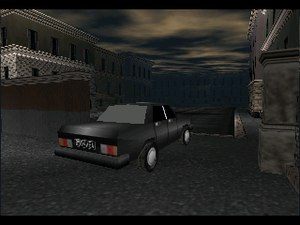
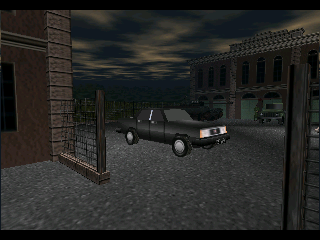
One of the big action scenes in the movie has Bond chasing Ourumov through the streets of St. Petersburg in a tank, all the while being chased by Russian soldiers and police. The Streets mission is a bit disappointing in comparison, but it's clear the developers had more in mind for it. First up, Ourumov's ZIL from the movie (license plate 0594ЛЕА) was modeled and is a functional wheeled vehicle. Not only that, everything is already in place to make it move through the starting area of the map: Action block 0402 tests your proximity to pad 10A, which is in the lot near the tank. When you get close to the fence, the car will take off down path 00.
Unfortunately, Ourumov's driver is not nearly as good as he was in the movie, and will crash into the brick arch just around the first corner. Even if this didn't happen and the car continued down the path, it only goes a short distance farther, around the next corner. It's unknown if this was the intended stop point of the path, meaning the car was mere detail, or if the developers simply didn't finish the path. If it were a detail, there would be nothing stopping the player from outpacing the car to its apparent end path (using the Turbo Mode cheat if not simple speed strafing), and it's possible that guards and clear pathing concerns were a factor in the car's removal (guards could body-block the car, and having a clear path for the car would mean the player would just run that path every time). It's likely that racing against the clock was always a part of the mission, since that is mentioned in an early briefing found in Perfect Dark.
In addition to Ourumov's car, the jeep prop is also a functional moving vehicle. It looks a bit strange moving on its own without a driver, which might be why it was never utilized. It might also be a remnant from when GoldenEye was a rail shooter, or you might have otherwise had to drive the car on a fixed path while aiming. Use the following GameShark and Pro Action Replay codes to replace the military truck in Dam with a jeep in the North American and PAL versions respectively:
GameShark
801E8D37 0027
801E8D39 0018
Pro Action Replay
801D00C7 0027
801D00C9 0018
Action Block Oddities
- 0401 is assigned to the jeeps, but is just an infinite loop.
- 0402, as mentioned above, controls moving a vehicle on path 00 when you're within 32 units of pad 010A.
- 1001 sets the 2328 (destination) pad for invalid character IDs 2C, 2F, and 30.
- 1004 and 1009 are missing. They were likely intended to spawn Russian soldiers with IDs 2C and 30.
- 1007 is also missing. This one was probably supposed to spawn a civilian with ID 2F.
- 100A tests for civilian deaths, including invalid ID 2F.
Unused Characters
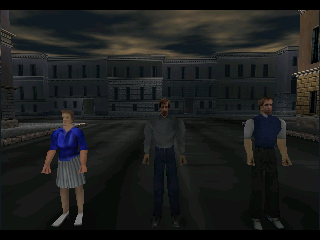
Only one civilian character, a man with a red shirt, is used during this mission. Three additional civilian characters are included in multiplayer, and three more exist that aren't normally accessible without a cheating device or hacking the game. It's likely that they only spawn one civilian model in this mission in order to keep the amount of texture memory used down, since there are already a lot of textures loaded.
Unused Props
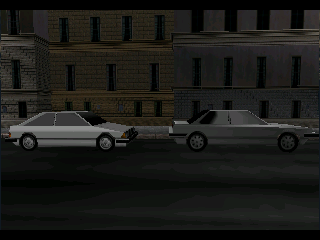
In addition to the "weird" (orange) and Golf (white) cars used in this mission, there are BMW and Escort props which were probably intended for this level, and were probably unimplemented for framerate reasons similar to the unused civilians. The BMW is actually used in a hut in Surface.
Unused Textures
These textures can be found alongside those used in Streets. They're mostly lamps and road signs.
Depot
Unseen Silos
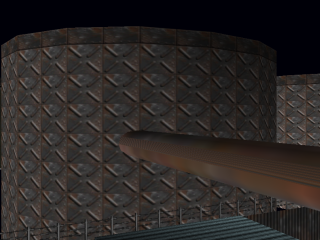
There are five metal silos just behind the walls and fences bordering the playable areas of the level. These are separate rooms from the playable area, but there are no rendering portals or other visibility data to make them draw, so they go unseen when playing. There is a raised pipe that is intended to connect to one of these silos before the building with the safe, but in the game it appears to be connected to nothing. (Note that the other end of this pipe actually connects to nothing, even though there is another silo nearby.) This pipe is shown in the mission photo, and the silo it connects to is visible; it's possible the visibility was removed to increase frame rate, like many other removals throughout this page.
Unused Props
Articulated Truck and Trailer
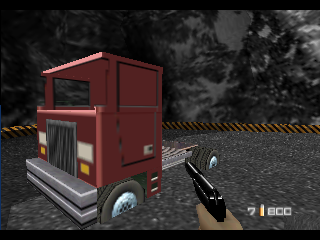
This red truck is yet another unused wheeled vehicle that can follow a path. Its wheels match the trailer in this level, so it's likely it was intended to be used here, but it can't be placed to any specific pad and there are no paths set up for it or an action block to make it move. Unlike most other vehicles, its windows and windshield are simply missing, while the others use opaque glass, to mask the fact that they have no drivers.
Interestingly, there is also a prop version of the trailer. The one in the level is modeled as a part of the background. The prop's shading is incorrect, so it appears entirely black. If the no shading GameShark code is used, its texturing can be seen and it matches that of the background trailer.
Unused Pads
This level's setup file has over eighty unused "00" pads. These are basic pads which lack any sort of scaling information, which makes it tough to conclusively determine what was intended to use them. Given that there are pads used for Janus Marines interspersed in this range of pads, however, it's entirely possible that some of them were intended for more enemies. While this mission already has a large number of enemies, they're spawned in via action blocks and not placed in the level to begin with, so these pads may be from an earlier point in development before the developers chose to go with spawning enemies instead.
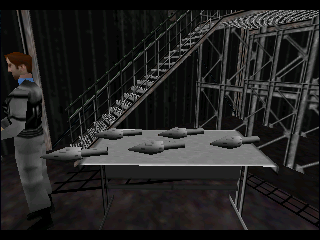
It's pretty safe to say that two of the unused basic pads were intended for additional rockets on this desk in the warehouse with the arms cache, though. Neither rocket really fits on the desk perfectly, especially in the case of the leftmost one, which is probably why they were cut. It's a shame the right one wasn't kept, since it doesn't look bad at all and will max out your rocket launcher ammo.
There's a pad for a 2 x 4 crate stack near the gate before the loading dock.
There's a large rectangular pad near the safe. One's first instinct is that it would be for another desk, like those used in some of the warehouses, however a desk scaled to its dimensions seems too low to the ground, so a different prop may have been intended for it. All of the other desks uses basic pads, without scaling data.
Traukinys
Paslėpta traukinio mašina
Paskutinėje mašinoje, kur Natalija yra, negali sekti Ksenios ir Trevelyano, pakol jie bėga, nes priešais juos užsidaro vartai. Jei esate labai greitas, tikrai galima pasivyti ir pravažiuoti pro vartus, pakol jie neužsidarė. Įdomu tai, kad galima pereiti per įprastai nepasiekamas duris - mašinos priekyje įeikite į kitą mašiną, kurią įprastai neįmanoma pamatyti. Ji atrodo kitaip negu visos buvusios traukinio mašinos, ir jos veda į kitas duris, kurios yra užrakintos. (Jei smalsu, kas už durų - atsakome: už durų nieko nėra.)
Removed Glass
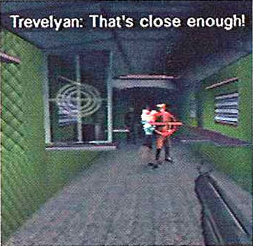
Several screenshots from just before the game was released show a pane of glass with a "target" on it in the now-empty frame in the car where the confrontation with Trevelyan goes down. The texture for this glass is still in the image bank. It's doubtful it was a prop, it was probably just a part of the background, and as such could be shot through like it wasn't even there. It was probably a wise decision, as the target pattern would likely distract players into firing at it and immediately failing the task at hand.
This glass pane is present in the original scene from the film.
Unused Text
Bond: You first.
In the movie, this is Bond's answer to Trevelyan's question "Why can't you just be a good boy and die?". However, Trevelyan does not say that here in the game but in the Facility, so the answer makes no sense on its own.
Jungle
Selection Picture
This is the selection picture you can see when you select the Jungle mission, and it shows the bridge. However, in the selection picture it looks completely different. It has multiple supports and looks rather rigid unlike the bridge in the level. There are also two guard towers beside the bridge; only one of these towers exists in the final version, and it is not found at the bridge.
The thumbnail used for the level selection menu and the selection picture are also different; while identical content-wise, the selection picture is strangely zoomed in significantly further compared to other levels which have extremely minor zoom differences at best.
Unused Text
Natalya:
This taunt for Natalya was never written.
Control
Unused Props
PchrexplosivepenZ
This prop's filename shows that Q's pen containing a class-4 grenade was planned for the game. Sadly, its model is just another Borg crate placeholder.
Keistenybės
Durys
Durys į saugyklą yra durys, kurios įprastai naudojamos tik liftams.
Mission Select Photo
This is another mission photo based on an earlier setup. The glass in the control room isn't tinted, there are ammo crates on the floor, commandos standing guard, and the layout of the monitors and keyboards on the desks is different.
Caverns
Unused Text
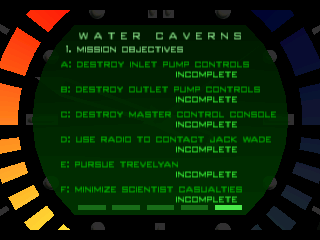
Pursue Trevelyan
pursue trevelyan
It seems that pursuing Trevelyan was originally planned as an objective: these strings can be found with those for the other objectives, before minimize scientist casualties. The objective lists support more than five objectives, but no missions take advantage of this.
Pursuing Trevelyan is kind of a given, which may be why the objective was cut. It may also be left over from earlier in development, from before the minimize scientist casualties objectives were added to the missions.
Cradle
Unused Text
 Trevelyan: Closing time, James. Last call.
 Trevelyan: You haven't won yet!
These two taunts are never spoken by Trevelyan in the final game.
Tower Collision
The inaccessible areas at the top of the three antenna towers have partial collision tiles. It seems likely that this would have been used for guards, as there is no way for Bond to get up there. However, like the towers in Surface, they would not have actually been able to shoot at Bond from up there.
Ending Credits
Unused Text
C U B A N J U N G L E
This text would be used for the pause menu - which you cannot open during the ending credits.
 1st Scenic Artist
 2nd Scenic Artist
 3rd Scenic Artist
 Scene Choreographer
 Lighting
 Casting
 Electrical Best Boy
 Special Effects Supervisor
 Stunt Capture
 Make-up Supervisor
 Sound Recordist
 Set Decorator
 Animation
 Weapons Consultant
 Dialogue Coach
 Multiplay Director
 Property Master
 Hairdressing
 Dolly Grip
There are several unused positions which were most likely taken directly from the movie's credits.
Actekinis
| To do: Nenaudojamas patrulių kelias ir trūkstami sargybiniai, atrasti Wrecko. Ir viskam dar pridėkite skrynšotus. |
Nenaudojamas personažas
Užbaigus Cradle'o misiją, multiplayeryje galima žaisti kaip moteriškas Moonraker Elite. Ji galimai ir buvo sukurta šiai misijai, bet tik vyriški sargybiniai yra naudojami.
Unused Pads
00A8 and 00A9 are found very close to the drone guns in the ducts and may be alternate pads for them to target, but it's hard to say with any certainty. The pads the drone guns are actually centered on (00AA, 00AB) come directly after these two, and are placed farther away from the guns.
2710–2721 are all intended for sets of three standing consoles in the side alcoves of the room with all the screens. Pad 2716 is the only one in this range that is actually used—it's the console that lowers the fake mainframe door.
Pad 2710 is placed over the guard with ID 0E in the final setup, so these consoles must have been cut before he was positioned there.
2722–272D are for screens attached to each side of the meeting room table. They were present in a prerelease screenshot. These screens were presumably cut when the table was converted into a moving prop, since they couldn't move along with it. Additionally, they Z-fight with the prop table.
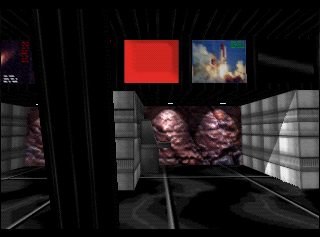
275E and 2760 are for two more screens on the upper sloped wall, shown in red in the screenshot, above the fake mainframes. Odd that they weren't utilized.
2781 is an incorrectly positioned wall screen, which overlaps 2780. Understandable why this one wasn't used.
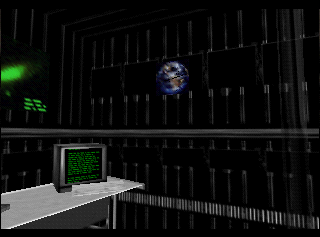
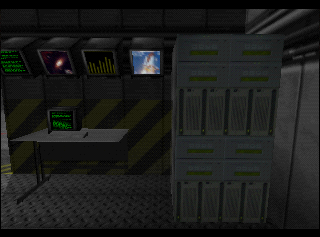
2789 is a small wall monitor in the room with the guidance data computer. It looks fine in this screenshot, but it Z-fights with the wall behind it.
278C and 278D are for additional left and right glass doors. They're positioned a bit farther out than the ones that are used, so there's a noticeable gap between them and the walls.
279C is for another mainframe in the launch bay, at the desk on the opposite side of the room.
27A1 and 27A2 are for standing panes of glass in the launch bay, connected to the ones that are used at a 90 degree angle.
Nenaudojamas tekstas
-
Techniškai vis vien naudojamas, bet šis brūkšnys yra laikinas simbolis vietoj apsauginės išmaniosios kortelės vardo ginklo lauke.
Action Block Debug Text
040A
This block is used by spawned guards to run to Bond and attack him.
DELETE!
This test is found before the action that eliminates a guard when they're too far from Bond.
1000
This block makes the shuttle bay doors open and the rocket boosters test fire when Bond enters the meeting room.
W2*

I2*

T1*

CL*
| To do: Figure out what these mean and explain them |
1007
Sets the destination pad (2328) for each spawned Moonraker Elite based on where Bond currently is in the complex.
START*

SCREEN*

DUCT*

BAY*

AZT1*

AZT2*
These are just labels for the areas the pads are in.
1008 1009 100A
These three blocks spawn in Moonraker Elites that will hunt down Bond:
spawn1
spawn2
spawn3
This text comes right before the attempt to spawn a guard.
->fail
If player pickups are disabled (meaning the outro is playing), all three blocks have this same text, which indicates a failure to spawn, before the block attempts to spawn the guard again.
s1 OK!
s2 OK!
s3 OK!
Otherwise, this text indicates that the guard spawned correctly.
Oddities
Explosive Floppy?
Internally, the name of the model used by the guidance data in the watch menu is GexplosivefloppyZ.
Egyptian
Old Level Name?
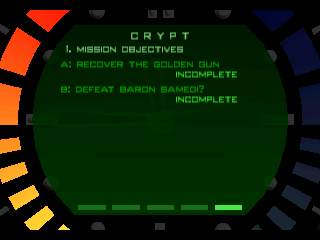
While most levels have some minor discrepancies between the names used for them in different places, this is the only one where the watch menu uses an entirely different name than anywhere else: It's called Crypt. This is also the name used internally by the level slot and the props designed for the level, and is likely its original name.
Unused Pads
Pads 271B-2727 and 2728-2734 form two doors made of stone blocks that slide in alternating directions horizontally. They protect the body armor placed behind two square columns in the area to the left of the start point – one is placed on each side of the back column. A guard is still positioned directly behind each door: they were likely originally intended to surprise you when you opened the doors. Currently they'll open the doors themselves and come after you if they hear gunfire, as they've been given the standard guard behavior action block, 0002.
Unused Text
Baron Samedi: Ha Ha Ha Ha...
This text would be pretty redundant since Baron Samedi's laugh is actually audible.
Cloud Color
| Used | Defined |
|---|---|
 |
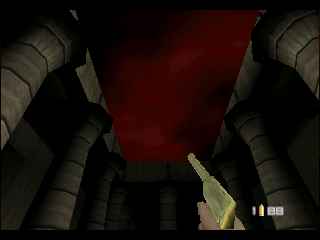 |
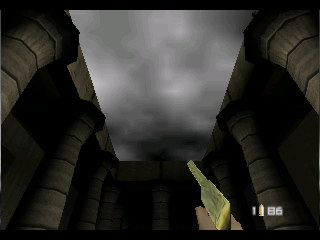
After "killing" Baron Samedi twice, the sky fades from blue with white clouds to black. The second sky's cloud color is set to red, but the action that fades to the second sky doesn't change the color of the clouds, so they remain white.
Temple
Solo Sky
| Solo | Multiplayer |
|---|---|
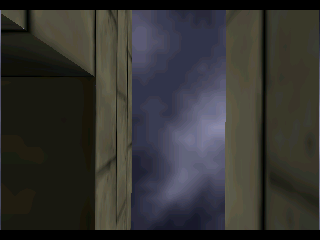 |
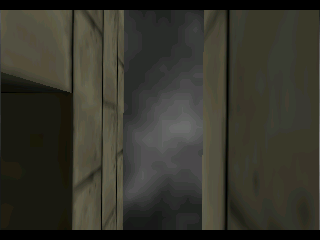 |
Like all of the multiplayer levels with skies, Temple has four different assignments depending on the current number of players. Unlike the others, where these skies are identical looking, Temple's solo sky is actually a different color than its 2, 3, or 4 player skies. The sky seen in multiplayer is dark gray with gray clouds, but the solo sky gives both a bluish tint.
