Bugs:The Fantastic Adventures of Dizzy
This page details bugs of The Fantastic Adventures of Dizzy.
NOTE: There are three versions of this game: the original standalone cartridge version, the revised Aladdin Deck Enhancer cartridge version, and the European standalone cartridge version. The European version is mostly the same as the Aladdin release, but not identical. The two major versions are often identified by the color of their title screen logo ("Blue" for original version, "Red" for Aladdin and European versions).
Contents
- 1 Clip Through Walls
- 2 Cloud Screen Skip
- 3 Dead End by Wasting Fire
- 4 Death on a Swinging Rope Oversight
- 5 Drowning Resistance Reset
- 6 Endless Fall
- 7 Extra Railway Exit
- 8 Leave Items On Elevator
- 9 Items Inside Damage Box
- 10 Jump Over Castle Wall
- 11 Jump Over Dylan's Elevator
- 12 Messy Info Screen
- 13 Miss Railway Exit
- 14 Moonwalking into Guards
- 15 Mysterious Death in a Barrel
- 16 Off-Center Collision Glitch
- 17 Partial Invincibility
- 18 Regrowing Snappy Weed
- 19 Respawn Point Oversight
- 20 Respawning Stars Glitch
- 21 Screen Item Limit
- 22 Screen Transition Music Glitch
- 23 Skip Item Pickup Animation
- 24 Slippery Elevator
- 25 Star Counter Glitch
- 26 Straw Disappearing Glitch
- 27 Typos
- 28 Unreachable Fruit
- 29 Zaks' Tower Crash
- 30 References
Clip Through Walls
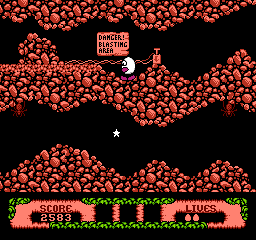
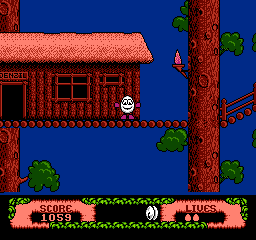
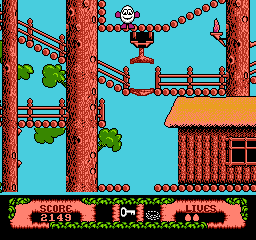
With a precise jump, it's possible to clip through some of the obstacles in the game, most notably diagonal slopes in Yolkfolk Village, and the destructible rocks in the diamond mine - although the latter clip might result in getting stuck in a wall.[1]
Cloud Screen Skip
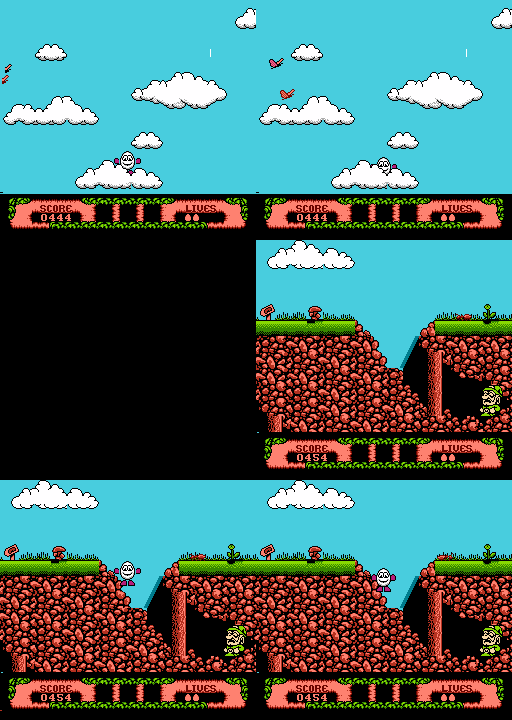
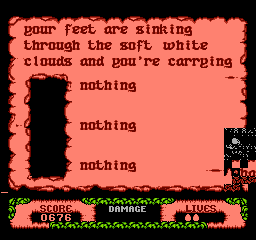
On the screen with the exterior of Zaks' castle, if you let Dizzy sink all the way through the first cloud he can land on upon jumping into the screen or the deepest part of the cloud beneath the castle, the game will place him at the bottom of the screen below, causing him to skip over that entire screen in a flash. You can get a better look at what happens there by holding A to jump during the screen transition: Dizzy will jump off the air at the bottom of the screen!
Dead End by Wasting Fire
One of the game's quests involves freeing Denzil from an ice cube, using straw and a match to light a fire. However, in the Blue version, you can start the fire anywhere except the very top of a screen (even underwater), causing you to lose both items and thus requiring you to restart the game.
This game-breaking oversight was somewhat remedied in the Red revisions, where these items only activate when used inside Denzil's hut, although it is still possible to waste them by using them in a part of the hut too far away from the block of ice you're trying to melt. However, as it turns out the fix only applies when using the match directly on the straw; if you try putting the match within 20 pixels from the left and top sides of the straw, it will start burning anywhere in every game revision. (this is a deliberately coded method of activating items, although due to another oversight it won't work on the right and down sides; that's because this activation area check is anchored to the top left corner of the item, and the right and down portions overlap with the item itself)[2]
Death on a Swinging Rope Oversight
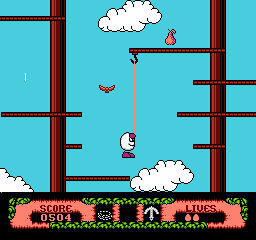
In the Blue revision, if you die while swinging on a rope, an unexpected behavior might occur - if you're unlucky, the game may softlock or crash. This was fixed in the next releases.
The function that handles rope swing has a sub-function that gets executed while getting off the rope. The said sub-function takes X register as an argument for which animation should be played. Due to an oversight, when Dizzy dies while swinging the X register is not set correctly, and the animation code will try to interpret unrelated data. Some of these out-of-bounds animations will actually end correctly allowing the game to proceed.[3]
Drowning Resistance Reset
A little-known feature is that the rate at which Dizzy takes damage from wading underwater without the Aqua-Lung depends on how many times he has died by drowning already, as if he gets better at holding his breath from the experience. Each of the first 3 drowning deaths halves the rate of water damage afterward, leaving Dizzy at 1/8th of his original drowning speed... until he drowns another 5 times. By accumulating enough extra lives from Theodore's puzzles to drown Dizzy for the 8th time, the drown counter (located at $03C0 in the Blue version or $03D9 in the Red versions) gets reset to 0 due to the game only preserving its lower 3 bits, and Dizzy reverts to his original fastest drowning speed. Acquiring even more lives (such as from the European version's extra starting life or the Red versions' cheat code) will allow the pattern to repeat as the 9th drowning death cuts the water damage rate by half and the 10th drops it to a quarter of the original again.
Endless Fall
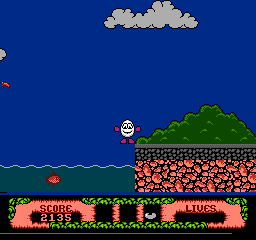
If you fall straight down in the far left end of the Dock street, Dizzy will go through the water (under normal circumstances water in Keldor City kills you instantly), and eventually reappear from the top of the screen, looping endlessly. This is because the river's death plane doesn't actually cover all of the water's surface, leaving a small gap. The only way out is to reset the game.
There are two ways to trigger this glitch:
- In the Red versions only, you let go off the directional button at the right moment while walking, it's possible to fall straight down from the ledge - typically you can only fall at an angle. This is because in the Blue version Dizzy walks much slower, and stops in place when you stop holding the D-Pad. In the Red revisions Dizzy decelerates for a brief moment, and if you time it just right he can stop in mid-air. You can still place items in the air and be harmed by birds, but you can't move or be killed - the death animation won't play until you land, which will never happen in this situation.
- A much trickier way is to jump and get killed by the bird in the exact spot above the aforementioned gap. Dying in mid-air stops your lateral movement, allowing you to fall straight down. This works in all releases.
Extra Railway Exit
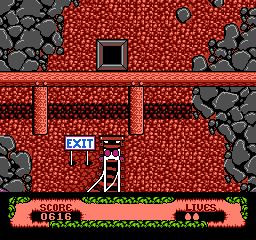
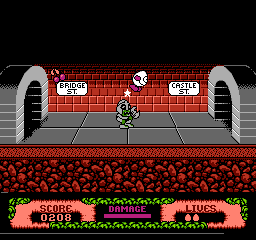
Just before the final exit of the minecart ride is one last hurdle between junctions that's supposed to kill Dizzy on impact, but if you hit it while you have the cart pulled back to the very bottom of the screen, Dizzy will sink through the track after he's thrown out and emerge from the space under the stairs at the west end of Bridge Street as though he had successfully landed on the exit hole. Best of all, in the Red versions, Dizzy still collects the final star!
Leave Items On Elevator
When you're standing under an elevator that's moving downward and press the B button, you'll leave an item behind and activate the elevator at the same time, which cannot happen normally.
Items Inside Damage Box
With a frame-perfect timing, it's possible to glitch the status bar to show items inside the damage indicator box (notice the missing item separators). This can happen when the damage indicator disappears in the exact moment as you make a screen transition, and the effect will stay until the damage bar gets shown again.
Jump Over Castle Wall
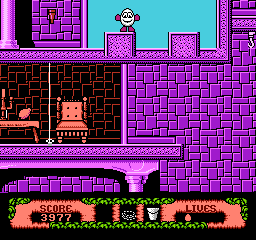
In Zaks' Castle, there's a balcony on the middle floor. Due to an oversight, in the Red versions it's possible to jump over the wall there, thanks to Dizzy's increased walking speed and map changes. This provides a way of avoiding the floor spikes without using the rug, thereby making Dozy's quest optional.
Jump Over Dylan's Elevator
In the Red revisions, it's possible to jump over Dylan's elevator, landing on a ledge above it. You're clearly not supposed to be in that place - the screen will constantly transition up and down until you get out of there.
Messy Info Screen
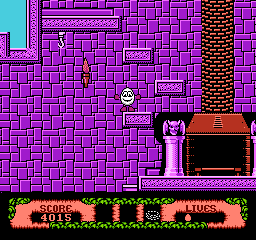
After the portcullis to Zaks' castle has been opened, the screen brought up by Select at the exterior of the cloud castle displays garbage tiles around its right side.
Miss Railway Exit
In both Red versions, if you try to take the second minigame exit (leading to the Carber Bay) while pulling your minecart down, Dizzy will not actually make it into the opening, and you'll lose a life. This didn't occur in the Blue version.[1]
Moonwalking into Guards
Getting hit by a butterfly doesn't just reverse Dizzy's controls; it reverses the momentum he gets from other things that push him around. For one thing, it becomes quite difficult to use the rope correctly in this state when Dizzy will jump away from the direction he is swinging. The game also features a few guard-type characters who will damage and push Dizzy back a bit until he can get them to leave by placating them with the correct item, and the effect of the butterfly-inflicted backward status on these guards' knockback can vary with the character and the version of the game.
- Armourog: Touching the Armourog, the horned creature near Crystal Falls that can be baited with meat, is an instant death sentence in the backwards state, as Dizzy gets stuck on the spot and takes a full bar of damage. If you do it from the left, you can see the Armourog walk backwards beyond its normal bounds after Dizzy dies.
- Palace Guard: One of the city's tunnels is guarded by an armored troll who will let you continue to the other end if you give him a bag of gold. In all three versions, simply walking backwards into the guard may fling you to the other side, but Dizzy fills up on damage from the time spent in his hitbox and dies before he can reach the other exit. Jumping backwards into the guard can be a different story: If you try to jump over him while walking backwards in the Blue version, Dizzy will jump on his head in an uncontrollable loop until the backwards spell randomly wears off, which can take a few minutes and still leaves Dizzy dead. In the first Red revision, although this bug was not fixed, Dizzy walks much faster and is actually able to jump all the way over the troll while suffering only minor damage with a high enough jump, which is not supposed to happen. Then the third version tweaks the physics such that the guard throws Dizzy straight up for a moment before Dizzy gets launched to either side no matter the jump height, which takes long enough that Dizzy always fills up on damage in a similar manner to just walking into the guard, thus removing this sequence break. (This also demonstrates that the third version corrected the small oddity of Dizzy's sprite appearing behind the highest background bricks in the previous versions.)
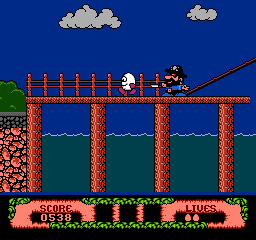
- Blackheart the Pirate: Try backwards-jumping onto Blackheart while he's on the gangplank in Keldor Town in the Blue version, and you may be thrown past him, fall through the water, and... you'll eventually end up in a glitched version of Bridge Street, where there are no enemies (except butterflies), doors don't work, fruit can't be collected, and any item you put down disappears. The only way out, which normally would take you to the graveyard, takes you to the river barrel ride instead. Complete the ride to get the game back to normal. If you walk into the pirate instead of jumping into him, chances are you'll be thrown onto the pirate ship deck, allowing you to skip the rum barrel quest (although this will cost you a life). In the Red versions of the game, the results of the glitch are far less spectacular, as you're thrown to a shorter distance and you don't fall through water. Since the pirate kills you and you don't reach a new screen (which would reset respawn point), this glitch has no real use in these releases.
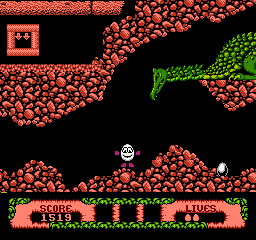
- Gold Dragon: It may be unlikely for the effect of the countryside's butterfly to last all the way into the dragon's lair at the end of the diamond mine, but if it does, the dragon's fireballs are likely to knock Dizzy into the den underneath it, giving all NES versions a way to collect the shamrock without bringing the egg! It's even possible for the fireballs to launch Dizzy high enough to land on the dragon's ledge, although nothing special happens up there; Dizzy passes through the dragon's body harmlessly while showing through its "black" portions, and the opening on the right doesn't take Dizzy anywhere. You won't be able to steal an egg from the den until the backward effect wears off: Not only do the fireballs still knock Dizzy to the right, but Dizzy may spontaneously roll back to the right before the fire can even get to him.
- Shamus the leprechaun: You need to give this leprechaun on the grasslands the gold shamrock to make use of the soil under his feet, but like the tunnel guard in the second version, you can backwards-jump all the way over Shamus in the Red versions while you have the butterfly's effect. It appears to be a guaranteed death sentence in the Blue version, however, as Shamus will keep throwing Dizzy back inside his hitbox the instant Dizzy recovers from his dizzy animation, similar to what happens if you stand at the back of Shamus's cave as he finishes walking there after you hand him the shamrock—but the backwards state actually stops Dizzy from getting trapped in that cave in the Red versions!
- Zaks' magical stargate door: The final gate to Zaks' tower may not be a damaging character, but it does throw Dizzy back until you collect the last star. If you hit it backwards without all the stars, the door will keep pulling Dizzy against itself, immediately replaying the message about needing the stars every time the message is cleared. This might not technically be a soft-lock because Dizzy gets out of it whenever his backwards state wears off, but that could take an extremely long time when only a few frames of action happen after each second that you have to clear the message again.
Mysterious Death in a Barrel
In the Blue version, at the right end of Bridge Street, start a forward jump just before you hit the entrance to the river rapids minigame, then take one of its side exits to Dock Street or Castle Street. You will hear the damage noise followed by the death jingle, and then Dizzy will spontaneously die once instead of jumping out of the barrel, even if the damage meter was completely empty.
It appears that the Red versions eliminated this bug by zeroing out Dizzy's Y velocity when the destination area is loaded. This can be observed by continuing to the final exit instead: The Blue version will see Dizzy do a short hop on the hill in his standing pose from his leftover vertical speed, but in the Red versions he can only scoot along the ground a few pixels.
If you have no overscan cutoff, you can also see the effects of the bug below the status bar, where the true Dizzy sprite is stored at Y coordinate $01 until the barrel hits the wall. With leftover jump speed, Dizzy will pop up a little higher on the first frame he appears (hitting a death barrier?) and do his water death animation before getting teleported to the barrel's height to do it again.
Off-Center Collision Glitch
After getting off the swinging rope, your walking speed will be slightly higher than intended, which breaks spider web traps collision detection, allowing to clip through them without dying. This will work as long as Dizzy is not centered on the screen.[1]
Partial Invincibility
While restoring your health or taking damage, hit Select to open the inventory, then again to return to the game. Certain hazards (most notably spiders) will no longer hurt you. If you do this via taking damage, Dizzy's face will also be stuck in the "hurt" expression until any other event that changes his facial expression. The invincibility effect lasts until you touch another hazard that does hurt you, or until you heal yourself. In the Blue version, a short "taking damage" sound effect will play every time the inventory screen is opened while this glitch is active - that's because the damage bar actually increases/decreases every time you hit Select, and the glitch can eventually wear off this way (this doesn't seem to happen in the Red versions).
This bug stems from the fact that Dizzy actually has two damage counters: the one that's used internally, and the one that's used by the visual damage indicator. Hitting Select while the damage bar is lowering/rising causes these two values to go out of sync, which in turn breaks hit detection logic for some entities: ants, mice (except the ones in Keldor City tunnels), crabs, spiders, water droplets, fish and guillotines. This is why the glitch is also undone by entering and exiting the Crystal River Rapids minigame or the Zaks' Tower minigame, even if you take no hits in them, since those minigames display the true damage value at all times and not the gradual increases.
See this video to learn what happens and why in more detail.
Regrowing Snappy Weed
The Yolkfolk's carnivorous plant's state is stored at the memory address $748. The same location is used for the Zaks' magical stargate door animation counter. If you leave the screen with the stargate door, and this variable value happens to stop on 0 (there's a 1/32 chance of this occuring), the plant will come back to life.[1] Technically, in the Red versions due to map and item location changes you can also use this glitch to kill the plant without using the spray bottle (avoiding this requires exploiting clipping through wall glitch), although this doesn't seem like an efficient way of doing so.
Respawn Point Oversight
Given its open-ended nature, The Fantastic Adventures of Dizzy provides plenty of opportunities to lock yourself out of being able to complete the game, for example by leaving a crucial item in an inaccessible place, or by setting the respawn point in the least convenient spot (for example, underwater while not wearing an aqua-lung).
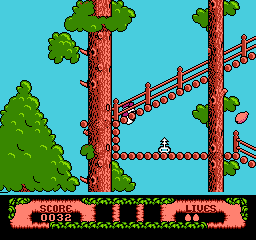
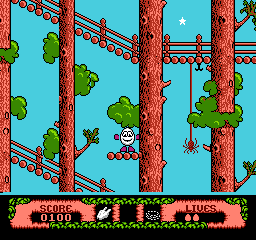
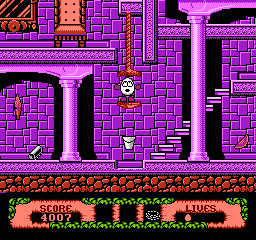
One of the possibly most interesting places for a respawn softlock is on the Yolkfolk Village's third floor. If you happen to swing on a rope on the far right side of the village and get killed by the spider, chances are you'll land directly on a trap several screens below (ironically collecting a healing fruit on your way down). Since going to another screen resets your respawn point, this puts you in a constant death loop until your lives run out. Interestingly, this trap is only present in the first (Blue) game revision; one might speculate this was the reason for its subsequent removal.
Respawning Stars Glitch
When you collect the last remaining star and don't leave the area until the star counter animation finishes, there's a chance that all previously collected stars in the current area will reappear. Collecting an additional star will cause the counter to underflow to 255 (the Blue version of the game fails to display such number, showing only "5" without any leading digit). Unfortunately, since the Zaks' magical stargate door requires the star counter to be exactly 0 to be opened, this makes the game unwinnable.
The glitch occurs because the gameplay is abruptly cut off by the dialog. This changes a RAM value that had an index in the bit array with stars. The value returned once the “you got all stars” dialog is closed is location dependent (which is why this glitch seems to work only on certain maps). It's possible for the RAM value to point at location in memory other than star bit array (for example, the table of eaten food). In the Red versions, some preventive measures were taken to stop this from happening.[4]
In some cases, the reappeared star can glitch into a state where it's flashing and can be collected indefinitely.[5]
Screen Item Limit
When entering a new screen (or exiting the inventory), the game can render up to 5 items in the overworld. Any items over the limit will not spawn, but they will come back after the limit is no longer exceeded. The game renders items following the internal item list order, thus the items with higher ID are more susceptible to temporarily disappear.
Screen Transition Music Glitch
When playing on a PAL console, the music temporarily speeds up during screen transitions. This affects all game revisions, though it's most noticeable in both Red versions.
Skip Item Pickup Animation
You can pick up items instantaneously if you do it while jumping/rolling, which saves a lot of time. This will not work if you fall off a platform without jumping, or while swimming with flippers equipped. In general, items you place (when having full inventory) will function as normal (keys will open doors, etc.), although when you use a lift key this way, the lift won't move immediately after it's been activated, and the match won't light up the dry straw. The exchanged item is placed where the Dizzy's sprite is positioned, even in mid-air.
It's unclear whether this was an intended behavior, especially since this is possible only in the NES version of the game. With that said, there are some clues that show the developers were aware of the issue, as in the Blue revision the pickaxe (placed on a ledge near a waterfall) is floating above the ground, just barely out of Dizzy's reach when jumping from below. In the Red versions this area is slightly remodeled, and the ledges are made higher.
Moreover, the European Red version stops Dizzy from collecting items this way while another item is still sliding into place from a previous collection. This prevents a glitch made possible in the first Red version: If Dizzy collected his first two items in quick succession via the midair grab, there would be an empty space between them, which normally never happens in the Red versions. If you took a third item in this state, it would slide to the middle and overwrite the second item out of existence in the process, easily ruining your quest in a game where almost every item is necessary!
Another glitch regarding this oversight (which seems to happen only in the Red versions) is that when you collect an item this way and then quickly make a screen transition (while the item is sliding into its position in the statusbar), it won't be shown in your item box until you view your inventory, or make another screen transition. When placed on the ground, it might use another item's graphics, or none at all. Moreover, if you do this glitch when your inventory is full, the item you're exchanging from your inventory disappears altogether! Although it can be briefly seen before you leave the screen, after you come back it's no longer there.
Observe the screenshot on the left. Dizzy has a wooden plank, rope and a lift key in his inventory. He quickly grabs the door key (leaving the plank), and then goes up to another screen. The space in his inventory, which should be occupied by the door key appears blank; however, when placed on the ground, this item takes appearance of the magical star plant. After going back to the previous screen, the wooden plank is missing completely (even though it was clearly put there by Dizzy when picking up the key). The door key appearance glitch was purely visual; it reverted to being correct after changing screens (viewing your inventory screen fixes this as well).
If you do that just before entering a minigame (Zaks' Tower or Dizzy Down The Rapids), the item will not complete its sliding sequence - either it won't appear in the inventory at all, or it will stop at an incorrect slot, making it unusable if your first item slot is empty (Dizzy will make his item pickup/drop animation, but nothing will happen, and the item will be deleted from your inventory).
Slippery Elevator
In the Red versions only, unlock the ground elevator with the nearby key, and after riding it to the top, run to the left to drop to the ground and then run back to the right with full speed. If you press B just as Dizzy reaches the middle of the elevator's width while it is still descending to meet him, Dizzy will continue sliding to the right at full speed during his turnaround animation, potentially grabbing or dropping an item at a point between the elevator and where Dizzy stops sliding. You could make a slide to the left happen by dropping down from the far-right edge of Dizzy's floor first.
This also works with Denzil's elevator. Unlock it with its key, then ride it back down and get back onto Denzil's floor with the rope on the left. When you approach the elevator again from above, the elevator will be automatically rising to meet Dizzy, but if you run at full speed and press B just as you reach its midpoint, Dizzy will slide all the way off the edge even as he takes or leaves something on it!
This can also be done with Dylan's elevator in either direction by dropping straight down from Dora's hut and rope-swinging across to keep from triggering the elevator into descending early, but the timing is more difficult because running too early will make Dizzy fall through the hole in the floor, and too soon after that will only have Dizzy "pop" up to the elevator's height. With Grand Dizzy's elevator, you can slide off to its left while dropping something if you take advantage of the point on the ramp where the elevator continuously rises and falls and find the window of opportunity to reach the elevator ahead of it reaching the top. The depression in the floor underneath Zaks' elevator may make it the most difficult to pull off the glitch on, but it can still be done in either direction by making a precise stop before continuing toward the elevator.
Star Counter Glitch
In both Red versions, if you happen to die when having between 100 and 109 stars left to collect, the star counter will erroneously say "10" instead of the correct value. Oddly enough, this doesn't occur when having 200-209 stars left.[1]
Straw Disappearing Glitch
After setting fire to the pile of straw, it's supposed to burn up and vanish. However, the game logic is flawed; instead for looking for the straw per se, it relies on a pointer in the item RAM table, which points to the straw object[6]. The issue with such approach is that when you leave the current screen, you shuffle items in the RAM upon map re-entry. This might lead to a situation, where the straw item fails to be removed; moreover, another item might get erroneously deleted if you're unlucky!
Typos
you are on castle street,
where you'll find the
shopkeeeper, carrying
In all game revisions, the inventory entry viewed on Castle Street misspells the word shopkeeper.
you are in the reception
hall of the trolls'
errie castle carrying
All NES versions misspell "eerie" in the description of the first floor of Keldor Castle, even as the same word was always spelled correctly in the description of the cave below the graveyard.
Unreachable Fruit
In the Blue revision, there's a watermelon in the top left corner of the Zaks' Castle, far outside the player's reach. It was moved much closer in the Red versions.
Zaks' Tower Crash
If you lose all your lives during the final Zaks' Tower minigame, the game will crash on a black screen. In some cases, it might reboot completely into the Codemasters logo, not the title screen as it usually does when you die.[1]
