The Legend of Zelda: Ocarina of Time/Unused Environment Settings
This is a sub-page of The Legend of Zelda: Ocarina of Time.
| To do: Proofread and rewrite. Also, not every location has a description of their respective unused environments, so write descriptions for every location's unused environments. |
Environment Settings define the mood of the stage; they contain details about the lighting, what color the fog should be and how dense, and the map's rendering level. They can be located in the scene header at command 0x0C.
They are formatted as such:
0Cxx0000 yyyyyyyy
X = environments numbers
y = environment offset
The command 0x11, or "Skybox settings", also located in the scene header, can define two types of environments: the first kind, Normal, is a natural sky simulator that can simulate morning, day, evening and night, and the second type can be used to create different types of effects, like rainy days and nights, and underwater effects.
They can also be triggered two different ways: either by an actor, or being triggered by interacting with an associated collision polygon.
Contents
- 1 Tips for Finding Environments
- 2 0x11 Skybox Settings
- 3 Unused Environments
- 3.1 Inside the Deku Tree
- 3.2 Gohma's Lair
- 3.3 Dodongo's Cavern
- 3.4 King Dodongo's Lair
- 3.5 Inside Jabu-Jabu's Belly
- 3.6 Barinade's Lair
- 3.7 Morpha's Lair
- 3.8 Ganondorf's Lair
- 3.9 Tower Collapse Exterior
- 3.10 Temple of Time Exterior (Child - Day)
- 3.11 Link's House
- 3.12 Lakeside Laboratory
- 3.13 Forest Temple
- 3.14 Fire Temple
- 3.15 Water Temple
- 3.16 Spirit Temple
- 3.17 Shadow Temple
- 3.18 Bottom of the Well
- 3.19 Ganon's Castle Tower
- 3.20 Gerudo Training Ground
- 3.21 Inside Ganon's Castle
- 3.22 Hyrule Field
- 3.23 Kakariko Village
- 3.24 Kokiri Forest
- 3.25 Sacred Forest Meadow
- 3.26 Goron City
- 3.27 Gerudo Training Ground
- 3.28 Zora's Domain
- 3.29 Haunted Wasteland
- 3.30 Inside Ganon's Castle (Collapsing)
- 3.31 Ganon's Tower (Collapsing)
Tips for Finding Environments
- Replace values.
- Identifying IDs in polygon types.
- Identifying polygon types used in a polygon array.
- Identifying triggers in actors.
- Identifying from cutscenes.
0x11 Skybox Settings
This group of Environments is used when the Skybox is enabled. This option will void all environments triggered by a collision polygon.
Normal
ID 0 Morning
ID 1 Afternoon
ID 2 Evening
ID 3 Night
Underwater
ID 4 Morning
ID 5 Afternoon
ID 6 Evening
ID 7 Night
Rainy Weather
ID 8 Morning
ID 9 Afternoon
ID A Evening
ID B Night
Unused Environments
Inside the Deku Tree
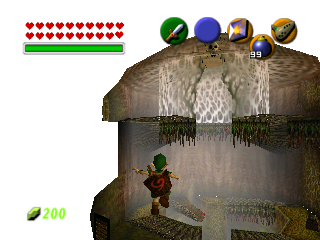
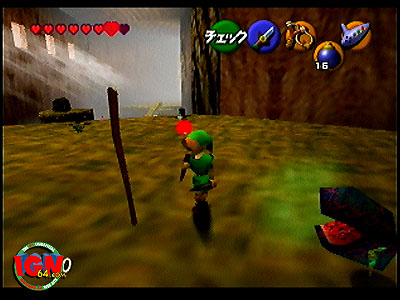
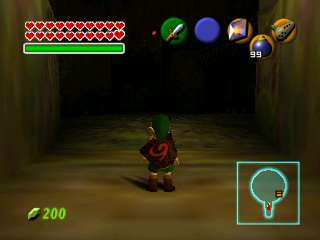
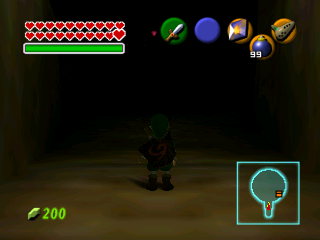
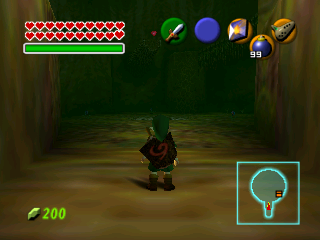
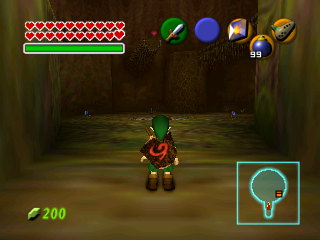
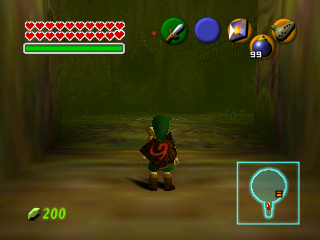
The inside of the Deku Tree contains six unused environments, which include bright lighting with white fog, dark lighting, and red and green fogs. Interestingly, one of these effects, specifically the bright lighting and white fog one, is shown in a pre-release screenshot. These environment colors were certainly used in an old version of Deku Tree, like the one that existed in the Spaceworld 97 build. In the final version it was chosen to use only one, for unknown reasons, perhaps because of the rush to finish the game by the developers.
Setup 00 (Normal Gameplay)
| ID 2 | Pre-release Image |
|---|---|
 |
 |
| ID 1 | ID 3 | ID 4 |
|---|---|---|
|
|
|
| ID 5 | ID 6 | |
|
|
Gohma's Lair
Setup 00 (Normal Gameplay)
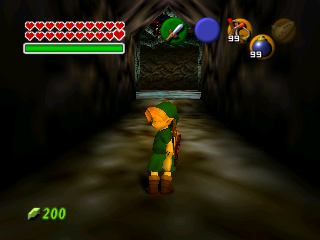
Contains various densities of red fogs, and some with harsh red underlighting.
| ID 0 | ID 1 | ID 2 |
|---|---|---|

|

|
|
Dodongo's Cavern
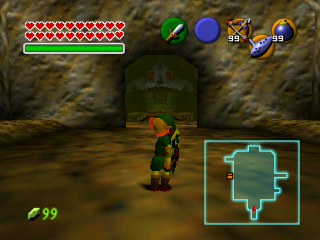
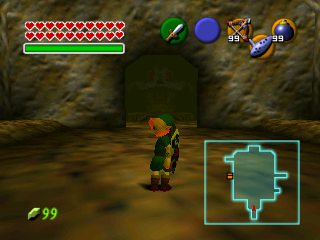
An environment setting for a lava pit, present in ID 3; it contains a fog very similar to ID 0. ID 4 is used for the lava pit in-game.
Setup 00 (Normal Gameplay)
| Unused | Used |
|---|---|
 |
 |
King Dodongo's Lair
Setup 00 (Normal Gameplay)
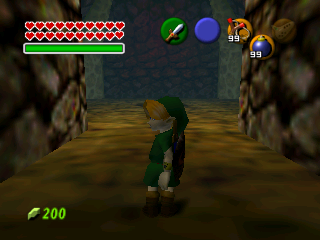
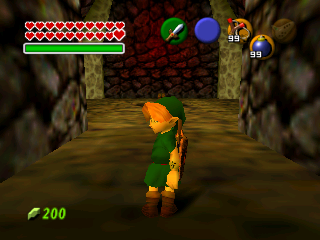
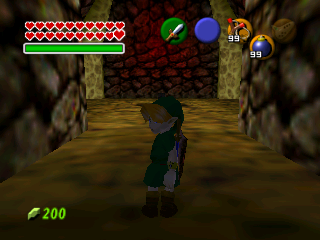
ID 1 sets the scene with thick, blue fog and strong shadows. ID 2 is clear with bright underlighting. ID 3 is similar to 1, minus the fog.
| ID 1 | ID 2 | ID 3 |
|---|---|---|
|
|
|
Inside Jabu-Jabu's Belly
Setup 00 (Normal Gameplay)
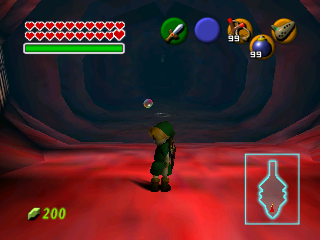
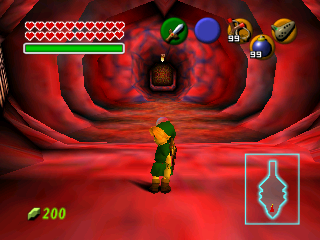
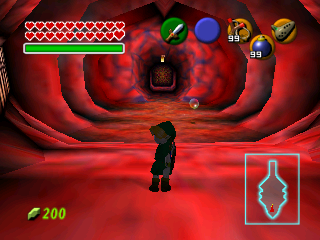
Contains settings similar to the boss room's environment settings.
| ID 1 | ID 2 | ID 3 |
|---|---|---|
|
|
|
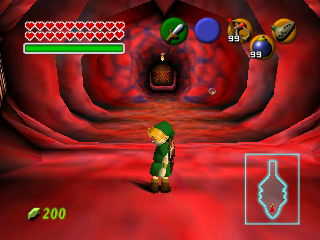
Setup 04
This environment is clear and has a light, blue fog. May have been used when you were in the presence of the Zora Sapphire.
| ID 1 | ID 2 | ID 3 |
|---|---|---|
|

|

|
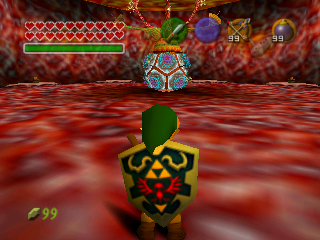
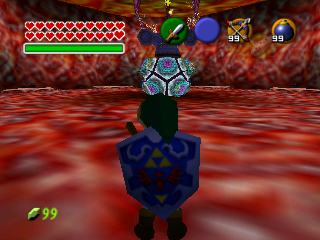
Barinade's Lair
This room contains both evening and night environments, possible duplicates from the overworld settings.
Setup 00 (Normal Gameplay)
| ID 2 | ID 3 |
|---|---|
|
|
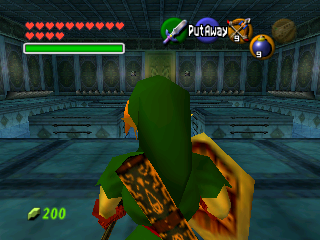
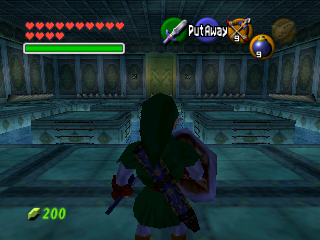
Morpha's Lair
Setup 00 (Normal Gameplay)
| ID 2 | ID 3 |
|---|---|
|
|
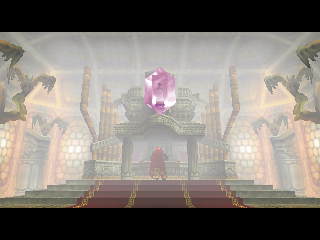
Ganondorf's Lair
Setup 00 (Normal Gameplay)
| ID 2 |
|---|
|
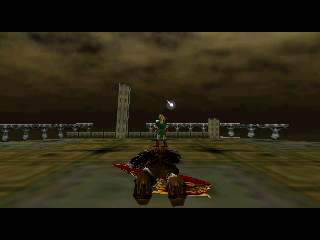
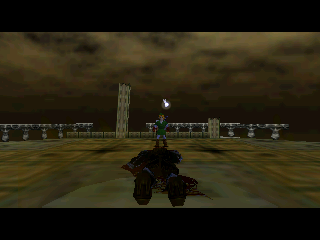
Tower Collapse Exterior
Setup 00 (Normal Gameplay)
| ID 0 | ID 3 |
|---|---|
|
|
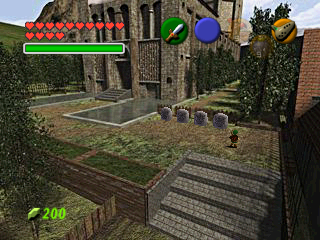
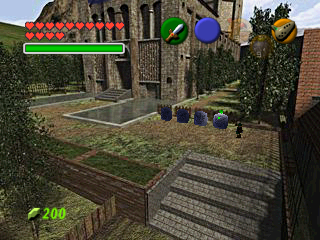
Temple of Time Exterior (Child - Day)
Setup 00 (Normal Gameplay)
| ID 1 | ID 2 | ID 3 |
|---|---|---|
|

|
|
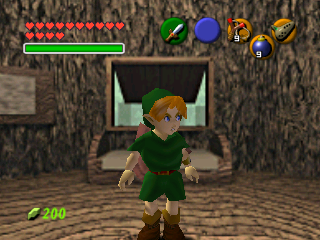
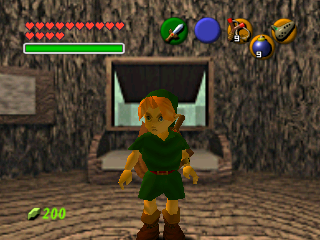
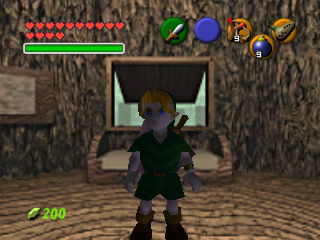
Link's House
Setup 01, 02 (Cutscene)
| ID 1 | ID 2 | ID 3 |
|---|---|---|
|
|
|
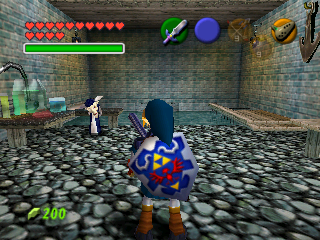
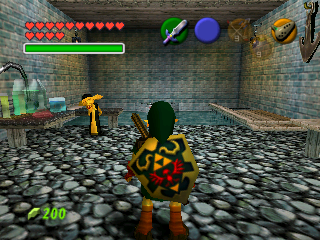
Lakeside Laboratory
Setup 00 (Normal Gameplay)
| ID 1 | ID 2 |
|---|---|
|
|
Forest Temple
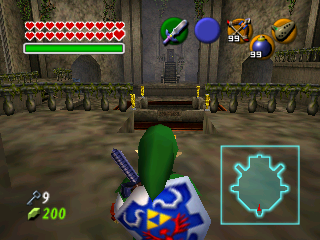
Setup 00 (Normal Gameplay)
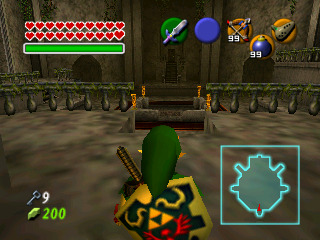
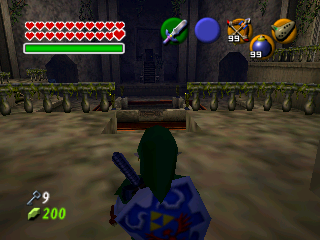
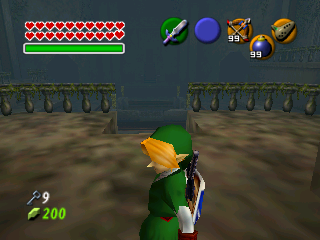
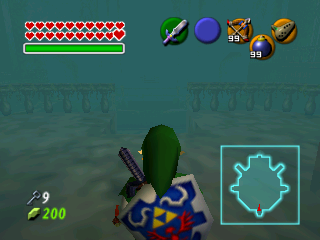
ID 1 is clear, with thin white fog. ID 2 has hazier, brown fog and redder lighting, like in the presence of torches. ID 3 has a dense, blueish black fog with strong shadows. ID 4 has highly contrasted shadows with thick, cool grey fog. ID 10 is similar to 4, but with less contrasted shadows. ID B has super dense, cool blue fog.
| ID 1 | ID 2 | ID 3 |
|---|---|---|
|
|
|
| ID A | ID B | |
|
|
Fire Temple
Setup 00 (Normal Gameplay)
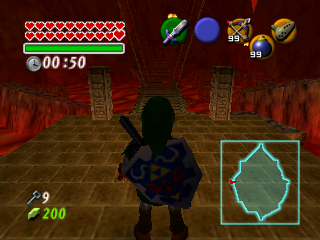
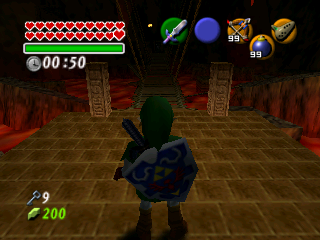
ID 1 has clear, red haze with strong shadowing. ID 2 has dense, black smokey fog or haze and neutral lighting, while ID 3 seems to use a mix of both environment settings.
| ID 1 | ID 2 | ID 3 |
|---|---|---|
|
|

|
Water Temple
Setup 00 (Normal Gameplay)
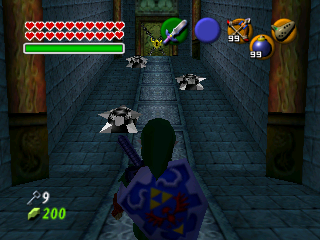
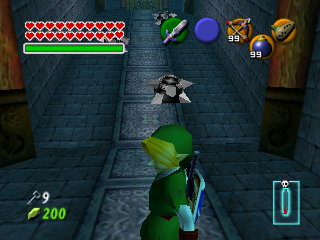
ID 3 has soft, strong shadowing. ID 4 uses sprase, azure mist and lighting.
| ID3 | ID4 |
|---|---|
|
|
Spirit Temple
Setup 00 (Normal Gameplay)
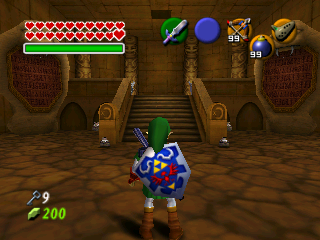
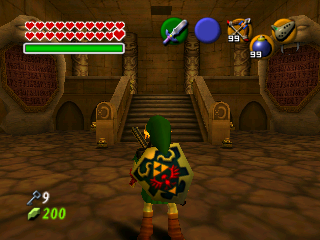
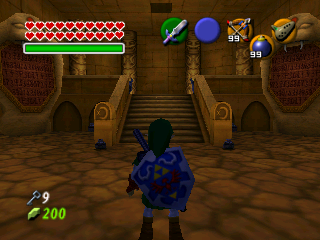
ID 1 features fairly neutral lighting and shading. ID 2 has red lighting. ID 3 uses strong, blue shading. These same lightings are also present in the two unreferenced scenes of the Spirit Temple and are unused.
| ID1 | ID2 | ID3 |
|---|---|---|
|
|
|
Shadow Temple
Setup 00 (Normal Gameplay)
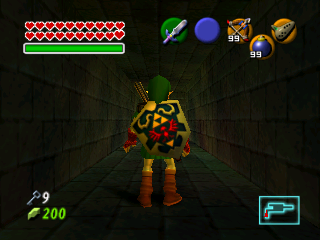
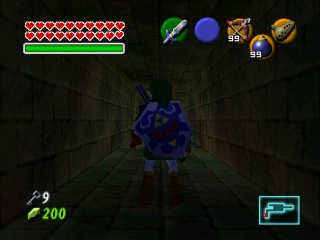
ID 2 has yellow-red warm lighting. ID 3 has strong, purple-black shadows.
| ID2 | ID3 |
|---|---|
|
|
Bottom of the Well
Setup 00 (Normal Gameplay)
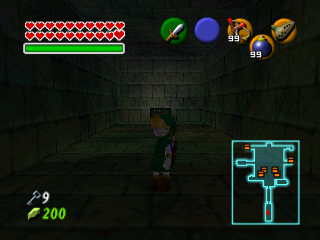
This singular unused environment contains dark, moody lighting with soft shadows.
| ID3 |
|---|
|
Ganon's Castle Tower
Setup 00 (Normal Gameplay)
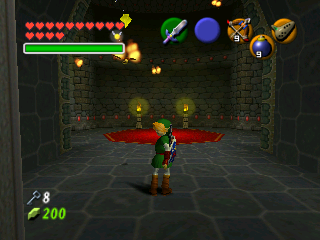
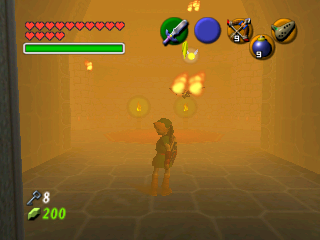
Two lightings are unused here. ID 0 would apparently be used for one of the rooms or maybe the first room as its color settings are very similar to ID 1. ID 3 would apparently be used on the last staircase, before the fight against Ganondorf, the fog is quite intense and the orange color is different from what is normally used.
| ID 0 | ID 3 |
|---|---|
 |
 |
Gerudo Training Ground
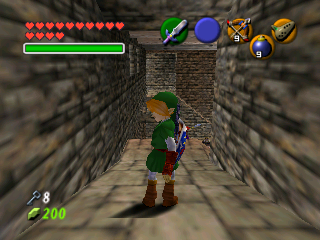
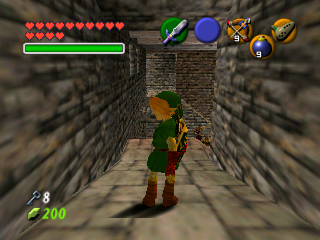
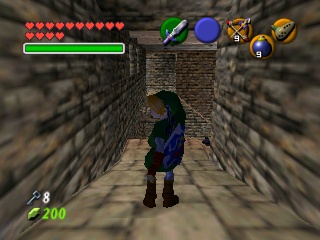
Setup 00 (Normal Gameplay)
| ID 1 | ID 2 | ID 3 |
|---|---|---|
 |
 |
|
Inside Ganon's Castle
Setup 00 (Normal Gameplay)
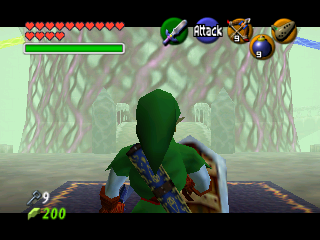
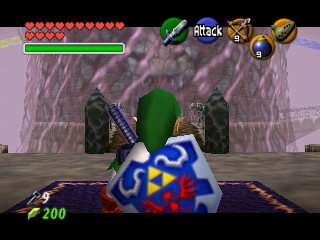
Apparently ID 7 should be used when the barrier is breached, however Saria's room lighting is used which is quite similar, leaving this ID unused.
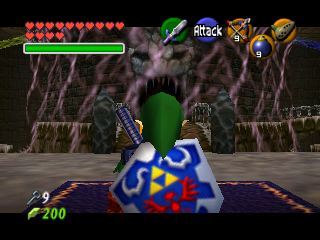
ID 8 should be used when the castle barrier is broken, however ID 4 is used which is very similar.
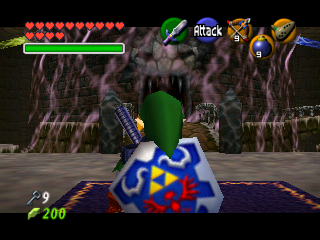
ID B there is only difference in color blending settings, it is almost exactly the same as ID 16, 17 and 18, there is no environment similar to them in this map.
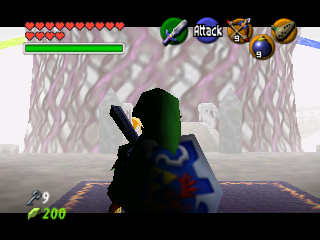
ID E, 13 appears to be placeholders, colors have been filled with black and white, and has neutral lighting direction.
| ID 7 | ID 8 | ID B |
|---|---|---|
 |
 |
|
| ID E, 13 | ID 16, 17, 18 | |
 |
|
Hyrule Field
Setup 00 (Child - Day)
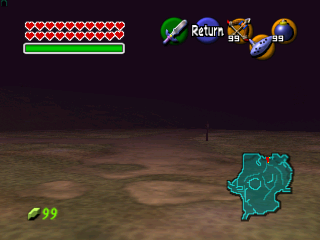
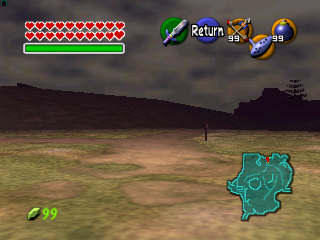
An environment used by actor 0x165 is present in Child Link's scenes settings; however this actor is found only in Adult Link. The only difference with Child Link's copy is denser fog. IDs C, D, E and F are the four settings used during daytime.
| Unused | Used |
|---|---|
 |
 |
Setup 06 (Title Screen)
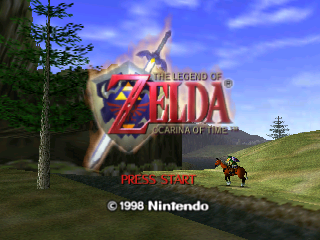
An environment setting for evening can be found at the title screen. However, since it's always day, this is never seen.
| ID 6 |
|---|
|
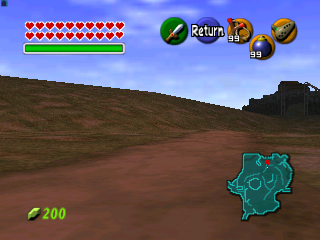
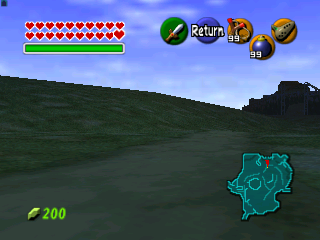
Setup 08
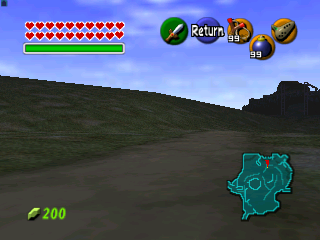
Only the environment ID 1 is used, during the afternoon. IDs 0, 2 and 3 aren't used in the cutscene.
| ID 0 | ID 2 | ID 3 |
|---|---|---|
|
|
|
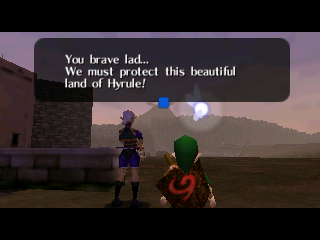
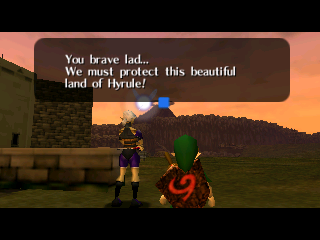
Setup 11
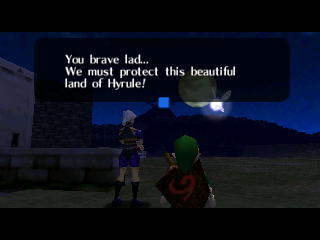
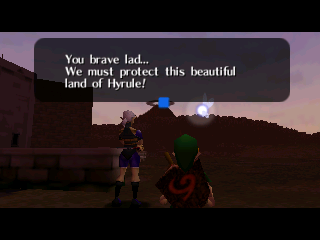
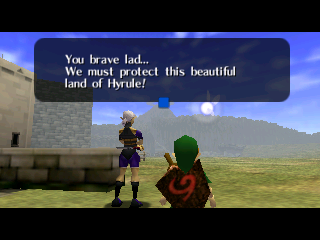
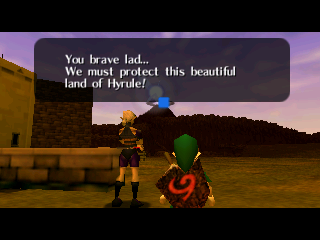
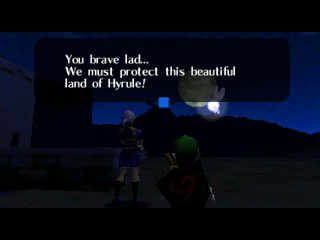
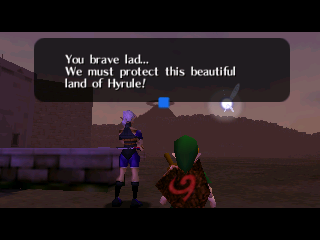
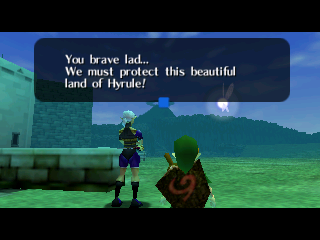
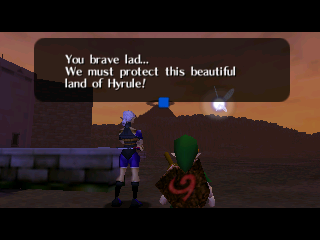
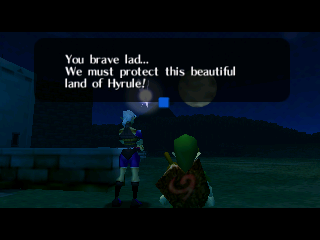
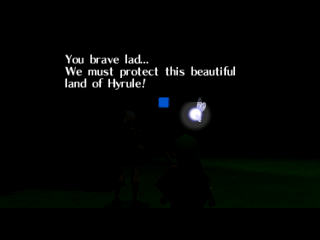
This cutscene contains many unused environments. Because time doesn't pass in the cutscene, you can't see the environments for morning, evening and night. Interestingly, the underwater and Rainy Weather environments seem to be swapped; ID B has a copy in ID C, and ID D has a dark environment with a light green color.
Normal
| ID 0 | ID 2 | ID 3 |
|---|---|---|
|
|
|
Underwater
| ID 4 | ID 5 |
|---|---|
|
|
| ID 6 | ID 7 |
|
|
Rainy Weather
| ID 8 | ID 9 |
|---|---|
|
|
| ID A | ID B & ID C |
|
|
Unknown
A dark, dense environment. Maybe it was used for the Ganon exiting Hyrule Castle cutscene.
| ID D |
|---|
|
Kakariko Village
Setup 02 (Adult - Day)
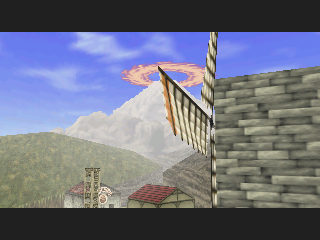
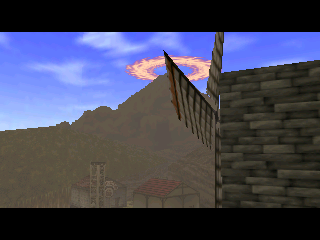
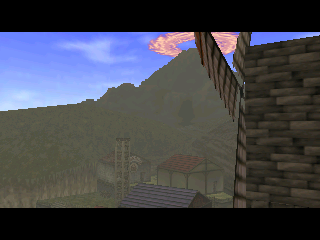
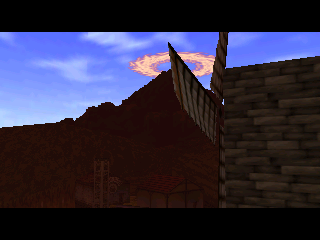
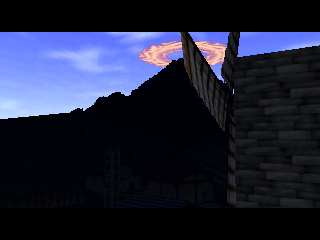
ID C-13 has bright lighting and haze, ID 14 has dense, warm haze and shadows, ID 15 has gray dense haze and red tinted shadows. ID 16 is ochre red in its thick haze and shadows, and ID 17 is just dark, with no haze.
| ID C - 13 | ID 14 | ID 15 |
|---|---|---|
|
|
|
| ID 16 | ID 17 | |
|
|
Kokiri Forest
Setup 00 (Child - Day)
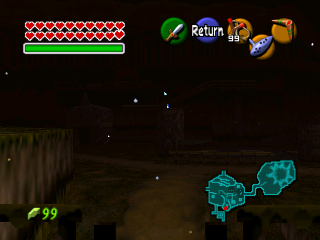
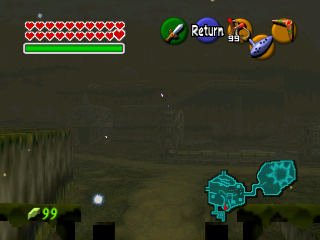
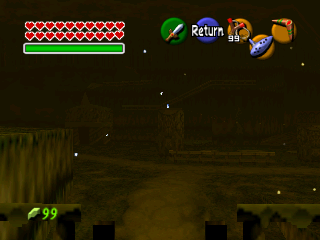
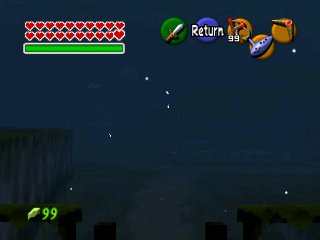
Contains several unused rainy day environments. ID 8 is red-brown and thick with haze, ID 9 is similar but yellow and green toned. ID A is similar to 8, but a little lighter, and ID B is a thick, blue fog.
| ID 8 | ID 9 |
|---|---|
|
|
| ID A | ID B |
|
|
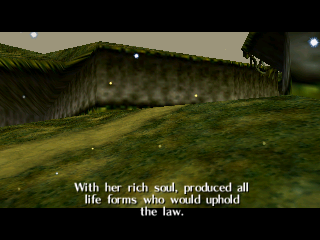
Setup 04 (Farore Creates Life)
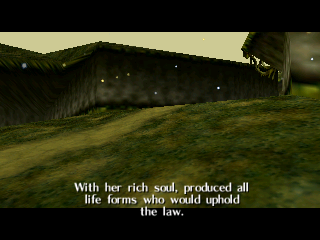
Contains two almost identical environments, but ID 0 has more dramatic shadows, and ID 3 has slightly cooler lighting.
| ID 0 | ID 3 |
|---|---|
|
|
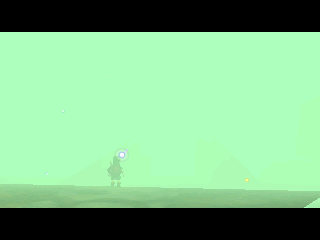
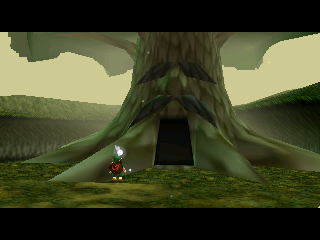
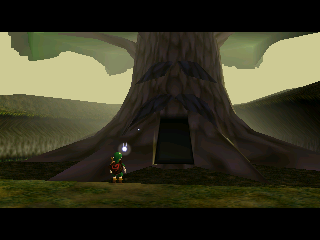
Setup 05 (The Deku Tree Dies)
Three different environments. ID 1 has an all engulfing, mint colored fog, while ID 2 has sharp green highlights. ID 3 is similar to ID 2, but with neutral highlights.
| ID 1 | ID 2 | ID 3 |
|---|---|---|
|
|
|
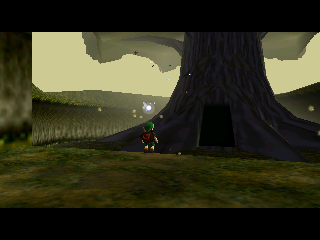
Setup 06
Having one unused environment, ID3 is similar to the used one, but with darker shadows.
| ID 3 |
|---|
|
Sacred Forest Meadow
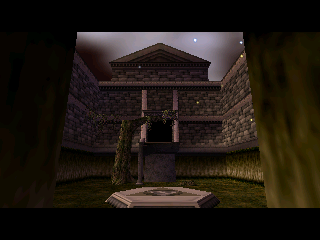
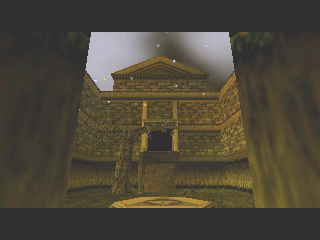
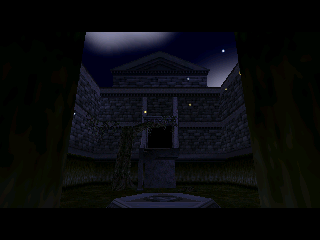
Setup 04 (Learning the Minuet of Forest)
This scene has several, interesting lighting effects. ID 0 is almost sepia toned with no fog, and ID 2 is lemon yellow with a dense, neutral fog. ID 3 has dramatic night time lighting, but again with no fog.
| ID 0 | ID 2 | ID 3 |
|---|---|---|
|
|
|
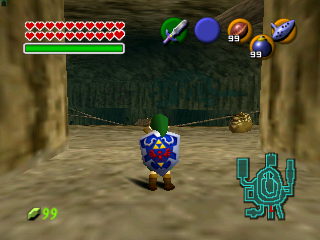
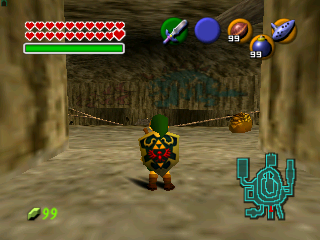
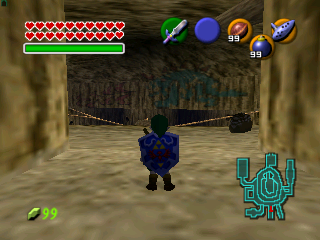
Goron City
Setup 04
ID 1 has bright lighting and a thin, distant cool fog. ID 2 has no fog, but strong red lighting. ID 3 is dark, with dark shadows on the objects.
| ID 1 | ID 2 | ID 3 |
|---|---|---|
|
|
|
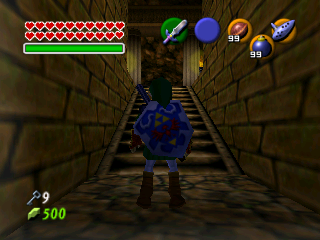
Gerudo Training Ground
Setup 00 (Normal Gameplay)
This singular unused setting, ID 3, has dark, night time like lighting.
| ID 3 |
|---|
|
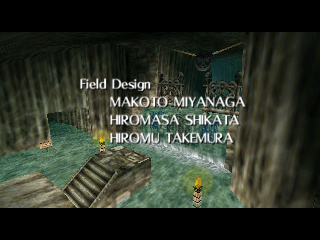
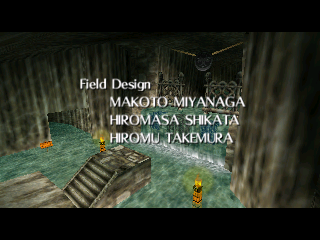
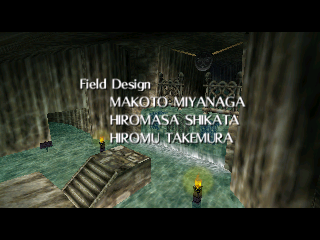
Zora's Domain
Setup 04
These scenes are all very similar, but ID 1 has a dense icy blue fog in the distance, ID 2 has warm lit objects, and ID 3 has darker, dramatic shadows.
| ID 1 | ID 2 | ID 3 |
|---|---|---|
|
|
|
Haunted Wasteland
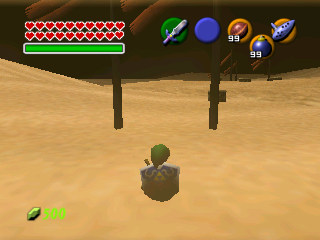
Setup 00 (Normal Gameplay)
A very dramatic environment, these IDs feature washed out brown lighting and flat, brown shadows. These environment settings are just placeholders for underwater environments, as there is no water box on this map.
| ID 4 - 7 |
|---|
|
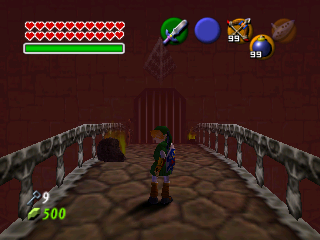
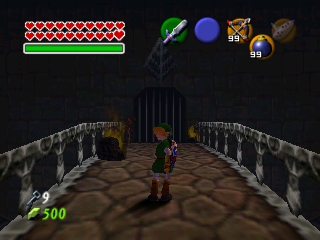
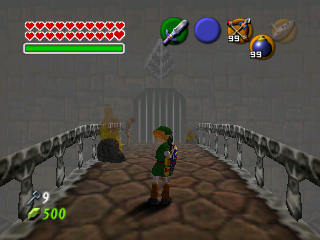
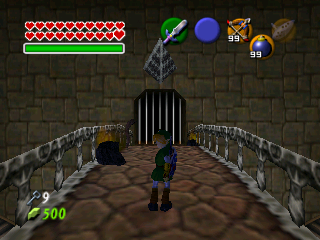
Inside Ganon's Castle (Collapsing)
Setup 00 (Normal Gameplay)
ID 0 has blood red dense fog. ID 1 features darker fog and cool lighting. ID 2 has a bright white fog with identical lighting to 1, and ID 3 is clear, with soft, indigo blue shadows.
| ID 0 | ID 1 |
|---|---|
|
|
| ID 2 | ID 3 |
|
|
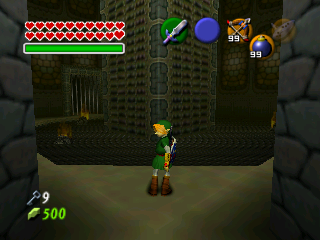
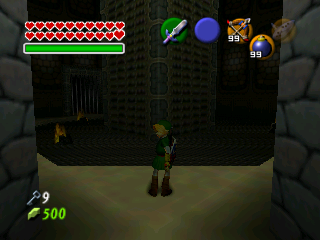
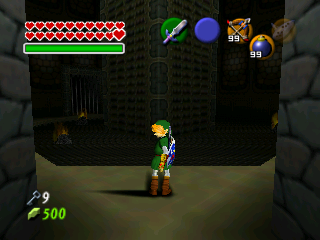
Ganon's Tower (Collapsing)
Setup 00 (Normal Gameplay)
ID 0 is moody, with a strong light source and thin, distant haze. ID 3 is dramatic and dark, clearest closest to the camera. ID 4 is similar to 3, but features even brighter lighting than ID 0.
| ID 0 | ID 3 | ID 4 |
|---|---|---|
|
|
|